2-Day Expedited Shipping Only $14.95 - See Restrictions
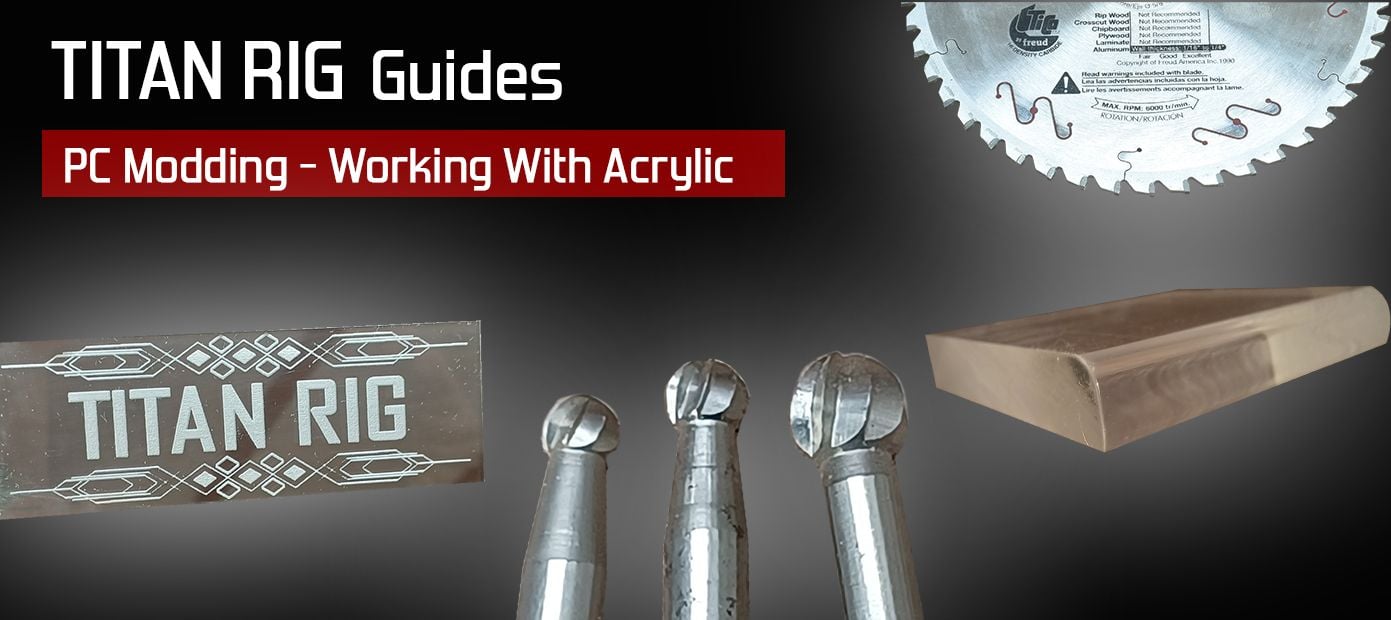
PC Modding - Working With Acrylic
October 04, 2021 1
Welcome back to Titan Rig’s Modding Series. It’s time to make your Personal Computer truly personal. Today we’re going to talk about one of the most useful materials out there for modders – acrylic.
When most of us hear the word acrylic we picture pretty shiny water blocks with a rainbow of lighting options, or maybe your mind goes to hardline acrylic tubing. Both are the same material, but while acrylic is indeed one of the best options for hardline tubing, that’s a big enough topic to earn its own post a little later. Today’s post is about acrylic sheet, what you can do with it and how to do it.
How It’s Made
The stuff we know as acrylic is technically polymethyl methacrylate, or PMMA. It’s a complex polymer type known as a thermoplastic – which means it can be heated and formed and retain the new form when cooled. Pretty handy for us.
Acrylic sheet it made in two ways: cell casting and extrusion.
Disclaimer: there is a third method of manufacture known as continuous casting, but as the end product is hard to find in small quantities and offered in very few colors we’ll leave it to the industrial applications it’s made for.
In cell casting, methacrylate syrup is poured into a mold between two sheets of high-quality glass and cured through heat and pressure.
Extruded acrylic is made by adding premade acrylic pellets to an extrusion machine. Those are melted into a syrup and forced through an extrusion die under extreme pressure to form pretty much any shape the die is made into.
How do I tell which it is?
You can usually identify cast vs extruded acrylic by the protective film on it. Cast acrylic will have a paper film, while extruded has plastic. This isn’t universal but nearly so. It’s also very rare to find extruded acrylic more than ½” thick.
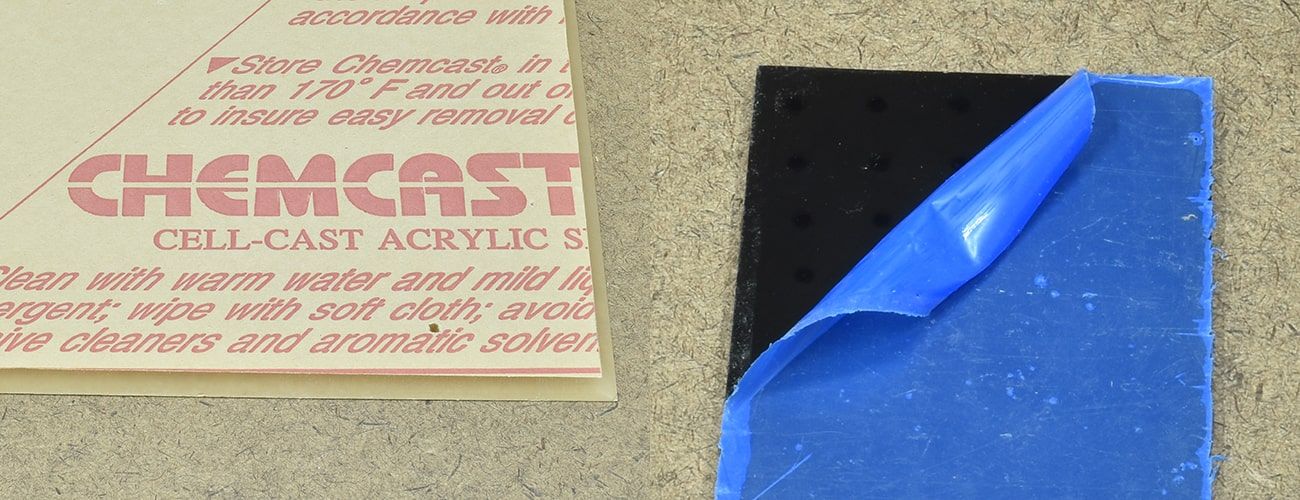 Cast and extruded acrylic come with different protective material.
Physical properties
While cast and extruded acrylic will look identical, the two forms have very different properties. For our uses, the only ones that really matter are density and melting point.
Cast acrylic is denser than extruded acrylic and also has a higher melting point. This makes it easier to drill, cut, shape or machine in any way.
Cast acrylic can be machined with standard woodworking or metalworking tools and methods, provided the cutting edges are in good condition and sharp. Machining cast acrylic makes delicate white shavings – thin curls, flat strips or flakes depending on the cutting tool you’re using. Interestingly, these flakes are always white, regardless of the color of the acrylic.
Machining extruded acrylic requires the same tools but much different techniques. Its softness and lower melting point require lower cutting speeds and lubrication to avoid melting and gumming up cutting tools. While you can get the same results from either material, cast acrylic makes the job faster and easier in almost all cases.
Two areas that extruded acrylic is better are bending and cutting with a laser.
Given the advantages that cast acrylic offers, we’ll be referring to that specific material for the rest of the post.
So how do we use the stuff??
There are five basic things we need to know how to do with acrylic to use it in PC modding: cutting, drilling, bending, sanding/polishing and etching or engraving.
Cutting
Cutting acrylic sheet can be done in a few different ways, each with their own advantages.
Score and Snap
Assuming you need your acrylic cut in straight lines, the simplest method is to score and snap it. This works well on thinner sheets (3/16” / 4mm or less) and is the easiest and least expensive method.
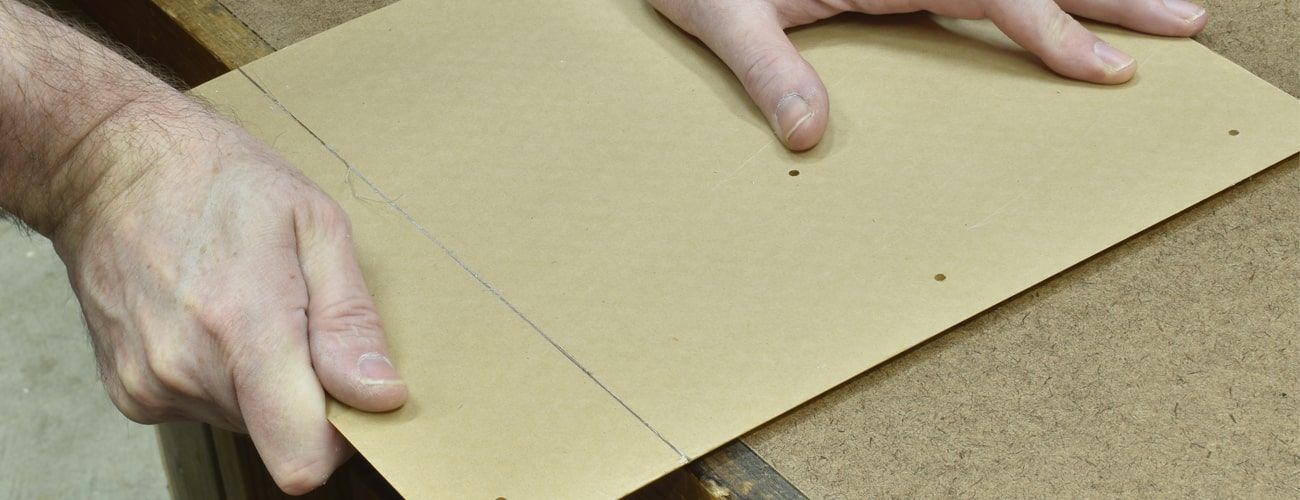
As with any cut, mark your line.
 Marking the cut line.
Then, using a solid straight edge and a good grip, draw the point of a utility knife along your cut line, pressing firmly.
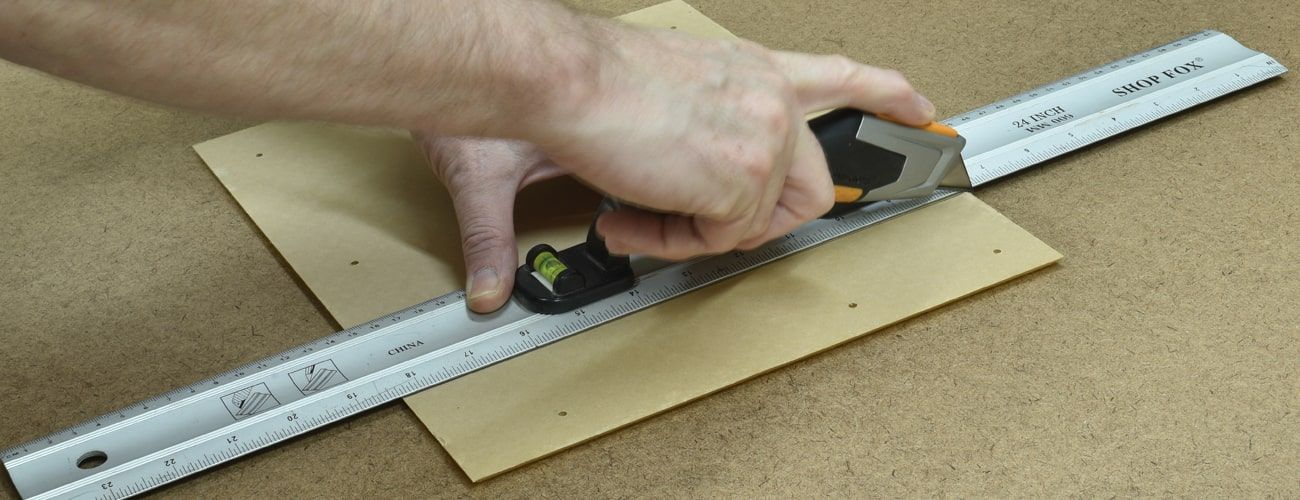 Scoring the acrylic.
Depending on the thickness of your sheet, you’ll probably have to do this step several times to get a deep enough score mark to snap it.
Once you have a solid score on the sheet, line your cut line up with a straight solid edge, like the edge of your workbench or a countertop.
 Lining up your score to snap.
Hold both edges and press down sharply and your sheet should snap on the score line you made.
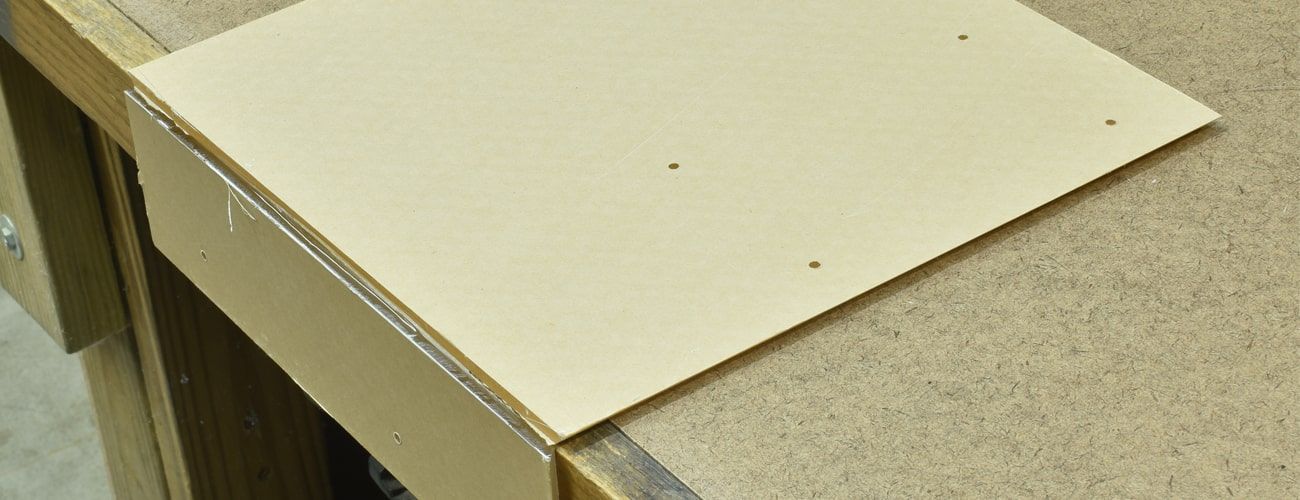 A clean snap.
While this is the easiest method of achieving a straight-line cut in acrylic, the edge it leaves behind is the hardest to clean up if it’s going to be visible.
 Rough edge left behind by score-and-snap method.
Hand Saw
If you need a curved cut, or if your acrylic is too thick to snap, the right hand saw will do the job.
Hand saws made for wood should be avoided. While they will cut the material and make fast work of it, the edges they leave behind are very rough and it’s very hard to cut curves with one.
A saw with a thinner blade and more teeth is the goal when cutting acrylic. The ideal tool of this type is a coping saw. They have a high tooth count and the blade is very thin and narrow, making curve cutting simple.
A hacksaw with a typical blade will do a good job with the cut, but can be difficult to make curves with.
Jig Saw
Time to break out the power tools!
Jig saws are an excellent and fairly inexpensive addition to your tool arsenal. They can cut lots of different materials with the right blade, and cut curves well.
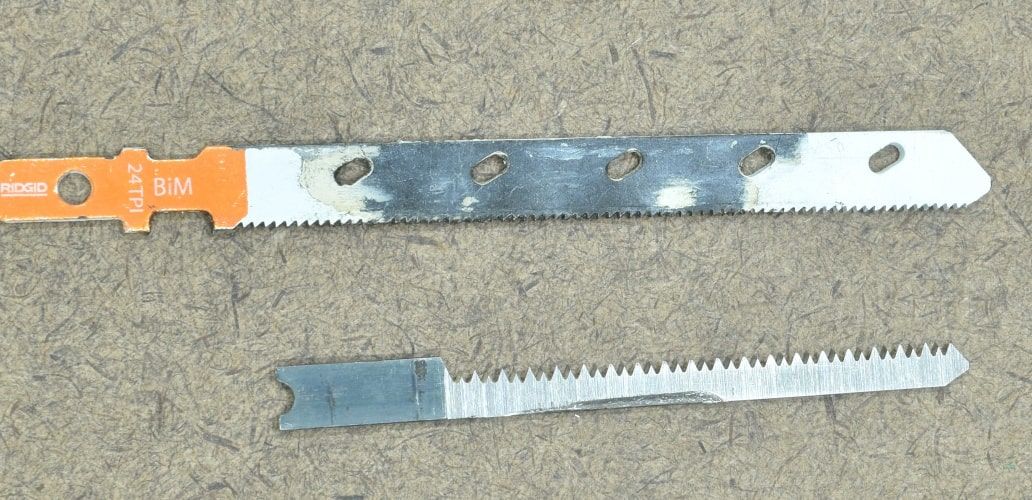 The top blade is a metal-cutting blade. The bottom blade is for wood - don't use these.
For acrylic you’ll want a metal-cutting blade for your jig saw. These will have the most teeth with a less aggressive cut angle than a blade made to cut wood.
Simply make your cut line, clamp the acrylic to a solid surface with the line off of the edge and cut it. If there is a lot of material on either side of the cut line, you may need to support both sides with clamps to keep the offcut from sagging as its cut and pinching the blade of the saw.
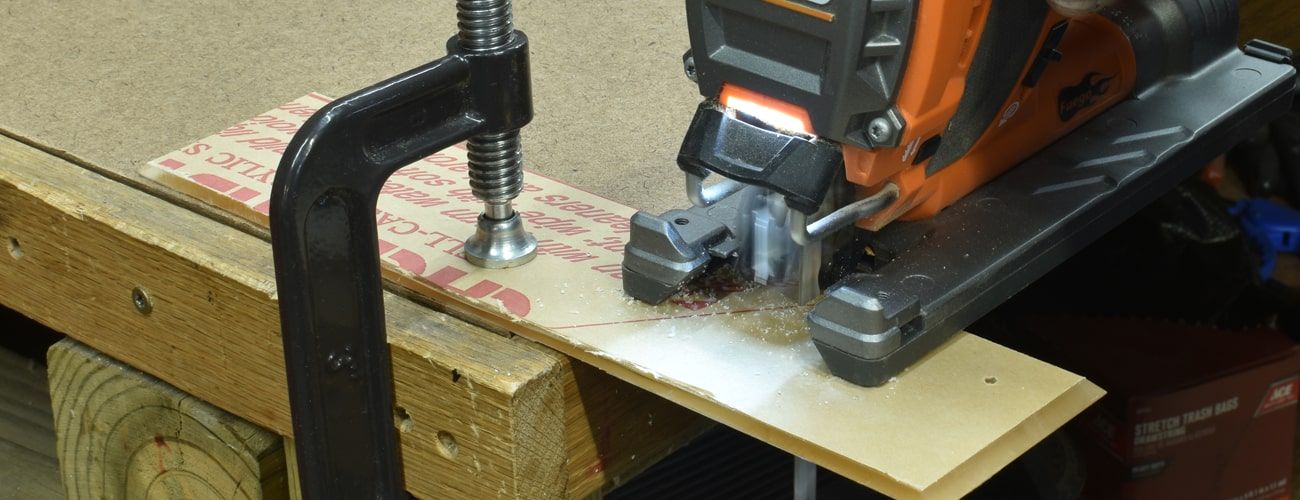 Acrylic clamped in place and cutting with a jig saw.
For straight cuts with a jig saw, a block of scrap wood can be clamped to the acrylic parallel with the cut line to guide the jig saw.
 Cut edge left behind from a jig saw - much better than the snap and score method.
Cuts made with a jig saw with the right blade are very clean and make sanding/polishing a lot easier than the score-and-snap method.
Table Saw
The table saw is the ultimate tool for straight cuts in most materials. Like just about any cutting tool though, using the right blade makes all the difference.
Just like with the jig saw, for the table saw we’ll want a metal-cutting blade. In this case though, we specifically need a blade made to cut non-ferrous metals. Table saw blades for ferrous metals like iron and steel are grinding blades rather than cutting blades, and the results of using those on acrylic are… bad.
 A 10-inch table saw blade made for cutting non-ferrous metals like aluminum. Perfect for acrylic.
While you can cut acrylic with standard wood-cutting blades, the cut isn’t very clean, and if you’re going to need to polish the edges it can make for a lot of extra time and effort. We want the edge to be as close to perfect as possible right off the saw.
When it comes to blades for table saws, circular saws, miter saws and the like, the main difference in a wood-cutting blade and a blade made to cut non-ferrous metals is the shape and angle of the teeth.
Non-ferrous metal blades have what’s known as a negative rake angle. Rake angle is the angle of the leading edge of each cutting tooth.
The image below has a non-ferrous metal-cutting blade on top and a typical wood-cutting blade on bottom
 Different angles on saw teeth made for non-ferrous metals and wood.
The teeth on the bottom blade are clearly angled much further forward. The teeth on the top blade actually angle backward – a negative rake angle.
One other thing you should look for in a good blade of this type for acrylic is known as “triple chip grind”, and refers to the cross-sectional shape of the individual carbide teeth on the blade.
 Different tooth grinds are made for different materials.
The tooth on the left is a top-grind tooth. Many blades are made with nothing but these teeth. The right tooth is a triple-chip-grind tooth – the same as a top-grind tooth with the outer corners ground down to a bevel.
A blade made for non-ferrous metals will have both of these types of teeth in alternating order.
The edge left behind by these teeth is excellent and among the easiest to polish up after the cut.
 Cut edge left from a table saw blade for non-ferrous metals - this will polish up easily.
Drilling
Drilling holes is easy. Drilling clean even holes dozens or more at a time can be hard.
Just like cutting, drilling acrylic can be made a lot easier and produces better results if the tool has the right geometry.
In the case of drilling, we ideally want to use drill bits that are specifically made for acrylic.
 Different drill bit geometry for different materials.
A standard twist drill bit made for drilling metal and wood has a shallow tip angle and a forward-leaning cutting edge, just like the teeth on the wood-cutting saw blade earlier.
Acrylic drill bits have a very steep angle and the cutting faces are vertical in relation to the gullets (the shallow parts where the material that’s removed builds up).
 Holes made in cast acrylic with different types of drill bits.
The hole on the left was made with a standard twist drill bit. I put quite a bit of effort into making that hole as clean as possible. The hole on the right was made with an acrylic drill bit – it took half as long and is a perfectly clean hole.
Note: Cast acrylic is brittle. When drilling, you want a minimum distance from the edge of the material equal to 1.5 times the diameter of the hole you’re making to avoid potential chipping and cracking between the edge of the material and the edge of the hole.
Here’s an example of why we don’t want to use extruded acrylic if we’re cutting, drilling or machining the material at all.
 Delicate white shavings are left behind when machining cast acrylic.
These clean white shavings are what you get when machining cast acrylic.
 Extruded acrylic is prone to melting and gumming up cutting tools.
And this is what you can expect when machining extruded acrylic. The material that came off in small flakes with cast acrylic stays behind with extruded acrylic, melted into a single blob of disappointment. It sticks to your tools also, and when it packs into a drill bit or saw blade and then cools down and hardens it can be a real pain to get off.
When You Need It Big
There will be times when you need to drill holes larger than most drill bits (or your drill’s chuck capacity) will allow. Those times call for a special tool called a Forstner bit.
 Forstner bits have perfect blade geometry for drilling acrylic.
Forstner bits are unlike twist drills – in fact there’s no twist to them. They have a single small round or square centering spike on the end and two or more flat cutting faces. Typically used to drill flat-bottomed holes in wood, the geometry of the cutting faces on a Forstner bit makes them an excellent choice for acrylic, with one small preparation step.
 The center guide spike on a Forstner bit has no twist and no cutting edges at all.
That small centering spike has no threads or cutting surface on it at all. In wood that’s not a problem, as the fibers will tear and compress and allow the bit to pass through. Acrylic is different.
Using a Forstner bit on unprepared acrylic can be done but you run a very good chance of cracking it as that non-cutting spike is
forced though it ahead of the cutting edges.
Preparation to use one of these bits on Acrylic is simple. If you drill a small hole either the size of the centering spike or slightly smaller in the material, the spike meets no resistance during the process and you’ll end up with a very clean hole.
 Making a pilot hole for the guide spike on a forstner bit is a must when drilling acrylic.
 High-speed drilling cast acrylic with a sharp Forstner bit.
 Large hole drilled in cast acrylic with a Forstner bit.
Forstner bits come in sizes as large as eight inches, but for a hole that size you’re better off using a hole saw or a Dremel. That’s a post for another day.
Bending
Acrylic is a thermoplastic, which is a fancy way of saying that if it’s heated up and bent it will hold its new form when it cools.
Heating acrylic sheet to bend it in a straight line can be done with any focused heat source, but too much heat will make it bubble and bend unevenly. A heat gun is the most common method, but a dedicated acrylic strip heater is the easiest.
 Single-setting strip heater for bending plastics.
This one is a very simple example. It has a single heat setting and one simple on/off switch. These can be cost prohibitive if you don’t bend a lot of acrylic, but they will heat acrylic in a perfectly straight line – something that helps with straight bends and can be difficult with a handheld heat source.
 Acrylic resting on top of a strip heater - heating evenly and thoroughly takes time.
Using a strip heater is as simple as turning it on and laying your sheet across the heating element, centered in your bend line.
 Blocking the rest of the heating element keeps heat from escaping and can speed the process.
For smaller pieces, covering the rest of the heating element will focus more heat onto your work and make the process faster.
 Once it's heated properly, acrylic will bend around a form easily.
Regardless of the type of heat you use to bend your acrylic, testing its flexibility often is key to good results. Heat both sides of the piece evenly and gently try to bend it every so often as you’re heating it. Once it bends easily by hand, place the bend line on a form of some kind and fold the material over it.
In this example I made a simple 90-degree bend, but acrylic will form over anything. You can make curves by draping it over a cylindrical object like a large piece if PVC or bend it further than 90 degrees with the right form.
In the example of the curve, more material will have to be heated since more material is involved in the actual bend. The more material you have to heat, the more difficult it is to heat it all evenly.
If you have the means, heating the form itself will help you get a good even bend also.
 Acrylic sheet after making a 90-degree bend.
Once your acrylic is bent, let it stand for a few minutes to cool and harden into its new shape.
 Visual distortion along the bend is common without a smooth form and proper heating.
Without a smooth form, more even heating and more careful application to the form, you’ll inevitably get some distortion along the bend line.
Shaping
Acrylic can also be shaped without bending it. In this case we’re looking at edge profile shaping. If you made an acrylic front for a water block for instance, you might want to add a curve or an angle to the exposed front edges to make it look better.
A table-mounted router or a dedicated shaper is ideal for this job.
 A table-mounted router is a versatile tool.
The shape of the edge will match the shape of the cutter used to make it. With a bearing-guided cutter like this one, you can form the edge around curves in the overall shape of the acrylic also.
 A bearing-guided roundover bit in the router.
In this case, I’m just making a small roundover on the corner of the edge using a 1/8” bearing guided roundover cutter.
 Cutting a rounded shape into the square edge of a piece of cast acrylic.
Cutter speed should be fairly high, between 18000 and 24000 RPM. Since the cut I’m making here is shallow I can do it in a single pass. If I were making a larger roundover I would do it as two passes – cut the first pass shallow and a second for final depth. Trying to remove too much material at once is not only likely to fail, it’s dangerous. Take as many passes as you need to do the job.
 Before and after shaping.
Here is a before-and-after look at the edge I rounded over. The small chip in the edge on the finished side is the result of feeding the piece into the bit too quickly. In a real piece it would be removed when you rounded the side we’re looking at.
Polishing
Polishing acrylic can be done by sanding or by what’s known as “flame polishing”. Flame polishing is a method of using high heat to melt the very outside surface of the acrylic so that uneven areas like scratches actually liquify and flow together before cooling and hardening.
Flame polishing is a useful tool, but it requires a lot of practice and no matter how good you are at it, a flame-polished edge will never look as good as a sanded-and-polished edge.
For sanding acrylic, several grits of sandpaper have to be used. What grit to start with depends on the condition of the edge. The rougher the edge, the lower the grit that will be required to get the roughness out for polishing.
As counterintuitive as it sounds, sanding is nothing but scratching. The lower the grit on sandpaper, the larger the grains of abrasive are on the surface, and the larger the scratches that are made with it. The lower-grit sandpaper serves to remove the cutting marks left behind and make the surface being sanded more uniform.
From there, the higher-grit papers simply make those uniform scratches smaller and smaller until they can’t be seen.
In this case, I started with 320 grit and went through 400, 600, 800, 1200 and 2000 grits.
 Various grits of sandpaper used to bring a machined edge to a polished shine.
 Machined edge shown in different stages of sanding.
This image shows the progression of the sanding process as it goes through higher and higher grits.
Once your sanding is done, usually at the 1500-2000 grit stage, polishing can be done. I do this on a buffing wheel mounted in a bench grinder, but it can be done with anything that will spin a polishing surface quickly. A Dremel is a good choice, whereas most drills don’t turn fast enough to do the job efficiently.
 Bench grinder with mounted buffing wheel.
My buffing wheel needs to be replaced. It’s seen a lot of cleaning.
 Blue polishing compound. Different colors indicate different grits.
The first step to polishing is to load polishing compound into the polishing tool. These compounds come in a lot of different grits also, but they will all do a fine job on acrylic. I’m using a stick of solid blue jeweler’s compound here.
 Embedding polishing compound into the fibers of the buffing wheel.
Turning on the grinder and holding the stick of compound against the polishing disc causes the compound to get hot and soften and embed itself into the fibers of the disc. You can actually watch the disc change colors as it happens.
 Polishing the edge of a piece of cast acrylic after sanding.
Since I sanded all the way to 2000 grit, polishing is quick. Two to three seconds held gently against the polishing wheel does the trick.
DANGER! Looking at the image above, this wheel is turning clockwise. If that top corner touches the polishing wheel with any force at all, the wheel will grab it and tear the material out of your hands so fast you won’t see it happen. Any corners to be polished have GOT to be on the downward side of the wheel as shown here.


These are before-and-after images of the edge I just polished. The after image is looking through the polished edge and the rest of the block of material.
Etching / Engraving
Etching and engraving acrylic is an excellent way to make some amazing additions to your PC. As with most things there are a few ways to do it.
The first and least expensive way to do engraving is by hand, either with a power tool like a Dremel or a simple scribe.
I’ve found that the best way to do this is with a template of some kind. I own a vinyl cutter, so I made a stencil for this piece out of vinyl to help me keep my etching where it should be.
Hand Etching
 Vinyl stencil for hand etching.
For the first method I’ll be using a Dremel with a round-head carbide burr. These remove a lot of material at once, which makes the job faster but also harder to control. A little too much pressure and the burr will gouge the acrylic or grab it and go where it shouldn’t.
The smaller the cutting/grinding teeth on the tool you’re using, the less material it will remove, but the easier it will be to control.
 Filling in the stencil with black marker.
Filling in the stencil makes it visually easier to use, and shows you where you’ve removed material as you work.
 Stencil filled and ready to etch.
Securing the workpiece is a must when using a handheld tool for this job. On a small piece like this where you’re doing shallow etching, tape is more than enough.
 Stenciled material is secured to a work surface for manual etching.
The results of this part were… sad. If I had used a cutter with smaller teeth and a tougher material for my stencil it would have helped, but freehand work has never been easy for me.
 The results of manual etching - I am ashamed.
Sandblast Etching
The next method of etching acrylic is sandblasting. I use a sandblasting cabinet, but a handheld sandblaster can be just as affective. Note that with a handheld unit your media (sand) is typically lost with a single use, so it is more expensive to use in the long run than a cabinet.
 Vinyl stencil for sandblasting - this material has to be a lot stronger than the previous vinyl stencil.
I made a second stencil with strong permanent outdoor vinyl – Oracal 651.
 Inside the blasting cabinet.
After masking off the rest of the piece with tape I put it in the blasting cabinet and sprayed it several times. Total etching time was about 40 seconds.
Once the mask is removed and the sand washed off, I had a perfect etching. Sandblasting has the advantage of leaving behind a perfectly even surface.
NOTE: All of your media should be washed off with running water before removing your stencil and edge masks. Otherwise you stand the very good chance of scratching your material in the process of removal.
 A perfectly even etching.
Laser Etching
The last and best method of etching or engraving acrylic is with a laser. I have an 80-watt CO2 laser that I use for this, and it is an absolutely amazing tool.
Masking isn’t necessary with a laser. You should leave the protective paper on the acrylic when you engrave, simply because it makes it easier to clean up the dust afterward.
 80-watt CO2 laser etching the acrylic. Memerizing to watch.
Like any computer-controlled tool like this, there is a leaning curve to it, but today's software and machines have come a long way toward making them user-friendly.
 A laser gives perfect results to whatever pattern is programmed into it.
After peeling the paper that came on the acrylic. This is a perfect etching.
Acrylic is one of the most flexible and useful materials in a modder’s arsenal. It comes in colors across the rainbow, both opaque and transparent. It comes in mirrors both single-sided and double. It’s available in two-color variants, made to reveal the underlying color when the first is removed.
Acrylic is tough, beautiful, immune to moisture and completely non-conductive. Learning to work with it will give you options you never had before.
Recent Posts