2-Day Expedited Shipping Only $14.95 - See Restrictions
PC Modding - Drilling
October 11, 2021
Welcome back to Titan Rig’s Modding Series. It’s time to make your Personal Computer truly personal. Sometimes the most basic things can cause the most trouble. Today’s post is about one of those things: drilling holes.
Drilling a hole seems simple, and to be fair it is. Drilling a perfect hole in a specific material or drilling a lot of perfect holes at once can be a lot more challenging. Let’s look at the process and see what it takes.
Bit Selection
With any job, choosing the right tool for the work is important. I can use a hammer to drive a screw, but a screwdriver will do the job more easily and better. The right drill bit can make a drilling job a lot easier and can produce better results.
Easily the most common type of bit in use today is the simple twist drill. It’s been around for centuries, but improvements in materials and geometry have made it an amazing tool.
Anatomy of the Twist Drill
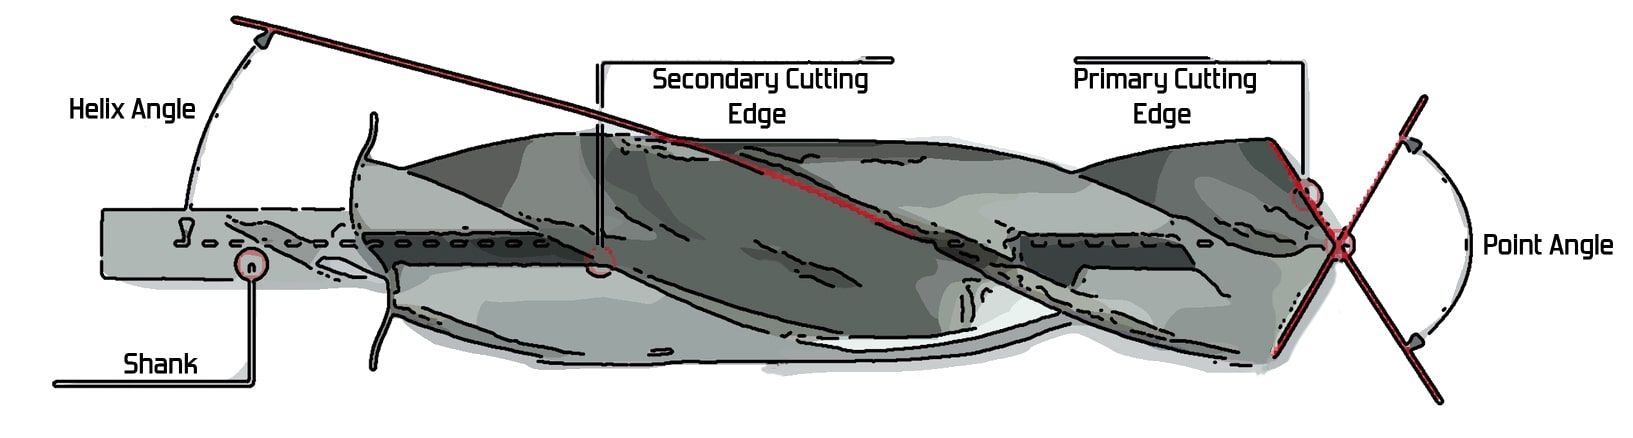
The twist drill has a few points of its anatomy that should be considered when choosing the right bit for the job.
Point Angle
This is the angle between the two primary cutting edges on the top of the bit. Point angle is one of the most important variables in the basic drilling process.
The most common point angle in use is 118°. It may seem oddly specific (why not 120° or 110°?) but that angle has been found to be the best all-around angle for use in various materials. In wood, metal or plastics, the standard 118° tip is a good performer.
Other angles commonly found are 130° and 135°. These larger angles makes for a flatter tip and longer primary cutting edges – these angles are typically seen in bits made for harder materials like metal.
Primary Cutting Edge
This is the working area of the tool. Drilling is really cutting in a very small area, and the primary cutting edge does the work. Once the point has penetrated the material, the primary cutting edges remove the rest.
The primary cutting edge is decided largely by your choice of point angle.
Secondary Cutting Edge
The long secondary cutting edges of the bit serve to loosen and finish cutting any material that escaped the cut of the primary edges. This is mostly useful in fibrous materials like wood.
Helix Angle
Helix angle refers to the angle of the flutes on the bit.

A steeper helix angle is usually used for harder materials. The material that’s removed has an easier time moving along the channels in the bit and out of the way of the cutting action.

Shallower helix angles are the mark of a bit made for soft materials like wood and hardboard. The shallower the helix angle is, the longer the secondary cutting edges are, making for a cleaner cut in material that requires that secondary cutting action.
Shank
The shank is the part of the bit that’s inserted into the drilling tool. Any drill will have a maximum capacity that’s dependent on the size of the chuck it uses. Typical maximum chuck sizes are 3/8”, 1/2”, and 5/8”.
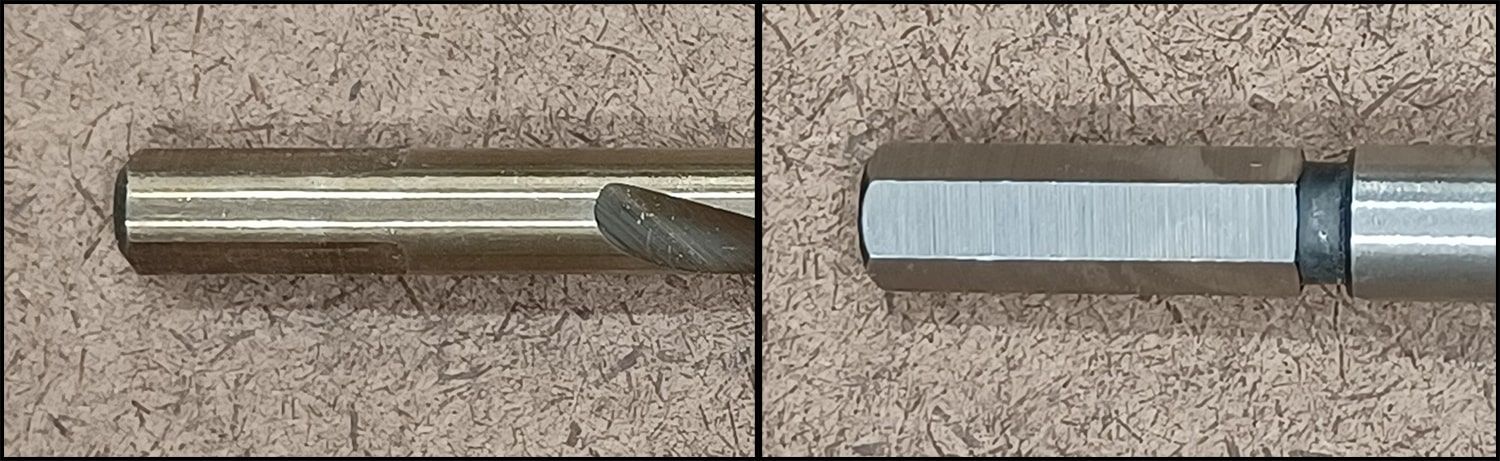
Some shanks are round, but the better options have three or six flat sides machined into them. These flat sides are made to be in contact with the jaws of the chuck on the drilling tool, and prevent the bit from spinning inside the chuck.
The Process – Metal
Metals like aluminum and sheet steel are the most common materials you might need to drill in PC modding. In our example we’re drilling a piece of ¼” thick 6061 aluminum, but as long as you’re not drilling unusually hard materials like titanium or certain grades of tool steel the process is the same.
Stop the wander - When a spinning drill bit first contacts the surface of the material you’re trying to make a hole in, the spin and friction make it want to move sideways across the surface. The steeper your point angle the less this happens, but the more stress you end up putting on your cutting edges. The easiest way to help stop wandering or “walking” as it’s called is to put a small divot at the point you want to drill with a center punch.
Center punches can be had as a solid punch that’s struck with a hammer or a spring-loaded type that simply has to be pressed down onto the material to work.
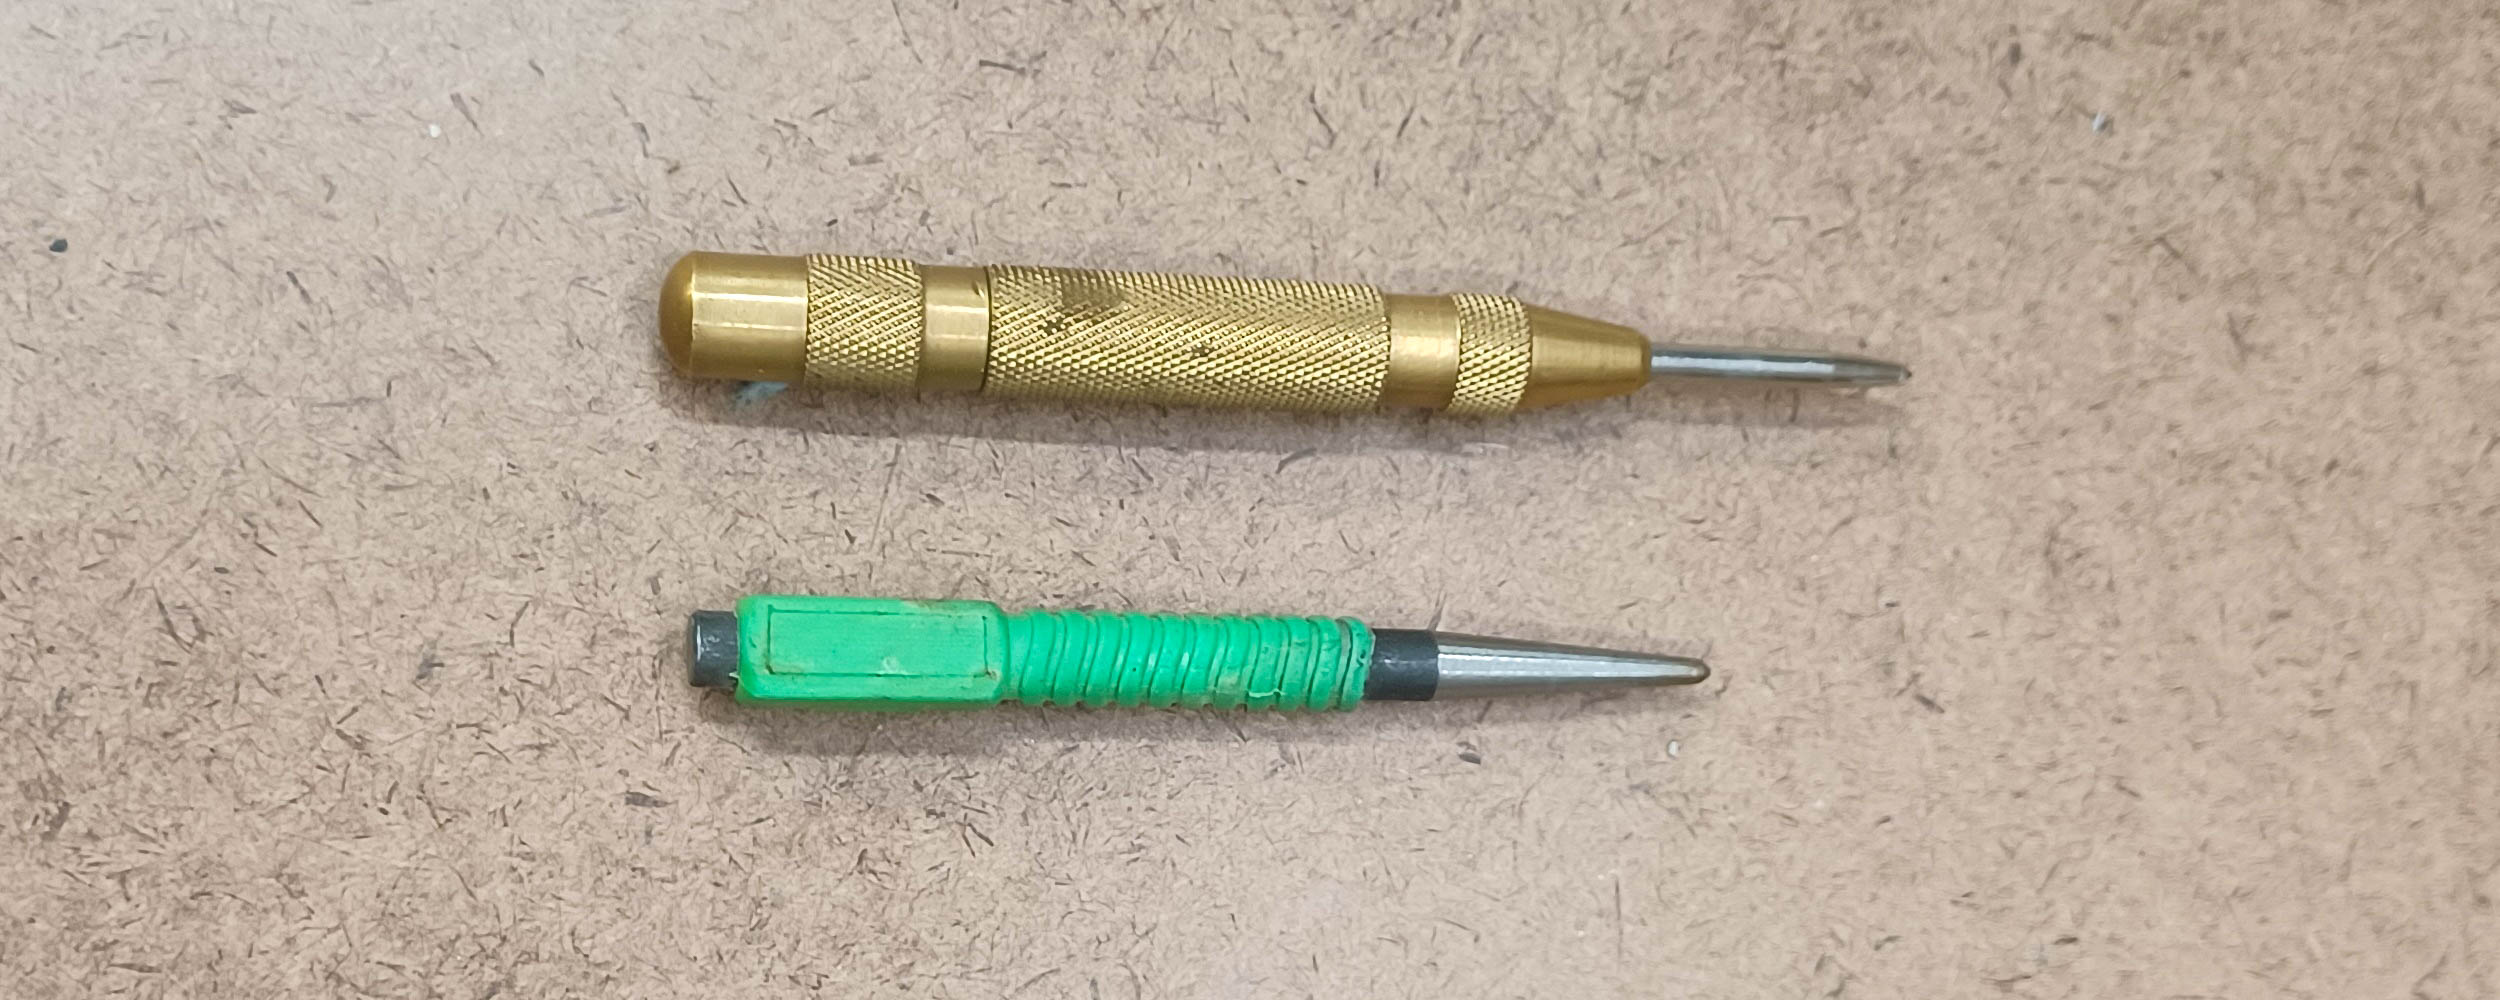
I prefer the spring-loaded type for simplicity but if you need a deeper divot in harder material, the solid type is best.
1 – Mark the spot.
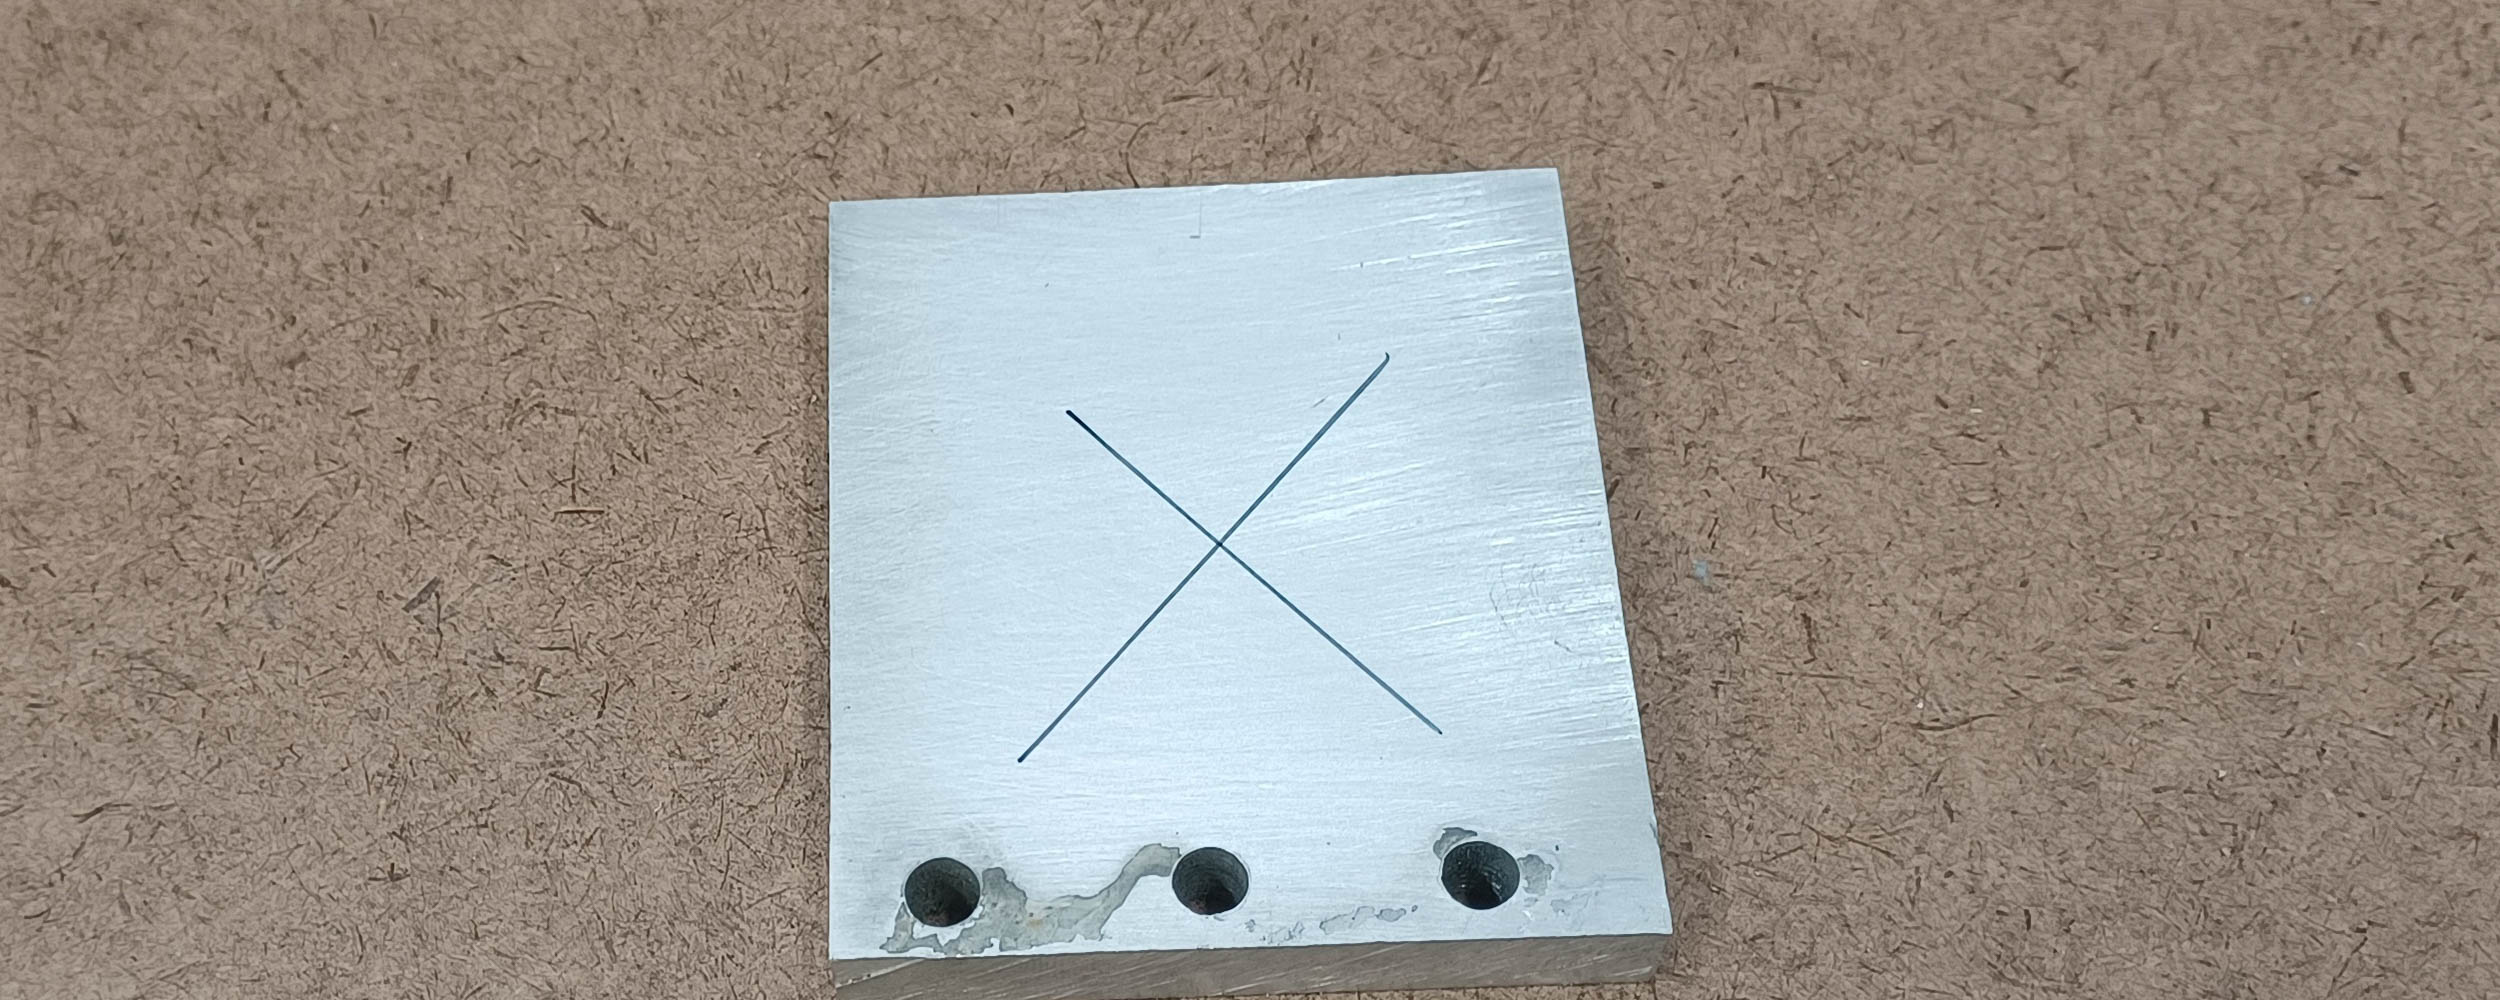
A clear and easy-to-see mark makes the whole process easier. For metal a fine-point marker is a good choice.
2 – Punch it.
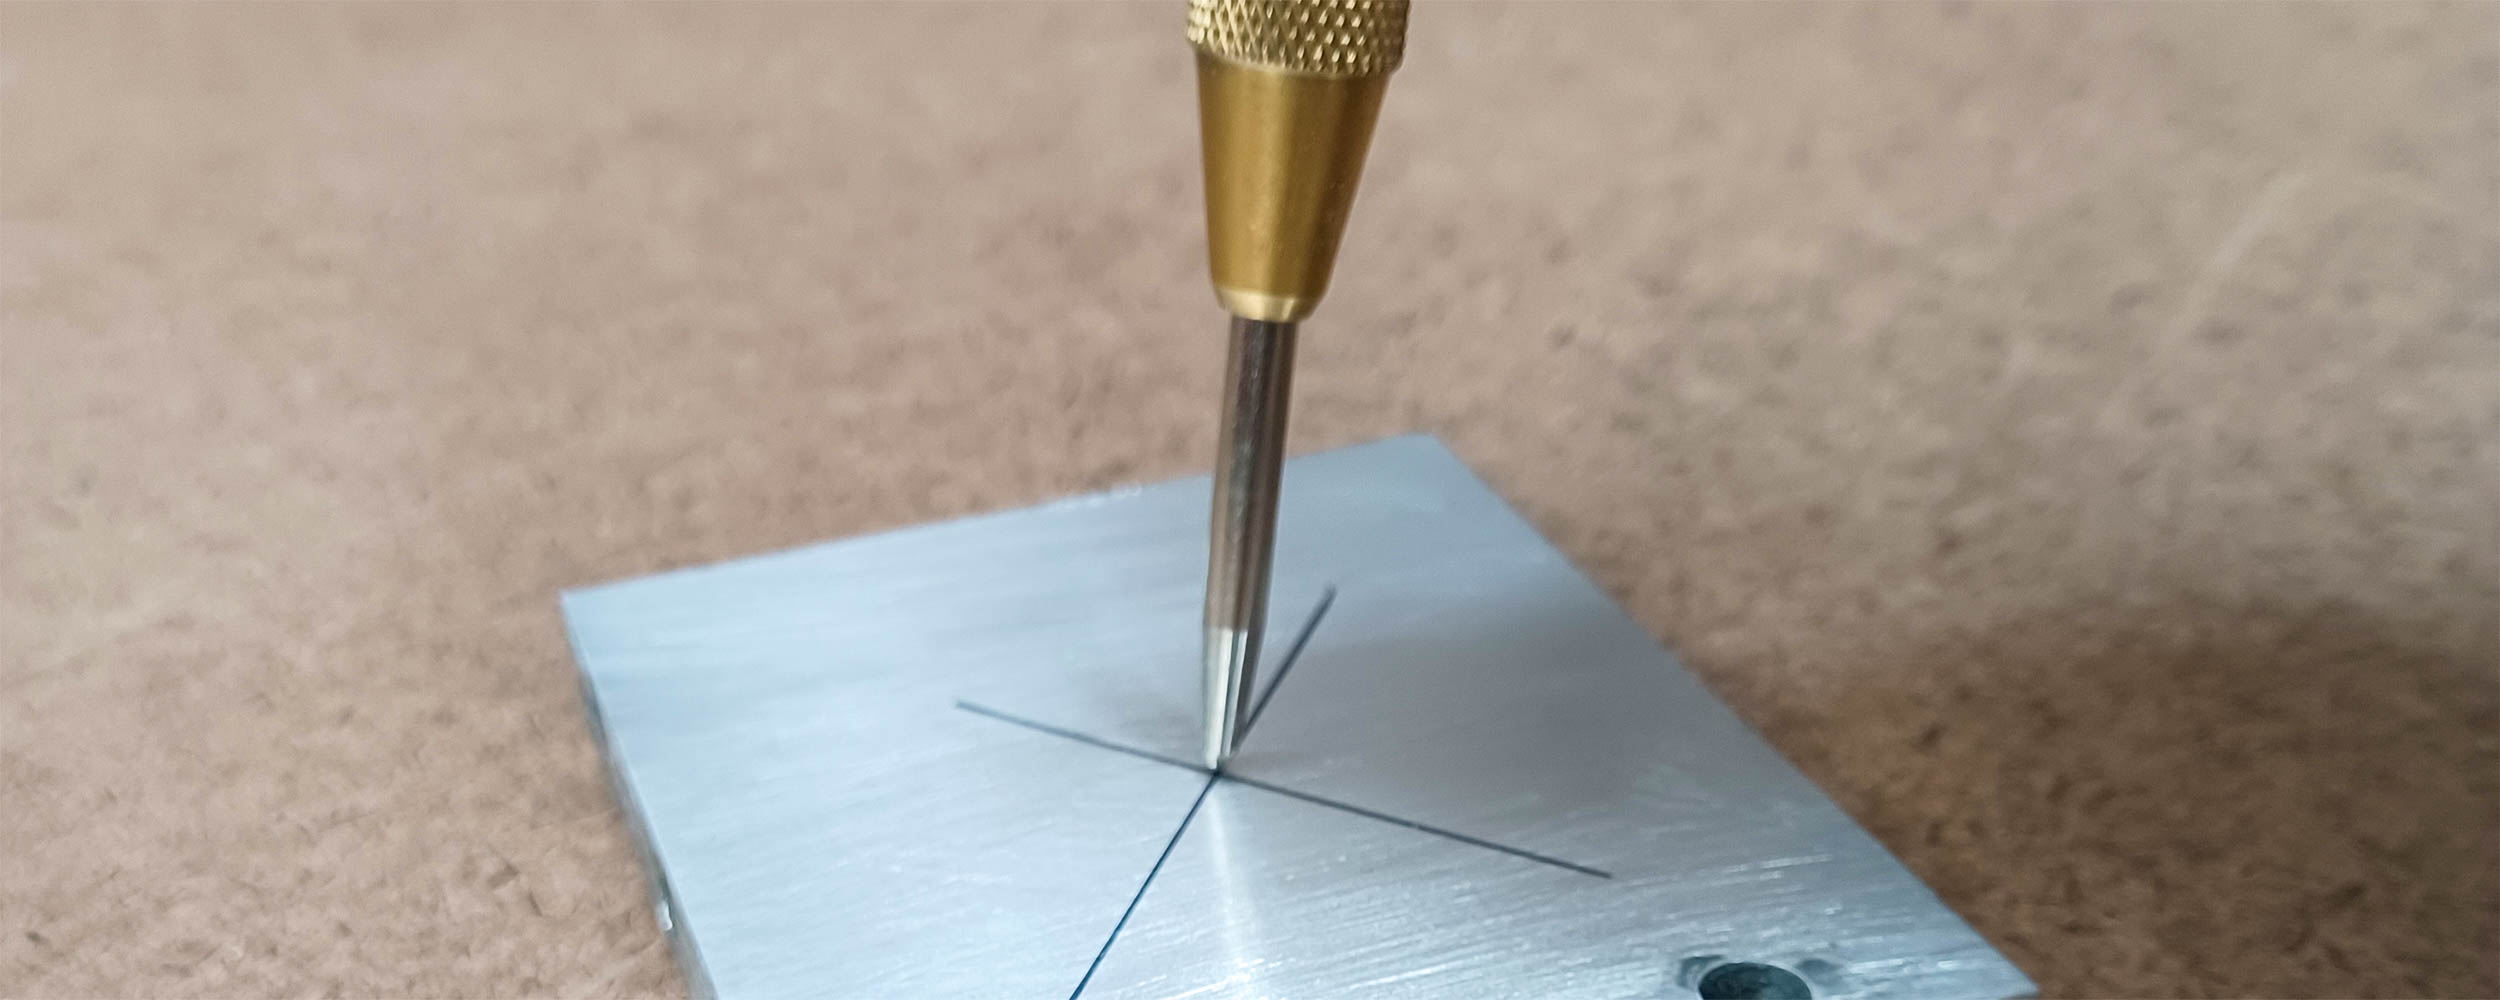
Put the point of your center punch on the center of your mark and either strike it with your hammer or push down in the case of the spring-loaded version shown here.

This puts a tiny dimple in the material – I missed the mark by a tiny bit on this one.

Line the tip of your bit up with the dimple and start the tool before coming in contact with the material. Starting with the bit touching it will make wandering much worse.
I drilled this hole on a drill press, but the process is the same with hand-held tools.
Protips
Lube
If your material is especially hard or thick, lubrication can make the job easier, the results cleaner, and the life of your tool longer.

Start drilling, but you’re only going to make a very shallow hole here – essentially enlarging the divot you made before.

Fill the new divot with lube. There are dedicated cutting oils on the market that work very well for this. I’ve also had great luck with a lighter-weight synthetic oil from Super Lube. Either one only takes a couple of drops and a bottle will last a long time.

Drill your hole deeper – how deep will depend on the material, but in this case about halfway through – then pull the bit out and add more oil. Continue this process until the hole is complete.

While it may look like a mess in this picture, these long single pieces of waste material are a sign of a good cutting action. Note that this only applies to specific materials like most aluminum alloys and plastics. Harder materials are typically more brittle and will make smaller chips.
Chamfering
Once your hole is drilled, you may not be finished. Many purely functional holes can be called done at this point, but there will probably be a small lip of metal around the edges of the hole at this point, especially on the exit side. A countersink is a tool made to add an angle to the edges of holes. It cleans up that lip of metal and gives it an overall more professional appearance.

Masking and Backing
Some materials like wood and some plastics are prone to tear-out and chipping, especially when the drill bit exits the material. You can minimize this by wrapping the area to be drilled (front and back) in masking tape.
Putting a second layer of waste material on the underside of the your primary material can prevent exit damage altogether – it’s best to clamp or tape the two pieces of material together to make sure the two faces meet as tightly as possible.
Smaller is Easier
As a rule, drilling a small hole is easier than drilling a large one. If you need to drill a large hole, drilling several consecutively larger holes can give you better results with less chance of damaging the material.
Keeping it Straight
The best tool for most drilling is a drill press. While they are excellent tools that serve more purposes than just drilling, they can be cost prohibitive.
There are a few much less expensive options for keeping your drilling perpendicular to your material. The simplest of these is the drill guide.

Made of plastic or hard rubber with steel inserts in several standard sizes, the drill guide will keep your drill bits at a perfect 90-degree angle to your work.
Speed
How fast your drill bit is turning when it’s doing its job is important. What speed you should use depends on the material you’re drilling and the bit you’re drilling with. The larger the bit you’re using and the harder the material, the slower you should be going. Some materials will drill best at speeds as low as 250RPM.
Below is a chart with suggested speeds for different drill bit types and sizes as well as materials.

Other Types of Drill Bits
The twist drill has had features added and refinements made to it over the years, and has spawned countless other forms of drilling tools.

Pilot points – With different names from different brands, the pilot point takes advantage of the “smaller is easier” rule. Essentially it’s a twist drill bit with a very short smaller drill bit on the end. These bits are excellent at helping to prevent walking on contact. In some versions like the one above, only this tiny point has any point angle. The primary cutting edge is made at a 180-degree angle, making for a very aggressive cut. While these will work on metal, their point angle makes them best suited to softer materials like wood and plastic.

Brad points – Very similar to pilot point drill bits, the brad-point bit actually has a cutting angle of more than 180 degrees. The guiding point has very small cutting edges, the helix angle is very steep and the secondary cutting edges are sharper than most. These bits should ONLY be used in wood or plastic.

Auger bit – The auger bit is made for making deep large holes in wood in a single step. The tip actually has threads on it like a screw to help pull the bit into the material. This bit is really only suitable for wood.

Forstner bit – We talked about these handy tools in our post about working with acrylic. They’re made to make flat-bottomed holes in wood, and do it better than any other tool. They can be used for through-drilling also, though they are prone to massive tear-out on the exit hole. This can be eliminated by making a small hole through the material to mark your spot and drilling the hole from both sides.
The guide point on a Forstner bit has no cutting edges at all – it’s simply a round or 4-sided spike. In wood this isn’t a problem, but in any other material a pilot hole the size of the spike will have to be made since it will not make its own.

Masonry bits – Best identified by the carbide insert in their tip, these are made for drilling in masonry and stone. Another good example of a specialized tool that does very well in its area but isn’t good for much else. Do not use these on anything but their intended material.

Acrylic bits – Acrylic bits have a very steep point angle and perpendicular primary cutting surfaces, and make perfect holes in acrylic and other plastics with ease. They perform well enough in wood also, but there are better options available.

Unibits – Often called step bits, these bits are made to make successively larger holes in thinner material. Perfect for sheet metal, a single unibit can make holes in a very wide range. A pilot hole slightly smaller than the initial point on the bit is advised, as the initial point isn’t typically very good at the initial cut.
The cutting geometry of a unibit is different than any other bit and will typically work best at lower RPMs. The large cutting faces make for an aggressive cut and good securement of the work is important when using these.
Drilling a hole is a simple job. Drilling that same well can be a little more complicated, but with the right tool and the right process, you can make perfect holes of just about any size you need in whatever you’re working with.
Recent Posts