2-Day Expedited Shipping Only $14.95 - See Restrictions
PC Guides - RGB Made Simple
November 15, 2021
Custom PC Lighting Demystified
You’re building your own custom PC. You’ve picked your hardware: whether it’s bleeding-edge tech or legacy gear doesn’t matter – it’s going to be yours. You’ve got your motherboard, processor, video card, memory, storage, power: all planned out and matched to work together in a sweet symphony of technological harmony. Congratulations.
Sadly, all the complexities of building a custom PC can pale in comparison to what should be a simple choice: lighting.
Today’s custom lighting systems are complex multifaceted assemblies of lights, controllers, connectors and a huge array of management software. The options and the terminology can be overwhelming, and there are more of them every day.
We’re going to boil it all down for you and distill the information that matters so you can decide what lighting system is best for your custom PC.
RGB is King
RGB LED lighting is far and away the most popular lighting option today – so much so that we’re going to focus almost exclusively on it here. We’ll look at a couple of other options afterward, but RGB LEDs make up virtually all the custom PC lighting in use today.

Speaking The Language – The RGB Alphabet
Ok, there’s a lot going on with RGB lighting. It’s a complex topic. It doesn’t help that there are so many acronyms that go along with it – many of them meaningless to us as custom PC builders.
Let’s get those out of the way first.
SSL: Solid-state lighting – Every LED is SSL.
SMDs: Surface-Mounted Diodes – Smaller LEDs made to mount directly to the surface of circuit boards. Premade lighting components made with these are treated the same as any other. If you’re advanced enough to be using individual SMD LEDs you don’t need this guide.
CCT: Correlated Color Temperature – Different shades of white. You’ll use more basic English descriptions like “cool white”, “warm white” and “daylight”.
CRI: Color Rendering Index – How closely a light source resembles natural daylight. Measured on a scale from 1 to 100, you’ll never need to know this.
RGBW / RGBWW: Yay, more letters! These are simply a standard RGB package with a fourth diode added for the color white. You can make white with a standard RGB LED by turning all three diodes to maximum output – sort of. It ends up being a pale bluish light though, and much dimmer than a dedicated white-light package.
What’s the difference between the two? Color temperature, or the “tone” of the white light.
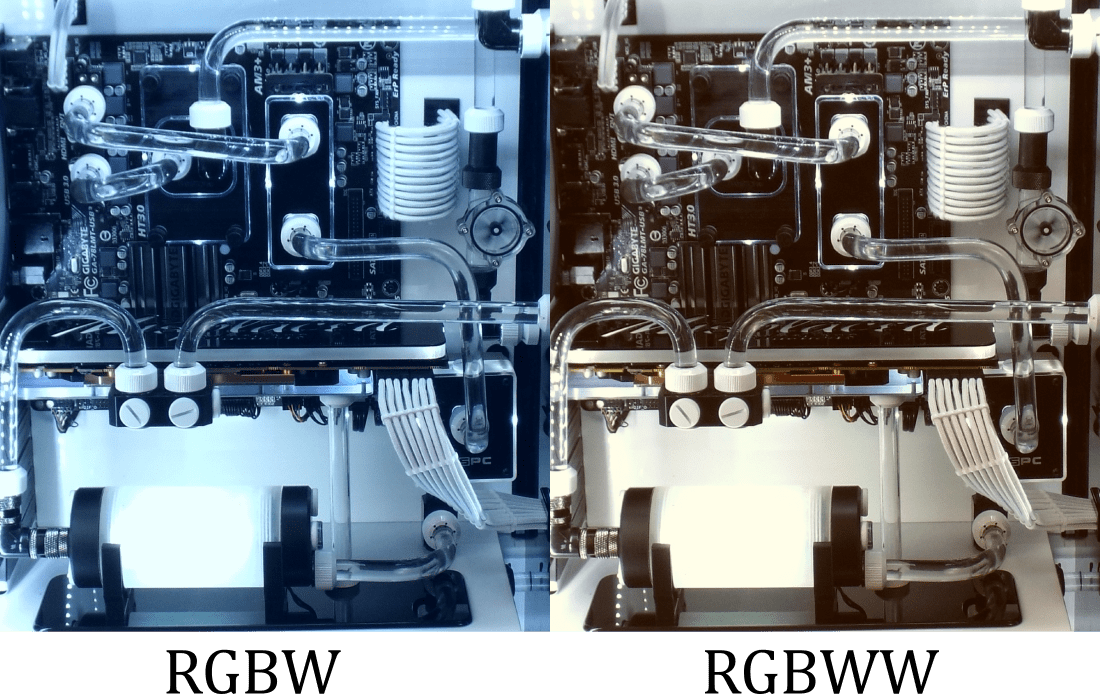
RGBW diodes shine white at greater than 5000K, making for brighter and more vivid colors and a white that has an almost blue hue to it.
RGBWW diodes shine white at under 5000K, making colors richer in appearance but less bright, and giving off a white with a tint of yellow.
To my knowledge, at the time of this writing there are no PC lighting options that utilize RGBW or RGBWW LEDs. The added LED in the package requires an additional wire to control its output, so it would require a custom controller of some kind if it were used.
That’s a short list of the acronyms you can safely ignore in choosing a lighting system for your PC. Let’s take a look at the important ones. There are really only four that matter, and two of them are the same thing.
See? I told you we were going to distill it down.
LED: Light Emitting Diode – The source of the light itself – a solid-state semiconductor that has no filament like incandescent bulbs and doesn’t need any special gases or coating like fluorescent lighting.
Nerd Alert: If you look closely at an LED you can actually see the two parts that make up the LED assembly: the anode and the cathode. The light is emitted from the junction of those two. When you see just how tiny that source is, the amount of light an LED puts out is amazing.

RGB: The most basic acronym, RGB stands for Red Green Blue. It simply means that a given LED can emit all of these colors, and millions more by using them in combination.
I wish the way it was used was as simple as that.
This single acronym is the largest cause of confusion. That’s because the same acronym is used to describe three different things.
1 – The LED light itself, used to distinguish these LEDs from single-color LEDs.
2 – The entire mutli-color lighting arena. “You’ve got a lot of RGB in there!”
This isn’t going away.
3 – One of the two types of RGB LED lighting used in custom PCs.
This is the key difference we need to know.
ARGB/DRGB: These only have one meaning thankfully. These stand for Addressable RGB and Digital RGB – two terms for the exact same technology, referred to as ARGB for the remainder of this post to save me five keystrokes for each reference.
What’s The Difference?
There are three main differences between RGB lights and ARGB lights: operation, connection and power.
Operation
RGB lights are limited to a single color per circuit at any given time. They can change colors quickly and easily, and can achieve the full multi-million color spectrum, but they can’t change colors or brightness individually. In a strip with 50 RGB LEDs for instance, every one of them will always be identical.
ARGB lights can change their color and brightness on a per-LED basis. That strip of 50 LEDs could be 50 different colors and 50 different levels of brightness at any given time. Each LED can change color and brightness at any time all by itself. This obviously allows for much more versatility in your lighting and the ability to achieve some amazing effects.

Connection
RGB lights use a 4-pin connector: one pin for power and one for each color that the LED emits.
ARGB lights use a very similar 3-pin connector: one for power, one for data and a third for ground. It looks exactly the same as the RGB connector with a single pin missing from the center.
If you’ve been building PCs for any time at all, you’ve noticed that any connector that should be plugged in a specific way will only fit in that specific way. Motherboard power, SATA power, data cables – all of them are carefully engineered to be resistant to the influence of the inexperienced.
Unfortunately, RGB and ARGB connectors are not. They’re completely reversible, and not in the good way, like USB C. They CAN be plugged in backward. They never SHOULD be plugged in backward.
Note the small arrows on the connectors. That arrow should always point to the pin on the header labeled +5V or +12V, depending on which type it is.
Power
RGB lights use 12-volt DC power. ARGB lights use 5-volt DC power.
Since the connections are nearly identical, it’s entirely possible to plug an RGB light connector into a 3-pin ARGB header. DON’T DO THIS. This will destroy the light an potentially the controller it’s connected to.
Thankfully the position of the missing pin on an ARGB connector has a solid plug in place of the normal female pin, so you can’t plug one into a 4-pin RGB header without deliberately modifying it.
When you’re designing your custom lighting solution, remember that every lighting option that you use will draw power.
LED lights don’t have an external power connector. They draw power from the header they’re plugged into. Each header has a maximum power rating. While you can use splitter adapters to plug multiple lights into a single header, be sure that the total power draw of the lights doesn’t exceed the rated power draw of the header.
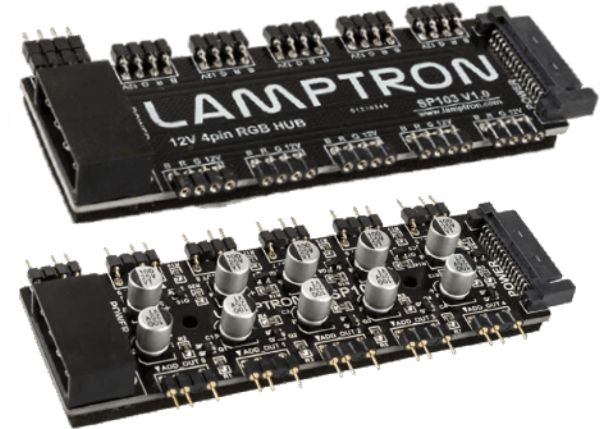
If you end up with more power draw than you have available, there are RGB hubs available to draw power directly from your power supply.
Control
Once you’ve picked your lights and made sure you can power them safely, you need to decide how they will be controlled.
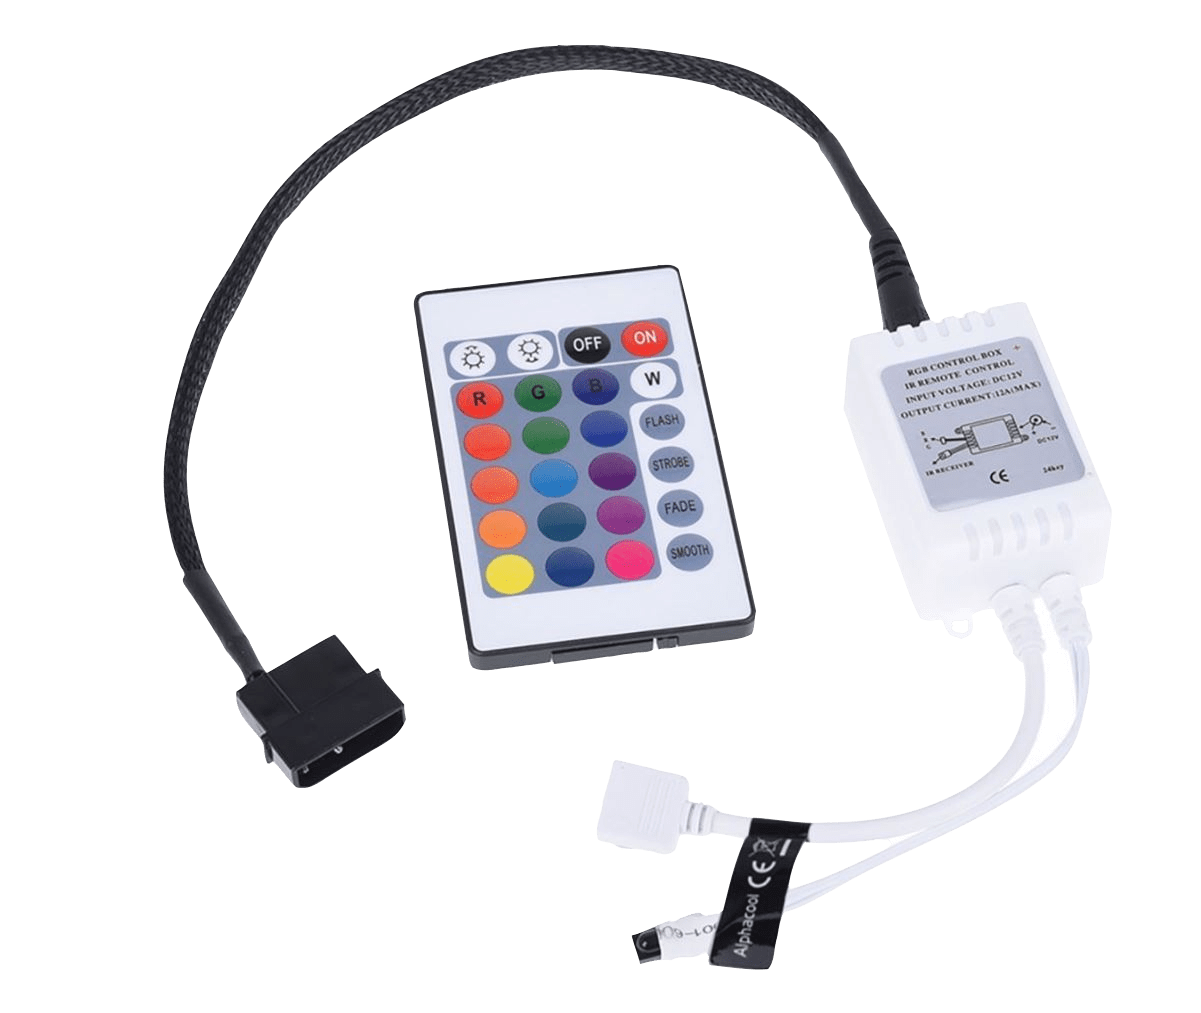
Option 1: The simplest option is a set of RGB lights connected to an external controller and remote control.
If the complex lighting options available through ARGB aren’t what you’re looking for, and you’re happy with hundreds of possible colors rather than millions, this could be the best option.
External controllers for RGB lights are cheap and typically reliable, and they eliminate the complexity of control through constantly evolving and updating software. Your lights plug into the controller, which is placed somewhere within your PC case, and the lights are controlled with a small remote that’s included.
Be aware that many of these controllers require power from a wall socket and won’t work with your PC’s power supply. The headers on these controllers will typically handle more power than a standard motherboard header for that reason.
Option 2: The most popular option is using either RGB or ARGB lighting plugged into the proper headers on your motherboard and controlled with whatever software the board manufacturer has.
Almost all motherboards sold today will have at least one RGB header – some have several in both RGB and ARGB. The software to control the lights will be part of the initial driver installation when you install the motherboard – followed by the inevitable updates.
One advantage to this method is ease of installation. Nothing external is required except the lights themselves.
The disadvantages are power requirements and the complexity of the software. Some software packages are more user-friendly than others, and there are far too many to get into in this post. You are also limited to the software included with the motherboard if your lights are connected to the motherboard headers.
Option 3: If you want the flexibility of using software other than what came with your motherboard, you’ll need to use a third-party controller. These are different than the controller in option 1: they’re full-fledged software-controlled ARGB controllers just like what’s built into your motherboard, but in a standalone package.
Your decision on which controller to use will probably be driven by the software. Like your motherboard, each controller comes with its own software. Corsair offers iCue, Razer has Chroma, Thermaltake offers TT RGB Plus – there are plenty of options. Take them for a test drive with a demo download and see which one works best for you.
Proprietariness? Proprietarity? Proprietariousness??
This is where we run into some more confusion and hypercomplication of the whole RGB arena – proprietary additions.
RGB and ARGB hardware is universal when it’s made. From the wires to the LEDs themselves, they’re all standardized technology manufactured to the same specifications.
They become non-universal when manufacturers install their own proprietary add-ons in an effort to lock you into their own RGB ecosystem.
These proprietary measures are usually simple connectors that prevent them being used with hardware from another brand, but sometimes they go as far as internal electronics. some controllers for example simply fail to recognize some lighting components from other brands.
While there isn’t master list that I’m aware of that shows all of the possible incompatibilities of different brands, we as a group love to share information. Some time scouring the Internet will usually find the answer to a specific hardware concern. Adapters that allow you to connect some of the more common brand-specific hardware together are becoming more readily available also – just be aware that you may need them.
The Advantage Of A Single Brand
The simplest way to be sure that all of your RGB/ARGB parts play nicely with each other is to use components from the same brand. Corsair and Razer both have a wide range of lighting hardware and their own software to control it, for example.
While using hardware from the same brand will guarantee compatibility, it does limit your options.
Mix and Match
If brand monogamy isn’t an option for you, don’t panic. Honestly, almost anything can be made to work with almost anything else. First, choose your software. That is the heart of your RGB setup and the part you’ll be interacting with. Find one that works the way you want it to. That will decide the controller you’ll need.
From there, buy what you want. Do some research online – chances are someone somewhere has made it work.
Open Source Is The Way
There are efforts being made to offer an open-source LED control solution that encompasses all brands. OpenRGB and Project Aurora are two notable examples. They’re not quite there yet, but the list of hardware they work with is growing by the day. Keep them in mind in your search for control solutions.

Other Lighting Options
While RGB LEDs are the best overall option out there for lighting your custom PC, there are a couple of other technologies that actually perform better in specific uses.

UV CCFLs offer much better coverage and power than UV LEDs
CCFLs – Yes, really. The CCFL was king of the lighting game for quite a while, and for good reason. A CCFL tube lights evenly from end to end with none of the hot spots associated with LED strips. That makes it perfect for lighting in places where it will be seen directly, like the inside of a reservoir.
For those of you into UV, the UV light from a CCFL is typically much stronger and more even than what you’ll get with UV LEDs also.
The drawbacks to CCFLs are the same as always though – they’re limited to a single color, and they require the use of an inverter connected to your PSU.
EL – Electroluminescent wire and panels offer perfectly even lighting in a flexible form. EL wire can even be wrapped around things, bent into shapes and tied into (loose) knots and still function.
Like CCFLs, EL technology uses AC inverters and is limited to a single color. It also degrades over time – the average lifespan of an EL wire or panel is 5000 to 7000 hours, so replacing them yearly is possible depending on your uses.
We hope you’ve enjoyed the smooth mellow flavor of our distilled RGB information. Hopefully it’s made the whole process easier to swallow. If you’ve got any questions or comments on anything here, leave us a note in the comments section below.
Recent Posts