2-Day Expedited Shipping Only $14.95 - See Restrictions
How to flush your PC water cooling loop
January 11, 2021
How To Flush Your PC Water Cooling Loop
Cleaning Things Up
PC water cooling is an amazing tool and a great hobby. It keeps our hardware safe, our noise levels low and it lets us reach clock speeds we could never reach without it. As useful as a water cooling system is though, it must be maintained to perform at its best.
Keeping the parts of your loop clean is essential to top performance. A shot of canned air across your radiator fins and fans every so often will keep the air flowing well, but how do you clean out the inside of your water loop?
There are a couple of different processes that can be used to clean the inside of your water cooling system. We’re going to focus on the easier of the two in this article – the system flush. The system flush is a lighter cleaning process than a full-teardown cleaning, but it’s much simpler and faster and is often all that’s needed for periodic maintenance or coolant color replacement.
In a system flush we effectively replace everything that’s in your cooling system with nothing but fresh new coolant to keep the system working at its best, all while leaving the water loop intact and installed.
There are two different methods for flushing your water cooling system. Method 1 is a lighter flush, used for routine maintenance or when you’re changing the color of your coolant to something close to what you already have, so total removal of the previous color isn’t as critical. Method 2 is a deeper cleaning, used for complete removal of previous coolant if needed, and if contaminants such as algae are suspected. Method 1 should also be used after Method 2 to remove the flushing agent.
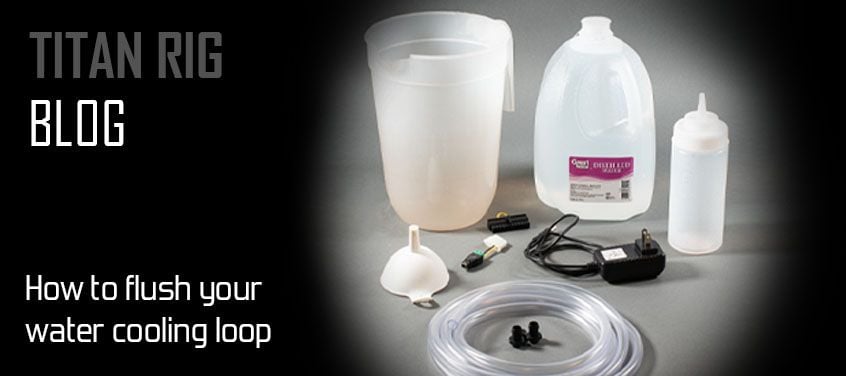
Tools Needed
Nothing out of the ordinary is needed for the process of flushing your loop, but there are some requirements.
Waste container – some sort of container into which you can put your old coolant. A simple bucket works well if you have the space, but any sealable container will do.
Filling aid – a container to use to add the flushing fluid. Many options are available, from purpose-made fill bottles and syringes to a simple cup-and-funnel combination. Anything that will allow you to add coolant to your reservoir without spilling it will work.
Tubing and fittings – a length of flexible tubing that can run from your drain valve to your waste container and a fitting to connect it to your drain valve. A short length of tubing and a fitting to attach it to your fillport can also be useful depending on its location.
Power supply – something to power the pump in your system. Two options exist: your existing power supply in your PC or an external power supply. Both will be covered below.
Flushing fluid – For method 1, distilled water will do the job just fine. For method 2 you’ll need the Mayhems Blitz Kit and distilled water.
Key Parts of Your Loop
Before we get into the actual procedure of the loop flushing, we need to identify a few key parts of the loop that will be used.
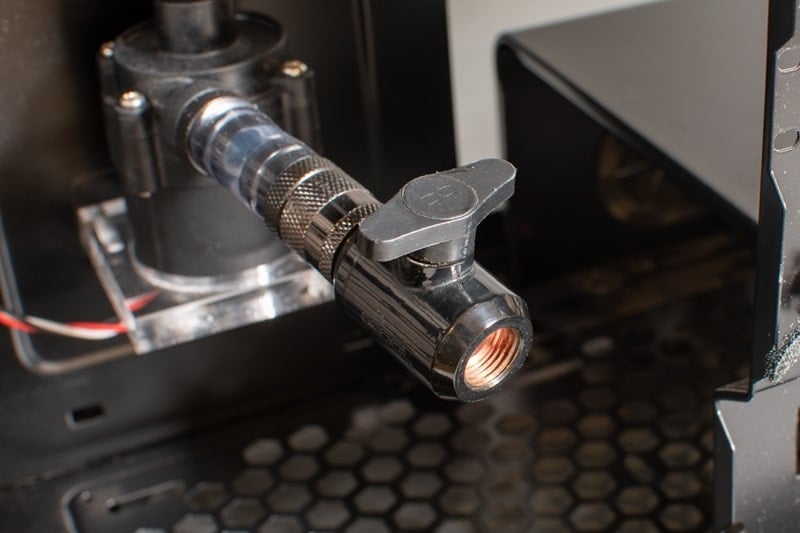
Drain valve – You did install a drain valve when you built your loop, right? If not, choose the plug or fitting that’s at the lowest point in your loop and get lots of disposable towels on hand. This is going to get messy. If your cleaning isn’t urgent, this is the perfect time to order a drain valve for your system. It’s entirely possible to add it to your loop while filled. If the fillport is left closed very little coolant will escape while the valve is installed.
Fillport – This refers to whatever port on your system you use to add liquid. Most are located on top of the reservoir, but some systems will have a dedicated fillport elsewhere, above the reservoir.
Pump – We will need to power the pump independently of your PC. Take note of the type of power connector your pump uses: 4-pin power (AKA Molex), SATA power or a smaller motherboard connector.
The Process
Powering Your Pump
CAUTION – Never attempt maintenance on a water loop (filling, leak checking, flushing) with the system powered on. Delicate PC components that are actively powered are highly susceptible to damage from liquids. Those same components can suffer contact with liquid unharmed if they’re powered down and the liquid is thoroughly dried before repowering.
Power Method 1: Internal power supply
If you’re using the power supply in your PC to run the pump for the flushing procedure, there are a few things you will have to do.
First, disconnect the power cord from the power supply and turn the switch to the off position.
Second, disconnect all power connections to the motherboard and video cards to avoid putting power to your components while working with fluids.
Third, you will need to make your power supply think it’s connected to a motherboard before it will power on. There is a plug adapter sold for this purpose (included in the Alphacool Eisbaer Refill Kit or a standalone version from EK).
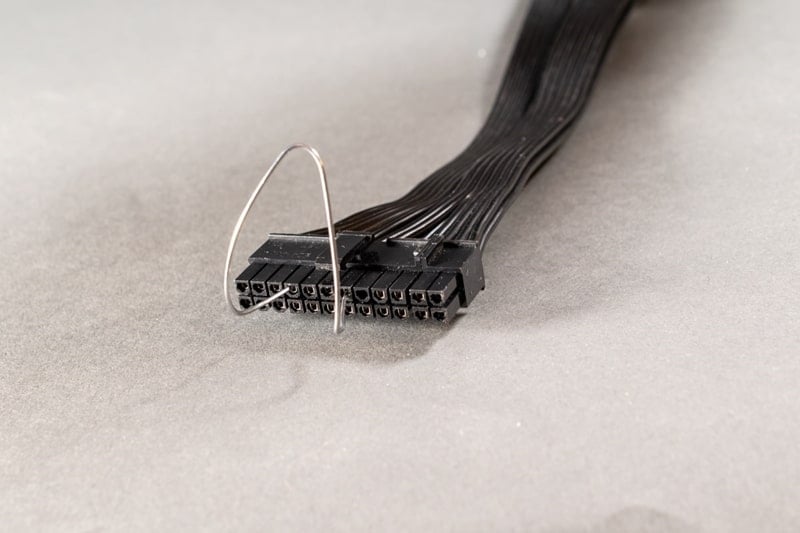
If you don’t have a plug adapter you’ll have to make a jumper wire for your 24-pin cable. A paper clip bent into a U shape works best.
Look at the wires going into your 24-pin cable. Older power supplies with color-coded wires will have a single green wire that tells the power supply that it has a motherboard connection. Newer power supplies have switched to all black wiring, making identification of the right pin a little more difficult. Check the pinout diagram below for reference. Slide one end of the paper clip into the pin where the green wire enters the 24-pin connector and other end into the pin for any of the black wires. From that point, when you turn on the switch on the power supply it will power on.
For the technical, here is a pinout diagram of a typical 24-pin connector with the green-wire pin position highlighted.

This will allow you to power on your PCs power supply without powering anything else, a critical step in the process.
Fourth – Plug the power cord back into your power supply but leave the power switch in the OFF position.
Power Method 2: external power supply.
This is the easiest and fastest way to power the pump in your system to move the coolant. The pump in your PC is a 12-volt DC device. Any simple external 12-volt power supply will power it so long as it has a compatible connector and supplies at least 2 amps of power. These are inexpensive tools and will save you time not only in this flushing process but also any time the system needs to be filled and checked for leaks. Look for one with its own toggle switch also, as this is much easier and safer than using the plug on your pump to control it.
It’s also possible to use this same method with a spare PC power supply if you have one. Simply follow the bridging process outlined above and continue below.
First, plug the external power supply into the wall outlet.
Second, unplug the power connector on your pump from your PC.
If your power supply has its own switch, make sure it’s in the “off” position and plug it into your pump. If not, you’ll have to plug and unplug the pump to control it since it will start running as soon as it’s plugged in.
Simple Drain and Flush - Method 1
Step 1 – Drain your loop. Attach the fitting and tubing to your drain valve and put the end in your waste container and open your drain valve. Some fluid will come out, but most will remain in the system. Slowly remove the plug from your fillport and most of the rest of the fluid will drain as air comes into the system to replace it. *Be sure to leave some fluid over the top of your pump so it doesn’t lose prime*
If you don’t have a drain valve the process is the same, but your coolant will be leaking out while you connect the drain tube and fitting to the port you’ve chosen as a drain. Once the fluid is drained, install a drain valve.
Step 2 – Close the drain valve and refill the reservoir with your flushing fluid.
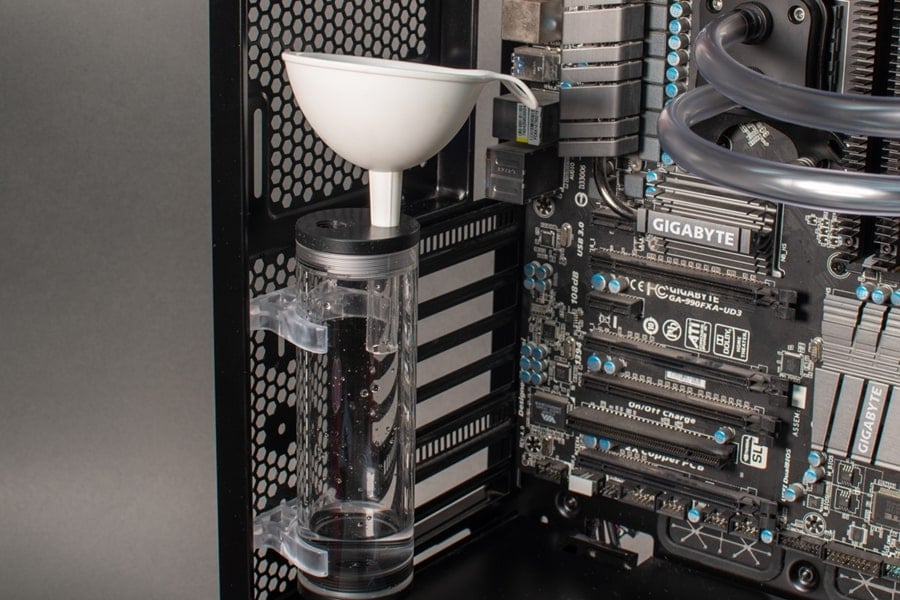
Filling tip: Using a funnel or hose that is as large as the fillport opening can cause vapor lock – the fluid can’t get into the system because the air inside can’t get out. If possible, use a fill method smaller than the port diameter. A filling bottle or fill syringe are perfect options.
Step 3 – Turn on your pump to start filling the system. As before, do not let the fluid level in the reservoir drop below the pump. Running dry can damage a water pump and keeping the pump primed will make the filling process much faster.
Repeat the reservoir-filling and pumping process until the system is full of your flushing fluid.
Step 4 – Reinstall the fillport plug and turn on your pump. Allow the flushing fluid to circulate in the system for 4-5 minutes. At this point you will likely see bubbles in various places in your system, usually water blocks and flow indicators. It may be necessary to tip the case side to side or even lay it down to get these air pockets out of the system. This is a necessary step to ensure that your flush is reaching everything it should.
Step 5 – Repeat steps 1-4 a minimum of three times. If you are removing colored coolant, continue the process until the flush fluid is clear. If you plan on replacing the old coolant with a color that’s close to the old color, total removal isn’t necessary.
Note – If you are using a vinegar solution for your flush, two more flushing cycles should be performed afterward with pure distilled water.
Step 6 – Drain one last time and fill with the coolant of your choice.
Deep Cleaning Drain and Flush - Method 2
If you’ve opted for a deeper cleaning with Mayhems Blitz Kit, the process is slightly different than the lighter cleaning. Again, this process if performed prior to method 1.
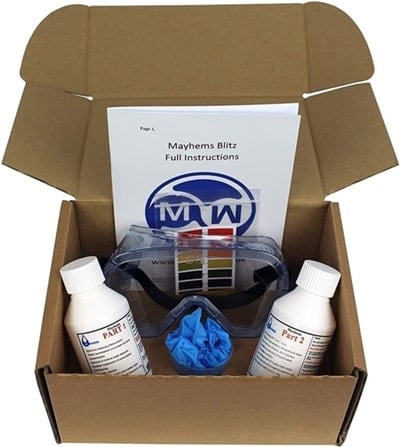
credit: Mayhems Solutions Ltd
Step 1 – Mix the Mayhems Part 2. Add the entire 25ml bottle to an empty 1-liter container. Top off the bottle with distilled water. This will give you 1 liter of properly mixed flushing fluid.
Step 2 – Drain your loop as described in Method 1.
Step 3 – Close the drain valve and refill the reservoir with your flushing fluid. Add slowly as the product will produce foam. This is normal. Replace the plug on your fillport as foam may escape when the pump is powered on.
Step 4 – Turn on your pump to start filling the system. Again, don’t let the fluid level in the reservoir drop below the pump.
Repeat the reservoir-filling and pumping process until the system is full of your flushing fluid.
Step 5 – Power on your pump and allow to circulate continuously for 24 hours.
Step 6 – Perform the Method 1 system flush.
CAUTION – some cooling fluids cannot be disposed of in a household drain. Note the contents and disposal instructions on your coolant of choice.
Though this cleaning process may seem complex by the number of steps involved, it’s simple and completely effective if there are no signs of performance issues or deep contamination in your system. Either of those issues will likely need a full teardown cleaning to fix, but normal maintenance is thankfully much easier.
Done regularly, a simple system flush-and-fill will keep your water loop looking and performing its best. TITAN RIG has everything you need to make the process easy and effective.
Recent Posts