2-Day Expedited Shipping Only $14.95 - See Restrictions
How to Clean Your Water Blocks
November 23, 2020 214
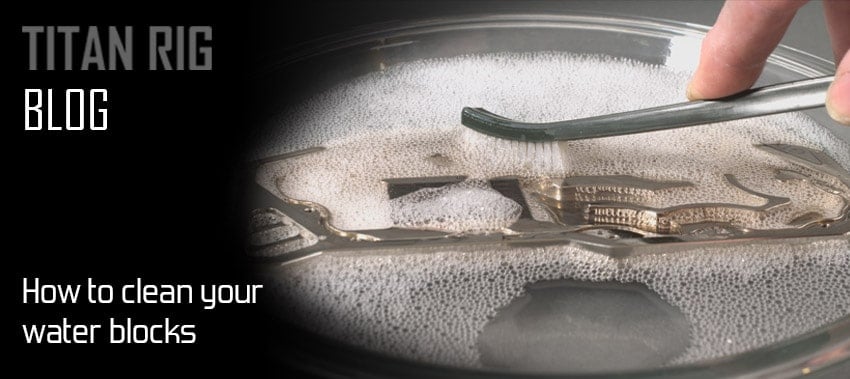
How To Clean Your Water Blocks
Got Gunk?
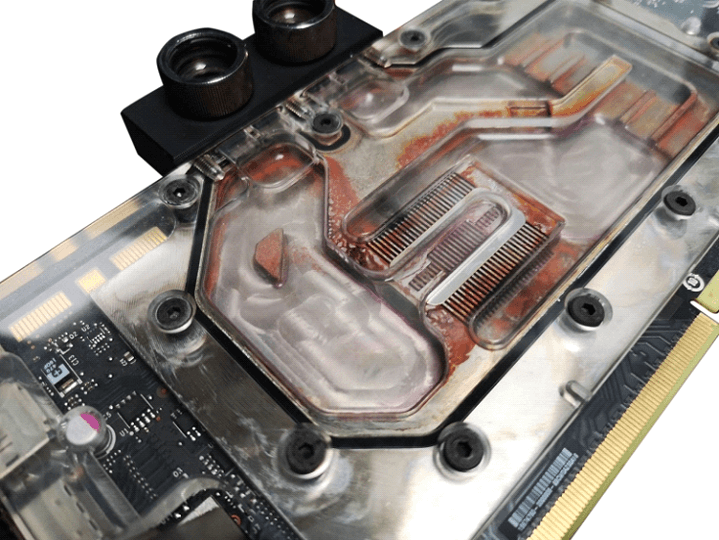 Photo credit: EKWB
Work area
Materials
Photo credit: EKWB
Work area
Materials
The Process – Basic Cleaning
 The Process – Aggressive Cleaning
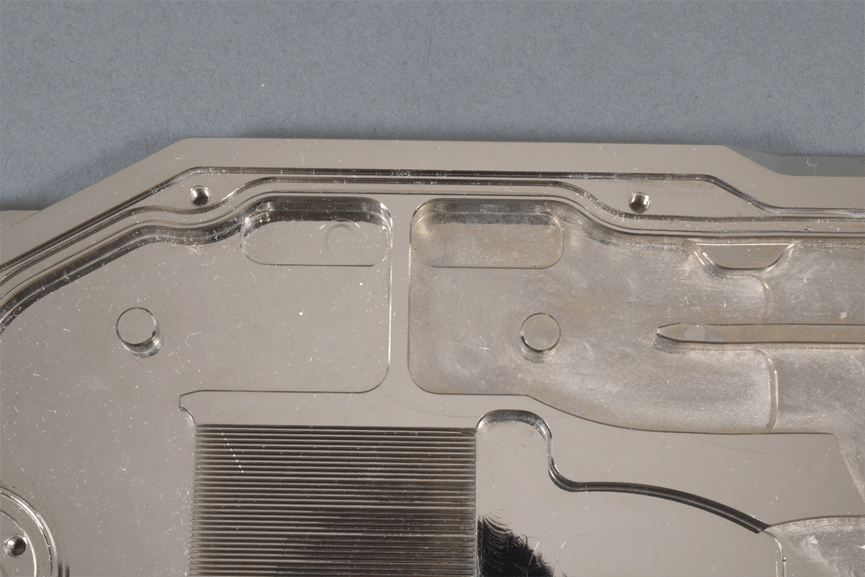
Pitting & Flaking Plating
The Process – Aggressive Cleaning
Pitting & Flaking Plating
 Rinsing
Water blocks in a liquid cooled PC are a major part of your water cooling system, both practically and aesthetically. They’re well-designed finely-machined pieces of hardware that are essential to the proper function of your loop. While a properly kept standard flush-and-fill routine should keep your water blocks functioning well for years, there are unfortunately times when more intensive methods must be used.
- The copper or nickel in your once-shiny water block has lost its luster.
- Your system isn’t as efficient as it once was even though you’ve performed all the external maintenance possible.
- There are visual signs of contamination in your water block.
These are all indicators that it’s time for a thorough block cleaning.
Cleaning water blocks is a fairly extensive process but it’s straightforward and can normally be performed in a few hours from draining your loop to refilling it. Just like flushing your water cooling loop, there are a couple of different processes that can be used. We’ll go over the basic cleaning process first, which is the easiest and can be applied to any material. After that we’ll cover the more extensive cleaning process as it applies to various materials used in today’s water blocks. By the end, your blocks should be as clean as the day you got them.
A clean work area is needed for the job. Any flat surface with space for your water blocks and a couple of containers will do if you have access to water. Tap water is fine for the first part of the task, but distilled water will be needed at the end.
Working on a counter top beside a sink is another option and provides an endless supply of tap water, but care should be taken to block the sink drain somehow – some blocks have parts in them small enough to fit there if they were dropped.
This list is for a basic water block cleaning. If more intensive cleaning is needed, additional materials will apply.
Water: Lots of it. Again, tap water is fine to start but a gallon of distilled water will be needed for the last step.
Soap: Standard dish soap works fine in this step. If anything else is used be sure it is non-abrasive. Towels: This is a wet job.
Containers: Any watertight container large enough for your water blocks to fit in with room to move. You’ll be soaking and scrubbing in these, so size them accordingly.
Brush: A toothbrush works well here but be sure it’s clean and labeled “soft”. Some blocks have water channels that are so fine that it’s hard to get a brush into for cleaning. For those you can get “extra soft” or “nano” toothbrushes that have extremely fine bristles, between ten and twenty thousand of them on a toothbrush.
Step 1:
Drain your loop and remove your water blocks. Be sure to place towels beneath all connections that must be removed to prevent stray coolant from getting where it shouldn’t be.
Step 2:
Disassemble your blocks. While all water blocks that can be disassembled are held together with screws there are a lot of variances in size and type of screw used. Consult the documentation that came with your block for specifics on yours. If no information is found, trial and error are the best way to figure out what is needed. A good precision screwdriver set should have any bits you might need.
A few small containers like sauce dipping cups or shot glasses are useful here to put screws and other small pieces in to prevent them getting lost during the cleaning. If disassembly of your block is complex at all it’s a good idea to take pictures of the disassembly process as you go. This will help you in reassembly after the cleaning. If more than one type of screw is used, taking a picture with the screw beside a label of its position is helpful also.
Step 3:
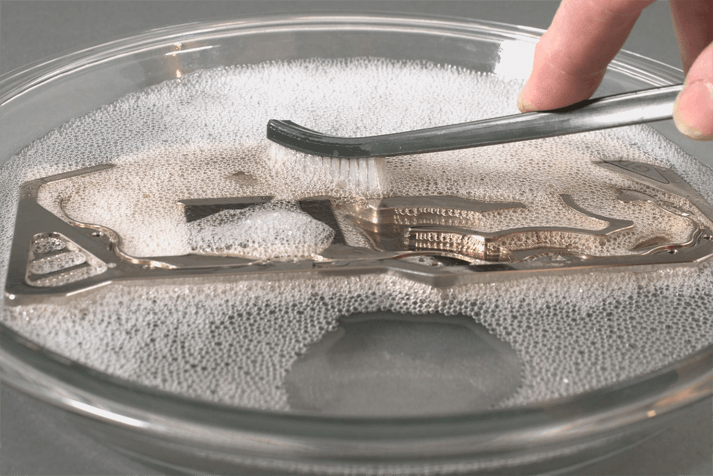
Mix tap water and dish soap in your container, ¼ teaspoon to a gallon of water is sufficient. This cleaning solution will work on any material so use it on every part of your block. Submerge your block parts in the solution and let them soak for 5-10 minutes.
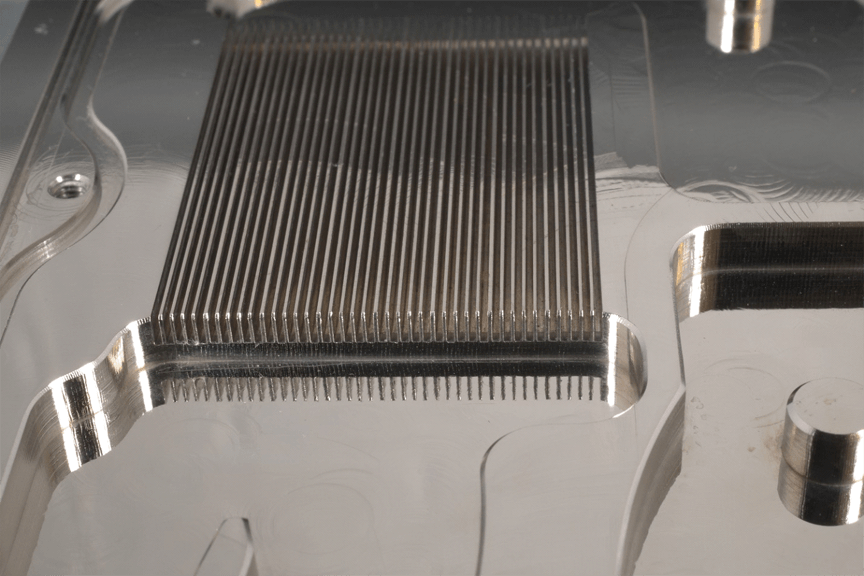
Afterward, take them out one at a time, dip your brush in the water and scrub them. Be sure to get inside the water channels on the base of the block as best as possible – this is the point that will clog first and obstruct water flow. Sealing areas are another spot that calls for special attention. Any buildup in the block can accumulate on these areas and prevent a proper seal if not cleaned.
Step 4:
Rinse the parts thoroughly in tap water.
Step 5:
Rinse them in tap water again. Seriously, it’s critical to get *everything* off all your parts before reassembly.
Step 6:
Rinse your parts with distilled water 2-3 times. This will remove any minerals or deposits present in your tap water.
Step 7:
Inspect your parts. Did everything get clean? If your water blocks were contaminated or corroded, the basic cleaning process may not clean them completely.
If your parts are clean, you can skip the more aggressive cleaning process below.
More thorough cleaning of your water blocks will require the use of different cleaning agents. Unlike the basic cleaning process, aggressive cleaning involves chemical processes. Different materials react very differently to certain chemicals, so care must be taken to avoid damage to your water blocks. Below is a list of materials found in water blocks and more information about cleaning each.
Copper:
Raw unplated copper is among the toughest and most chemically resistant materials used in water blocks. Since copper water blocks are solid copper and not plated, you can even use mild abrasives without fear of damage to the material itself. If a surface is polished, harsher abrasives should be avoided as they will scratch the finish.
To clean copper when the standard dish soap scrub doesn’t work, a mixture of a weak acid and a mild abrasive is best.
For a cleaning mixture that can be made from things readily available, ordinary table salt can be mixed with ketchup, mustard or any dark soda like Coca Cola or Pepsi. Each of these is very close to the same acidity and the salt functions as an abrasive. Note that this is one of the harsher abrasives listed here and should only be used on unpolished copper to avoid scratching.
Ready-made polishing compounds such as Brasso are also highly effective in cleaning raw copper. Be sure to follow the manufacturer’s directions for application of polishing compounds.
In the most severe cases of copper oxidation, a product called TarnX will remove practically anything. TarnX is a more potent acid than vinegar and should be used with care as directed.
Nickel:
Nickel in water blocks is electroplated to prevent the oxidation of a different metal. Nickel is much less prone to oxidation than copper. As a plating the nickel layer is very thin and care must be taken not to damage it. No acids or abrasives should be used on any nickel-plated parts.
Pitting and flaking of the nickel plating on water blocks can look like buildup of some kind at first glance. To determine which it is, clean the area gently with the soap-and-brush method and look at the colors afterward. If copper can be seen, the nickel plating is compromised. Sometimes this plating can flake off in layers thin enough to not expose the copper but it’s rare. Pitting and flaking have a few causes – poor plating process, corrosion from the coolant environment, and rarely physical damage. Once the plating is broken through at any point the flaking/pitting process will continue at a faster rate in that spot.
Flaking of the nickel plating isn’t necessarily a reason to replace your water block. That decision will depend on aesthetics (is it ugly enough to warrant replacement?) and the extent of the problem. Flaking will normally happen at a very small scale – small enough that any particulates that come loose into the coolant will circulate without issue.
Unless your plating is flaking off in pieces large enough to see a pattern like straight edges or sharp lines it should be serviceable.
If those patterns are visible or if large areas are flaking off block replacement is the best option.
If the basic cleaning process was unsuccessful, the best option for cleaning nickel plating is a non-abrasive metal polish such as MAAS Metal Polish, Blue Magic Metal Polish or Nevr-Dull. Some of these polishes will leave behind a protective coating also, preventing further oxidation. This coating will have minimal effect on thermal transfer. Be sure to use these products as directed by the manufacturer and observe all precautions. Note that the effect of this coating on some sensitive coolants like pastel colors is unknown. If you plan to use these coolants pay close attention to the product’s info on the topic of protective coatings.
Acrylic:
Acrylic is everywhere in water blocks today and looks beautiful when clean. The material is unfortunately easy to scratch so cleaning must be done accordingly. This means no abrasives.
First and foremost, never clean acrylic with alcohol. Acrylic reacts with alcohol and will form micro fractures called crazing, not only dulling its appearance but weakening its integrity. Ammonia-based cleaners such as Windex should also be avoided.
For stains that will not come off acrylic with the basic cleaning process, high-quality naphtha or kerosene is safe to use with a soft applicator. While there are purpose-made products for acrylic cleaning such as headlight restoration products, these are almost always abrasive and should be avoided in basic cleaning of water blocks.
For acrylic that’s physically scratched, these products can remove these scratches and shine it up like new. Acrylic is amazing in its resilience. With the right products and a little work, even badly-scratched acrylic can be restored to its former beauty. Good options for this include the Novus line of products (Novus 1 for cleaning, Novus 2 for light scratching, and Novus 3 for heavy damage - these can be purchased as a kit), Flitz polish and the entire lineup of polishes from Glass Polish. As always with any product be sure to read the manufacturer’s info and suggested uses. Keep in mind that these suggestions will likely not consider contact with cooling fluid. So long as it leaves a residue-free surface it should work fine for your water-cooling parts.
Acetal:
Acetal (known also as POM or the brand name Delrin) is an industrial engineering plastic that is extremely resistant to chemicals but is soft enough to scratch easily, eliminating the option of abrasive cleaning. High-purity isopropyl alcohol is the best option for cleaning acetal.
If you must use any of the chemicals listed above to get your water blocks clean, it is absolutely critical that all of it is removed before putting your water blocks back in service. Many are acidic and are likely to damage other components in your water loop if left in place.
The best way to be sure all of the cleaning chemicals are thoroughly removed is to perform the basic cleaning process again. Scrubbing with soapy water followed by several rinses in tap and then distilled water will leave your blocks residue-free.
Step 8:
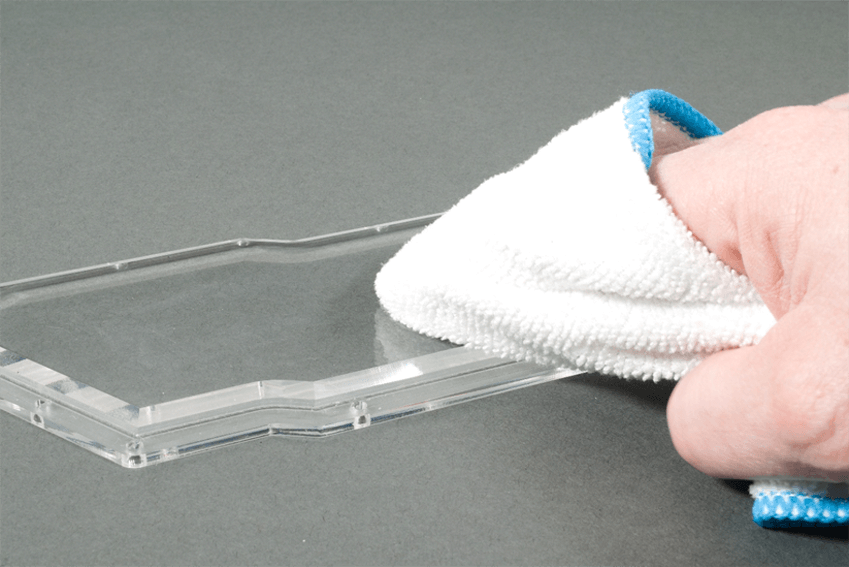
It’s best to let your parts air dry to prevent introduction of foreign particles from a drying cloth. If you’re unable to air dry your parts be sure to use only a good-quality microfiber cloth to dry them and check all your parts thoroughly when done for anything that shouldn’t be there.
Step 9:
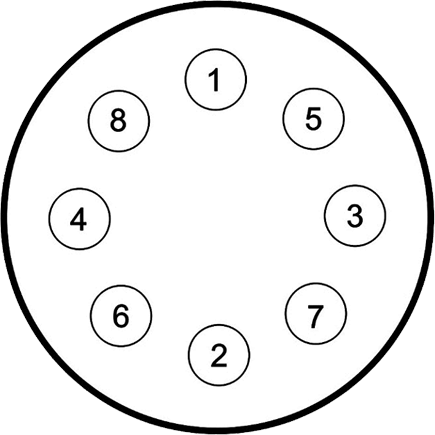
Reassemble your blocks. Care must be taken in this step to be sure any internal parts like jet plates and deflectors are installed properly and that o-rings are fitted to their sealing surface as they should be. Screws should be tightened gradually in an alternating pattern, one per side. This torque pattern will help to avoid pinching o-rings and seals and ensure even tightening. Below is a basic torque pattern diagram. Your block will likely not be a circle like the diagram but the process is the same regardless of the shape.
Before final tightening, check o-rings and seals again for proper placement. Do not overtighten. This is much easier to do than you might think.cAssuming the water blocks came clean, they can be reinstalled and put back into service at this point.
Regardless of what your blocks are made of, unless they have severe physical damage or very bad corrosion, following the steps above will get them looking as good and working as well as the day they were boxed up for sale. Regular maintenance will keep them that way.
Thanks for checking out our blog post!
Go here for a chance to win a CPU & GPU water block
214 Comment(s)
Load more comments
Recent Posts