2-Day Expedited Shipping Only $14.95 - See Restrictions
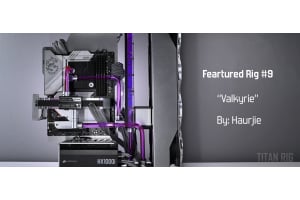
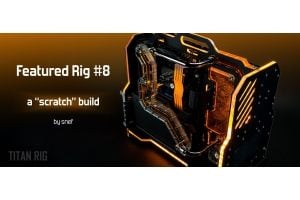
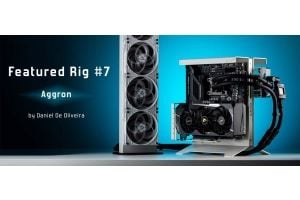
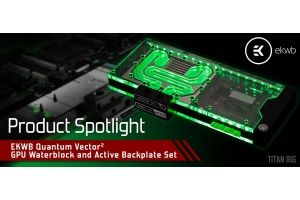
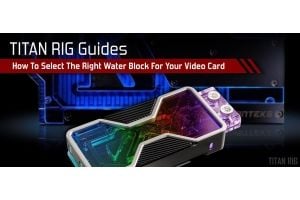
Featured Rig #1 - "Luxe" by Mikey Johnstone
March 08, 2021
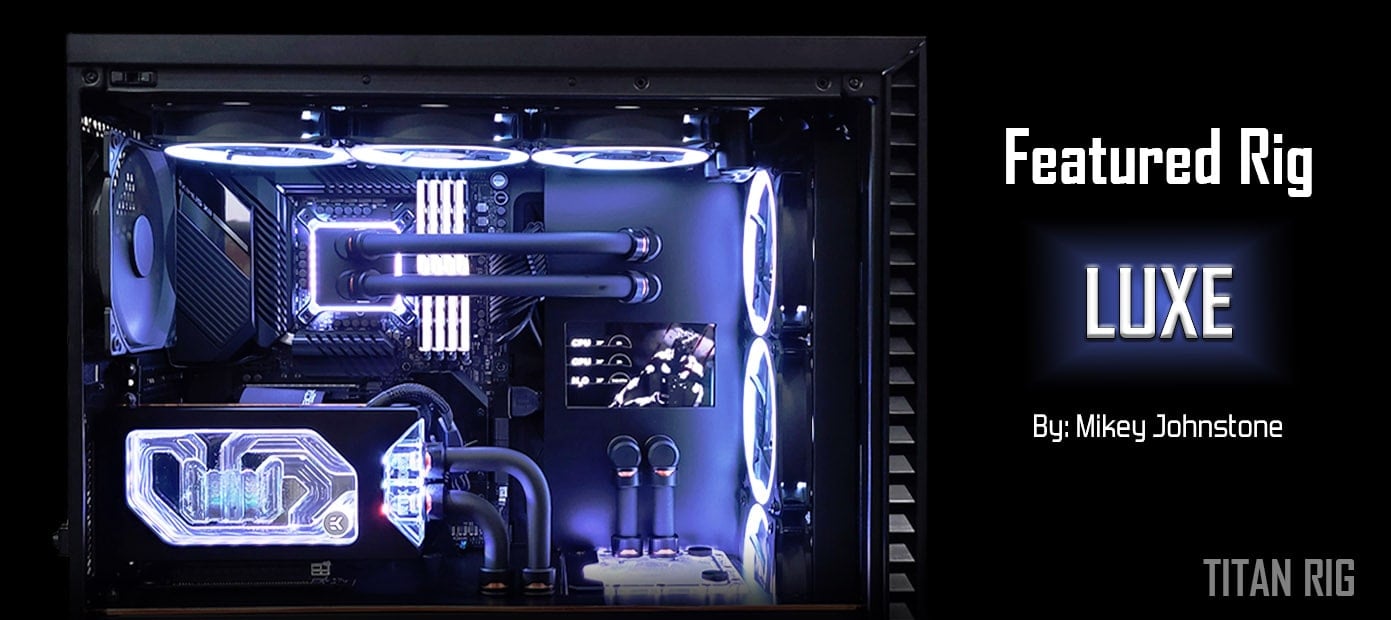
Featured Rig – Mikey Johnstone
I want to let you in on a secret: I love liquid-cooled PCs.
Ok, so it’s not much of a secret but it is a fact, and it’s a big part of the reason that I do what I do. I love custom PCs in general but there’s something about a well-planned and perfectly executed water cooling system that really stands out for me.
The finished builds I see cover the range from amazing to good to... not so good. I encourage every one of them though. Even the not-so-good builds are good really. Like anything else, the best way to learn to build an amazing liquid cooling loop is to do it.
I’ve got a firm appreciation for the amazing builds. It’s built on years of watching the work of others and doing the work myself. I can appreciate from experience the amount of time and work that goes into a truly amazing custom PC.
As part of that appreciation, and in an effort to showcase some of this amazing work to the world, we’re starting a new regular blog category: Featured Rig.
The Featured Rig posts will each showcase a single specific water-cooled PC build that we found to be singularly impressive. We’ll have lots of pictures of the build, information on the hardware and water cooling parts that were used, and an interview with the builder to answer questions about the system and how it all went together.
It’s our hope that the Featured Rig posts will not only showcase some builds that deserve to be seen, but also help to teach and inspire the next round of water-cooling enthusiasts by showing them what can be done and talking with the builders about how they did it.
Ok, enough intro - let’s get on with our first Featured Build post. Enjoy and don’t be shy about leaving comments on the build or anything in the post. Likes, dislikes, questions – whatever you want to say. We’re listening.
Builder: Mikey Johnstone
Hardware list:
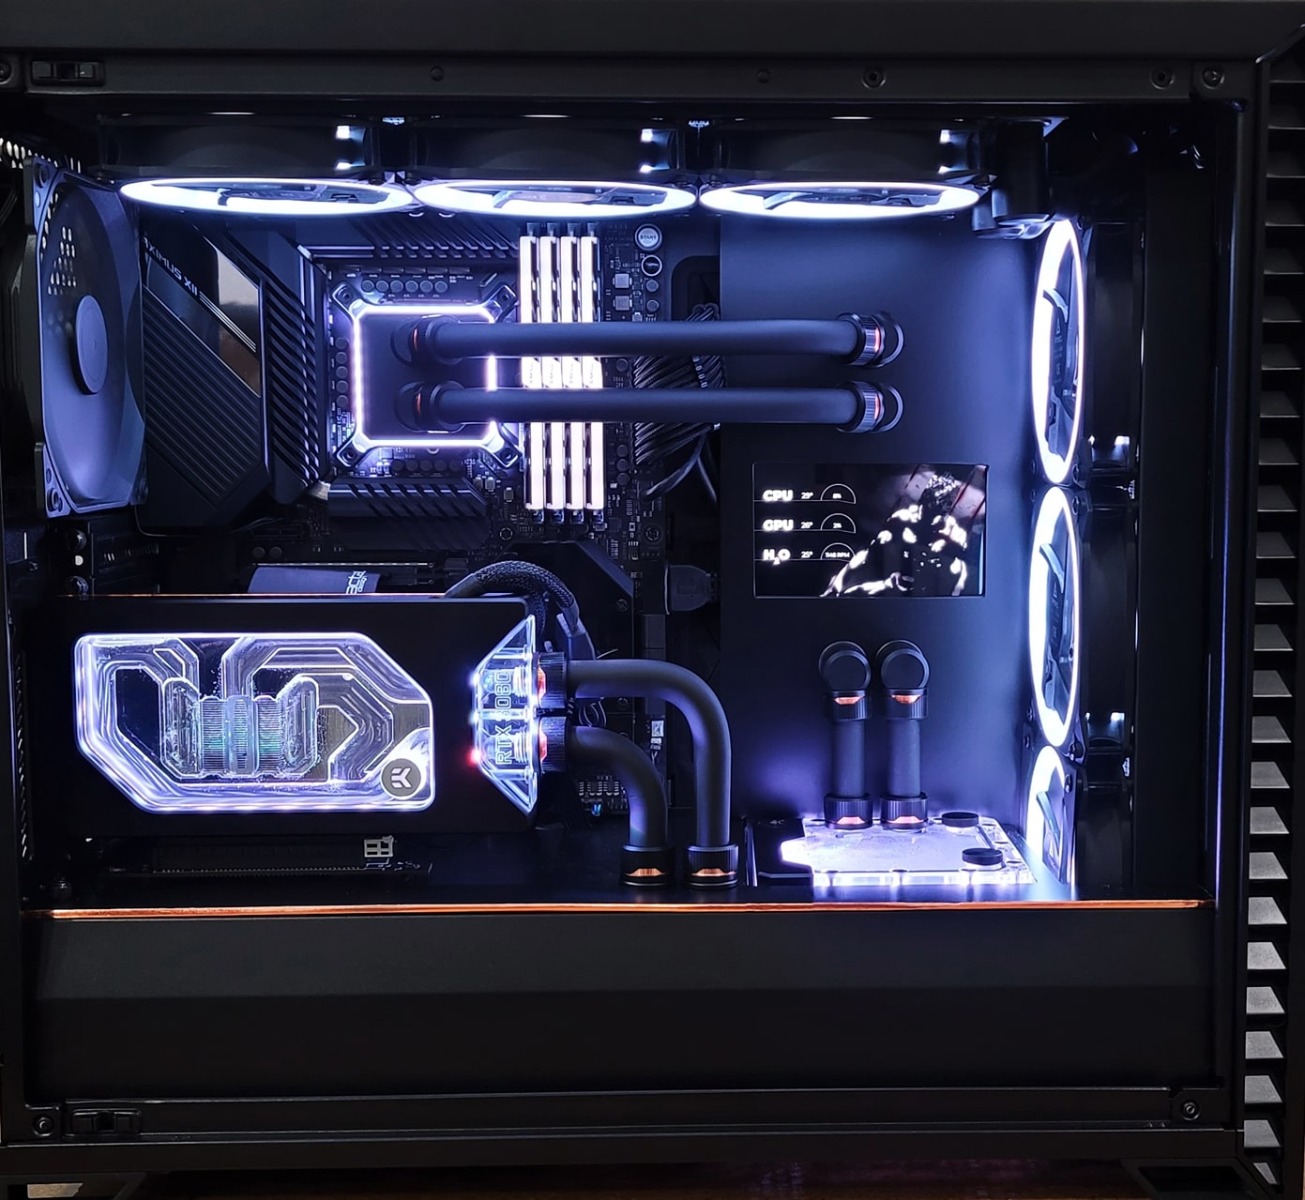
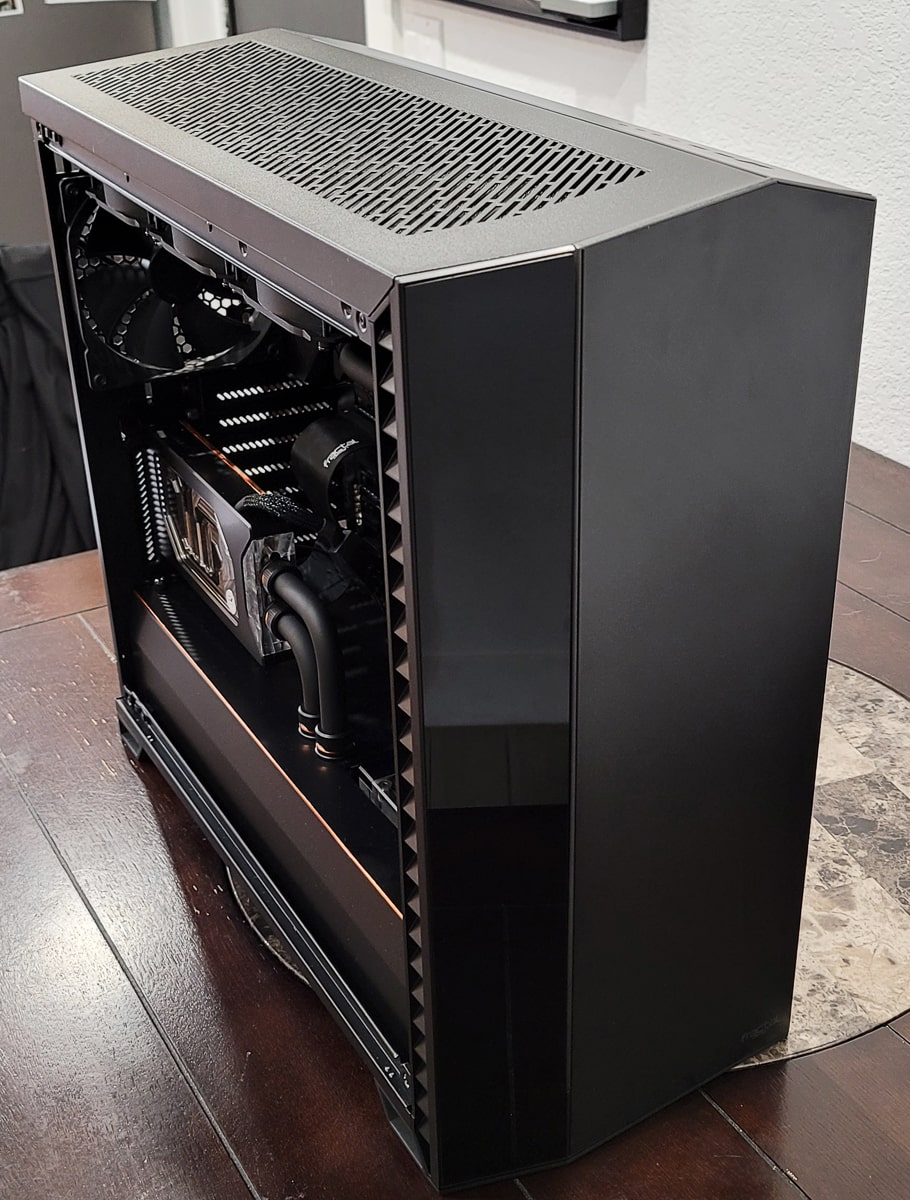
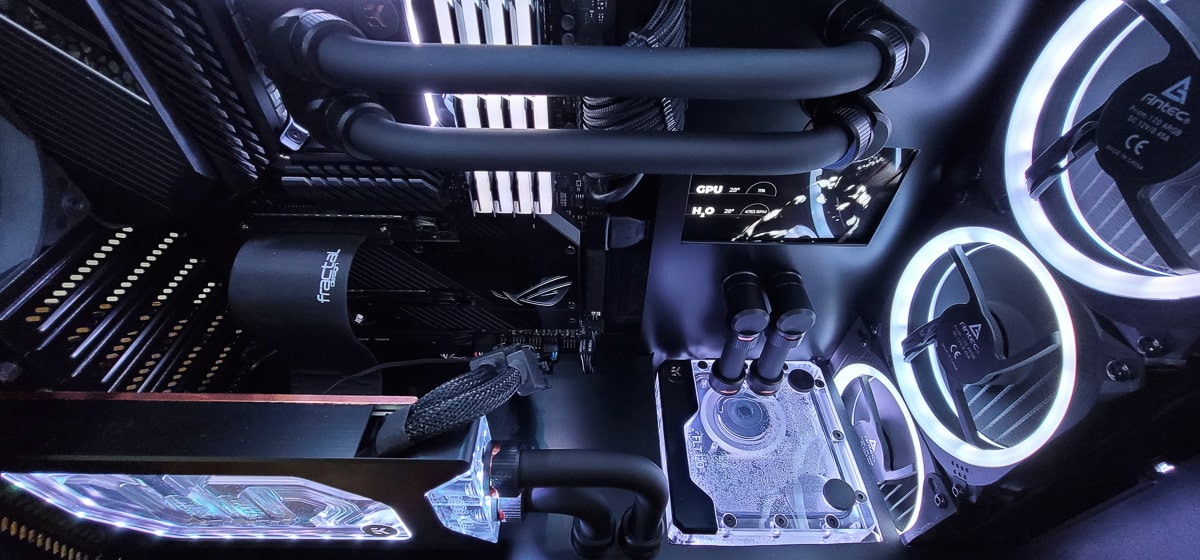
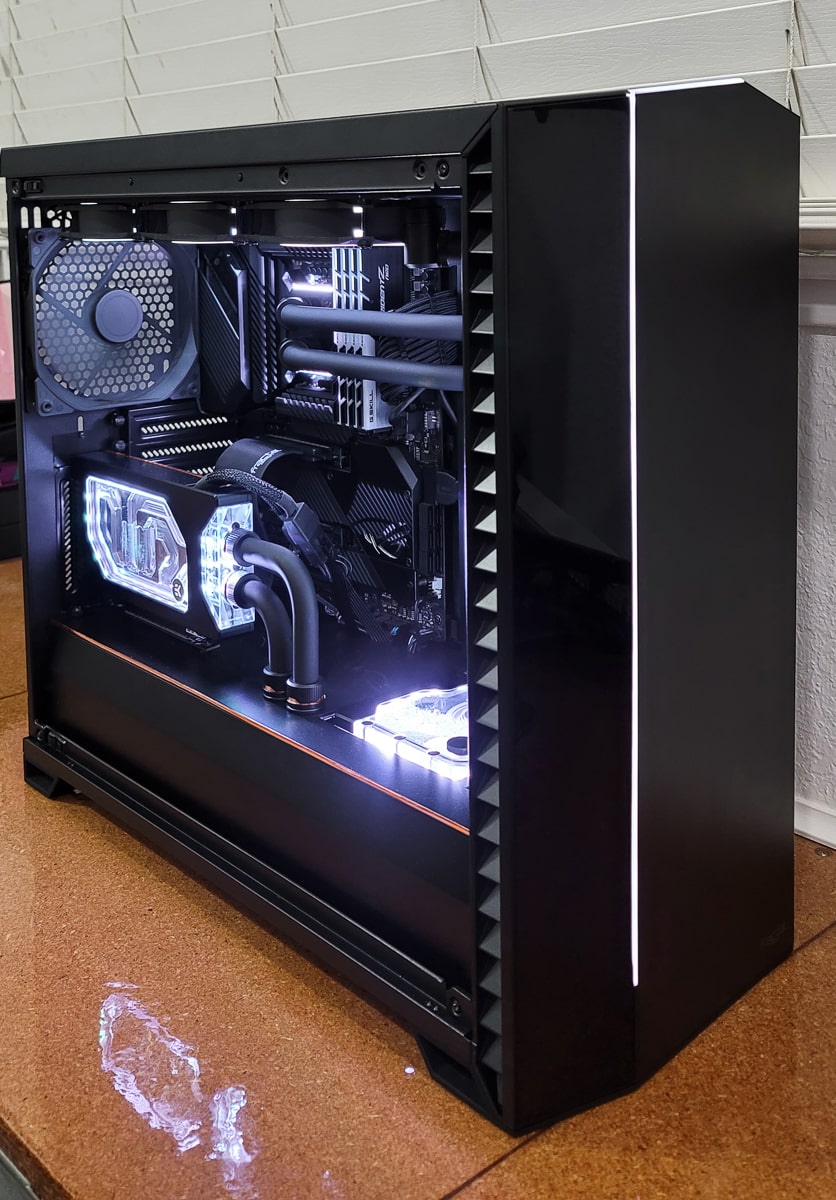
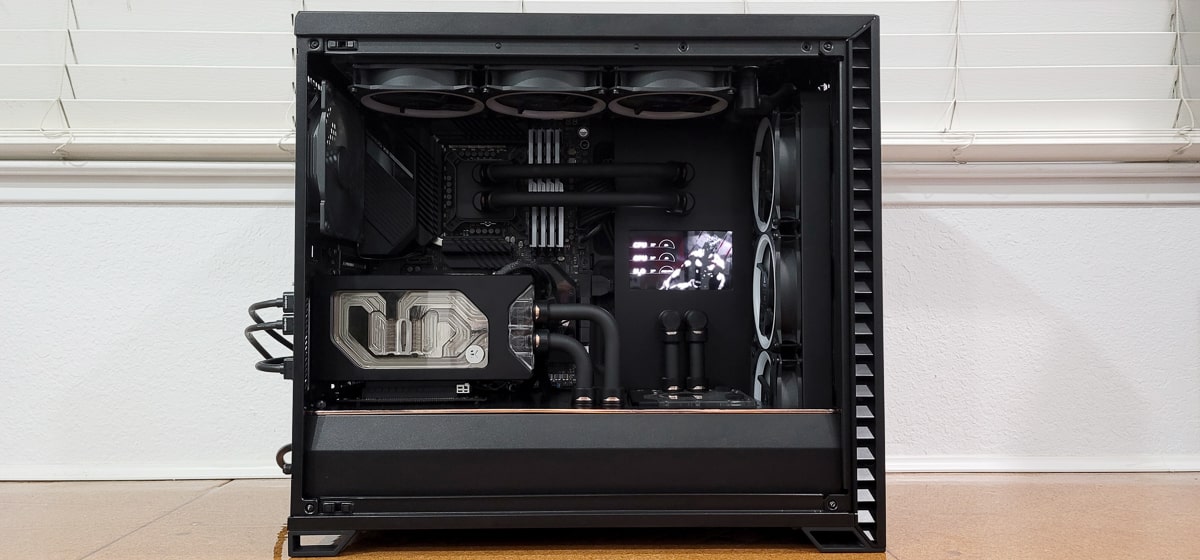
Case: Fractal Design Vector
Mainboard: Asus Maximus VII Hero
CPU: Intel 10900K
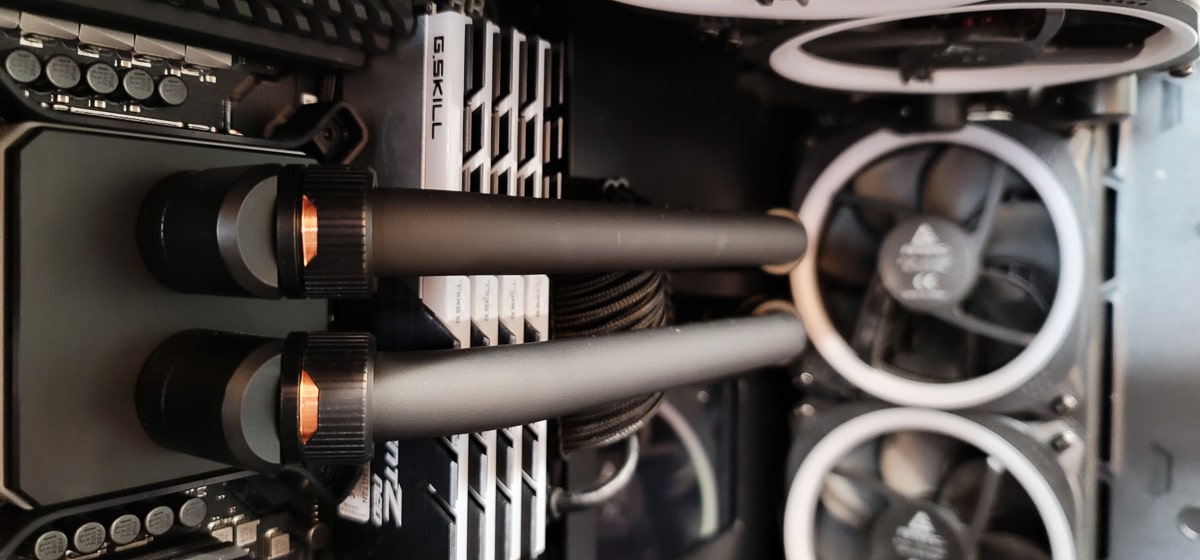
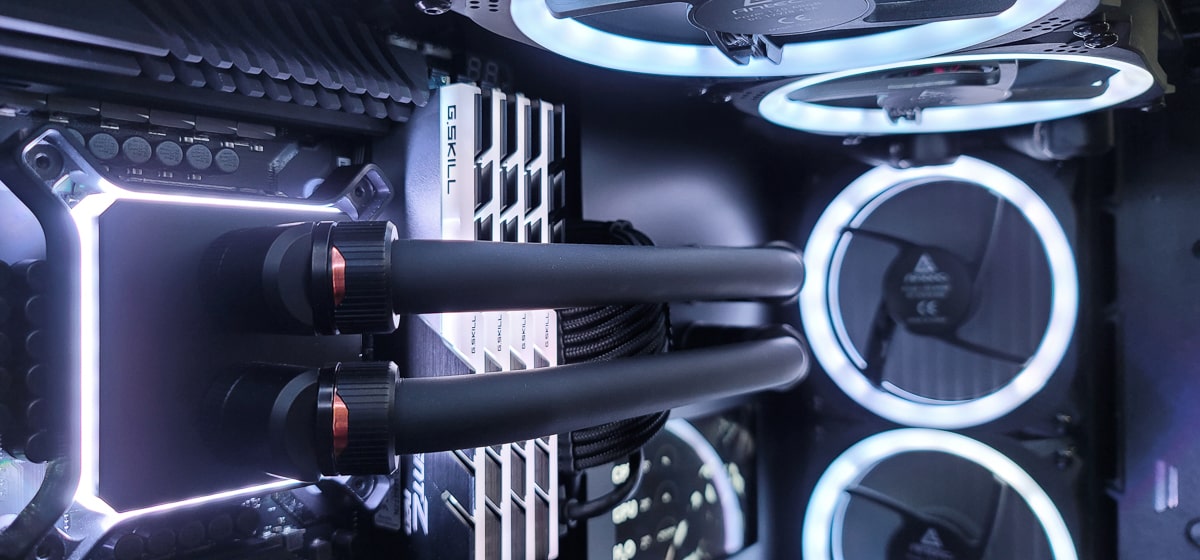
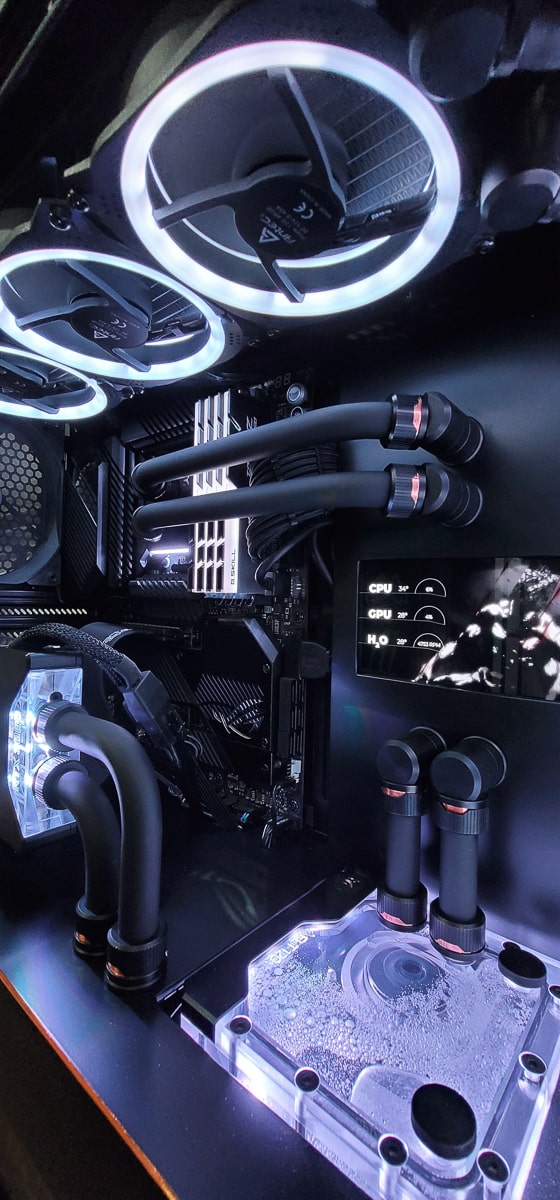
RAM: G.Skill TridentZ Neo 128GB kit 3200MHz
Storage: 2 x 2TB 970 EVO Plus NVME drives
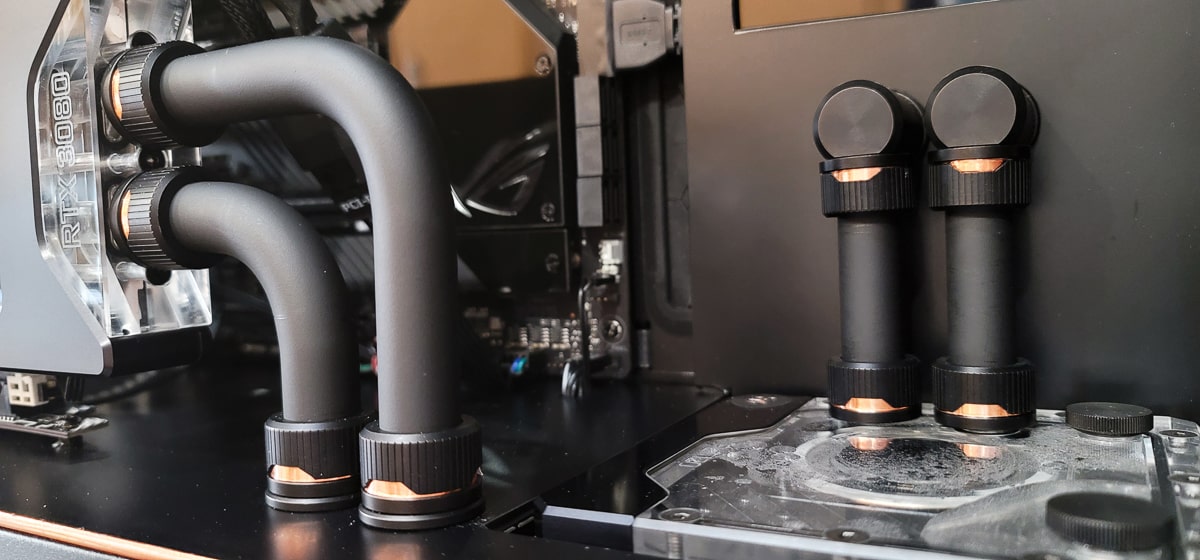
GPU: Nvidia 3080FE
PSU: Seasonic Prime Gold 1000W
RGB Controller: Arduino CODI6 ARGB controller kit
CableMod PRO ModMesh (black) extensions
Black vinyl wrap for back and bottom panels
Copper foil tape for copper accents
Watercooling Gear:
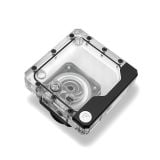
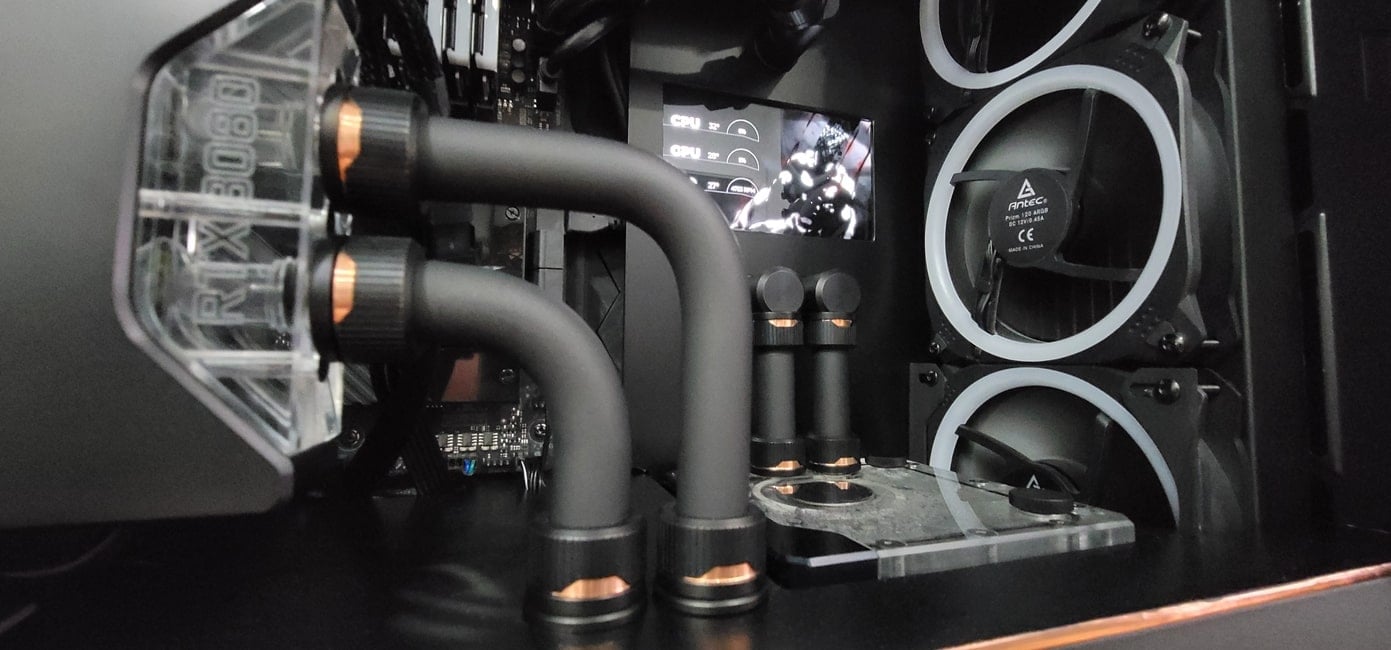
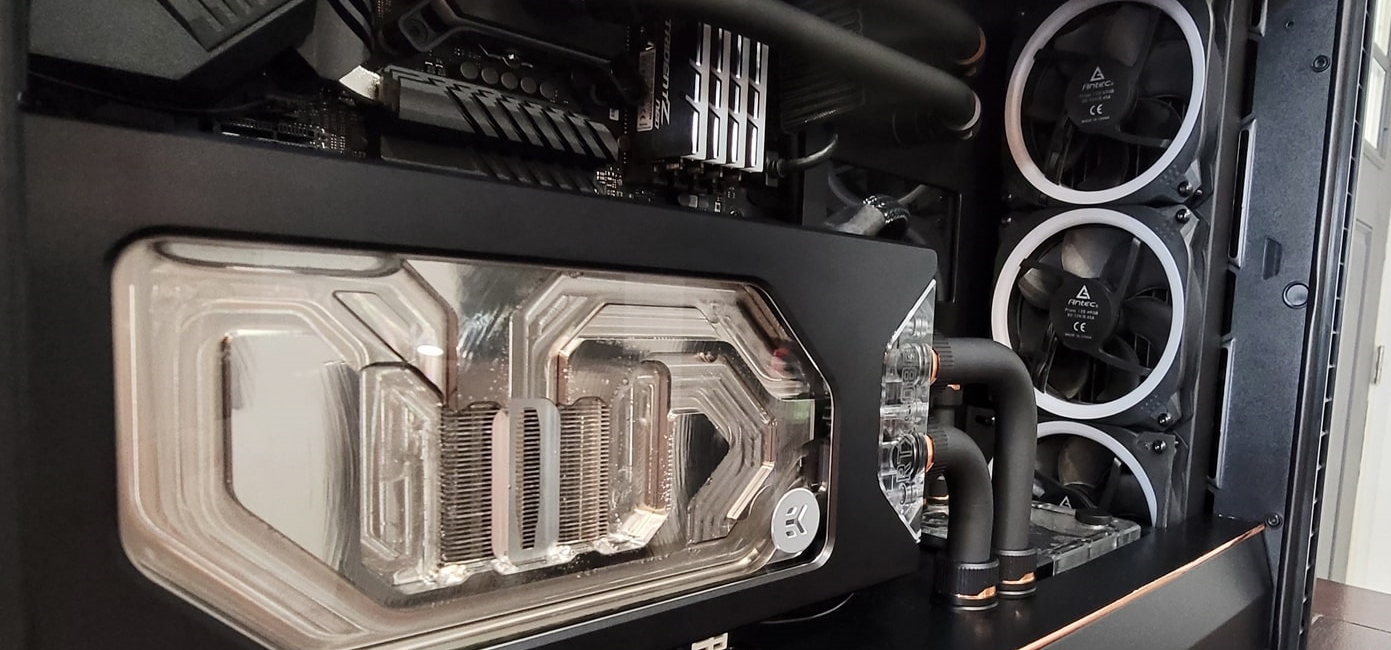
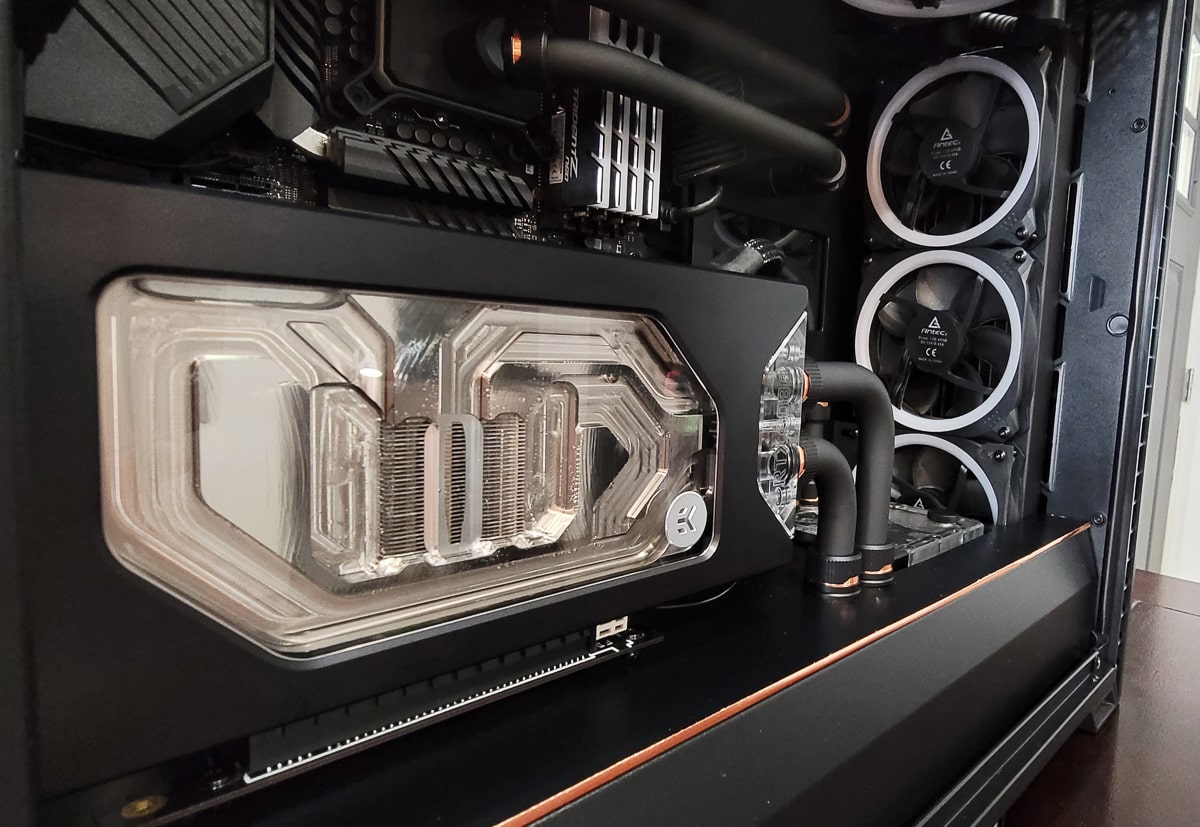
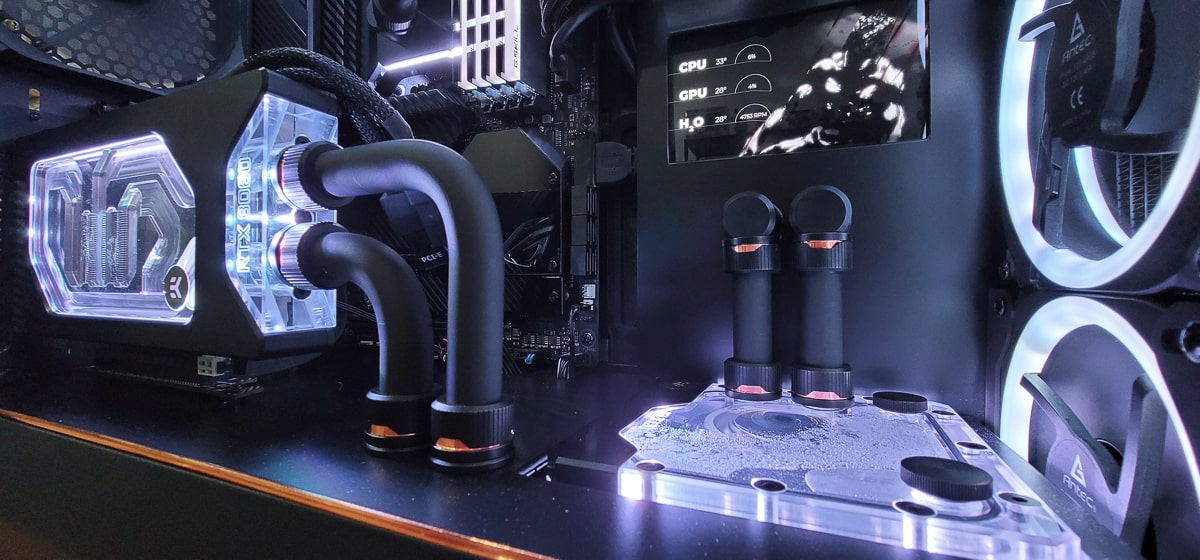
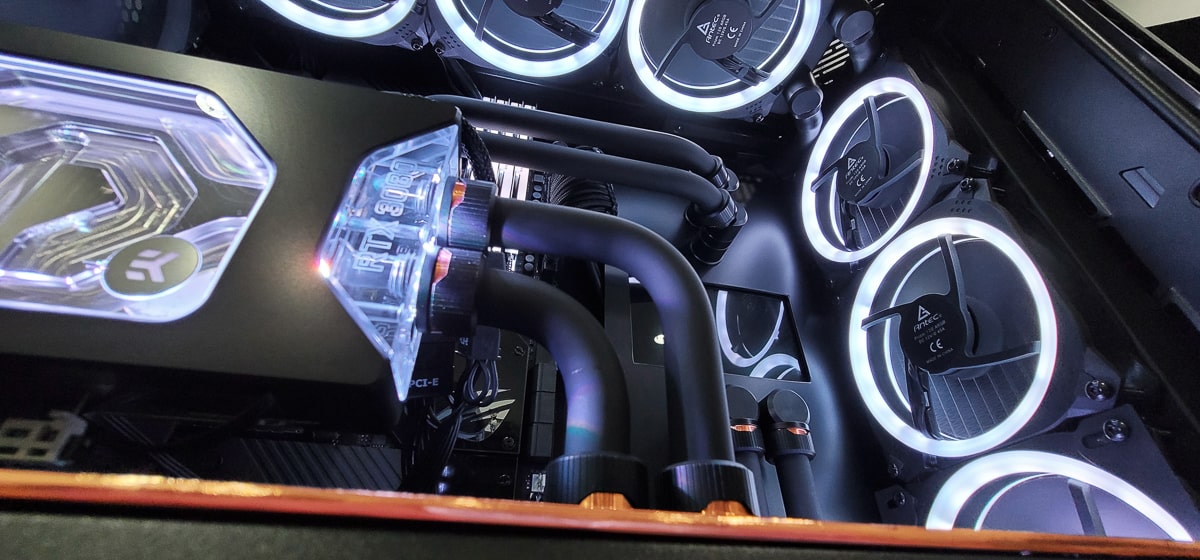
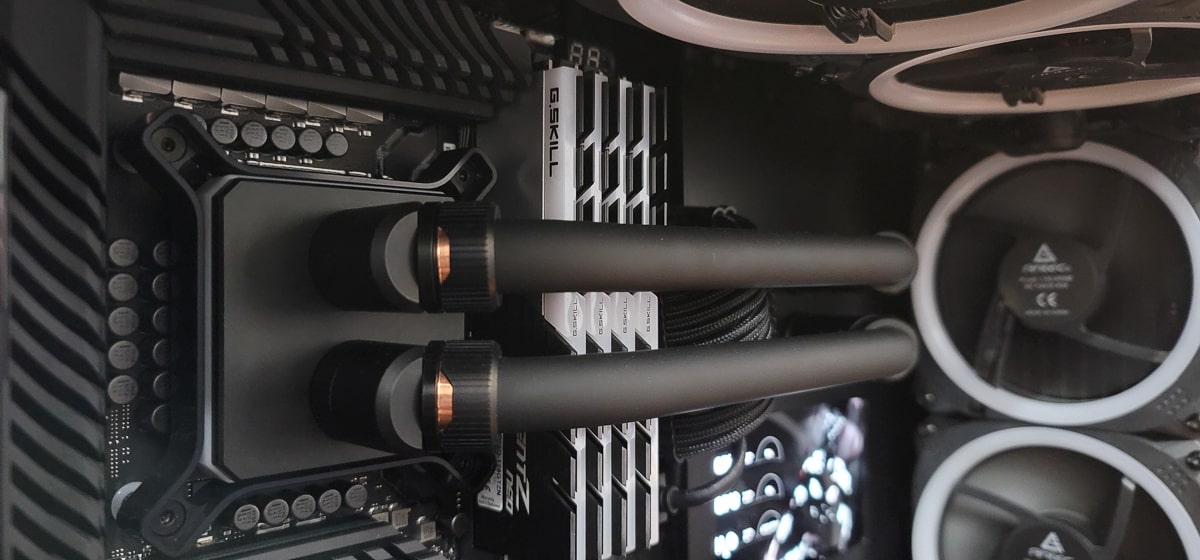
CPU Block: EK Quantum Magnitude D-RGB Nickel+Acetal
GPU Block: EK Quantum Vector FE 3080 D-RGB
GPU Vertical Mount: Fractal Design Flex VRC-25
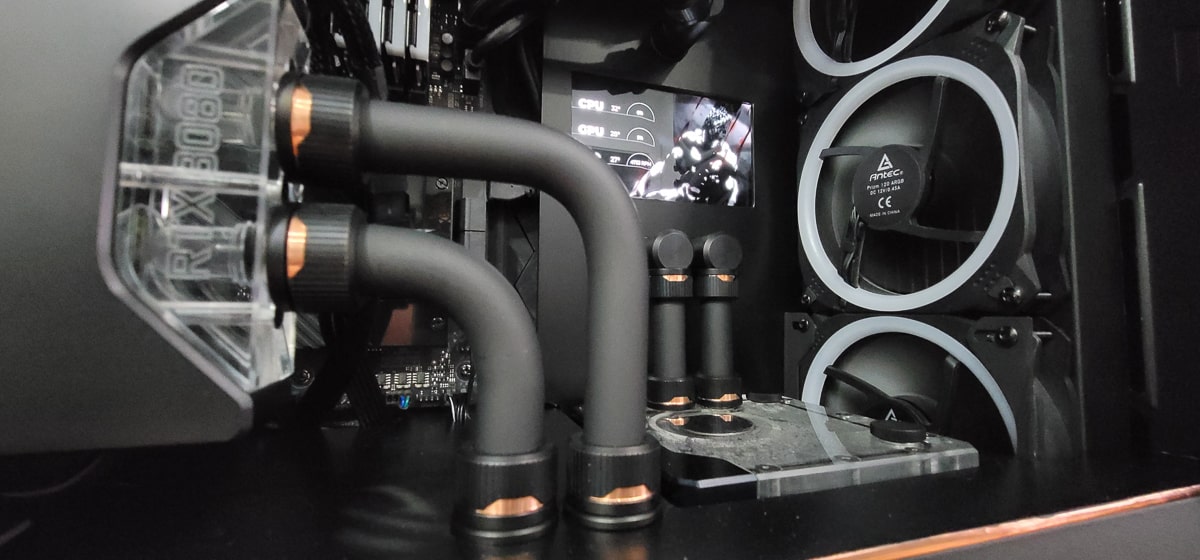
Radiators: 2 x EK CoolStream SE 360
Fans: 6 x Antec Prizm 120
Reservoir / Pump: EK Quantum Kinetic FLT 120 D5 PWM D-RGB
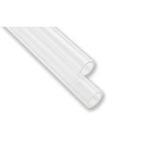
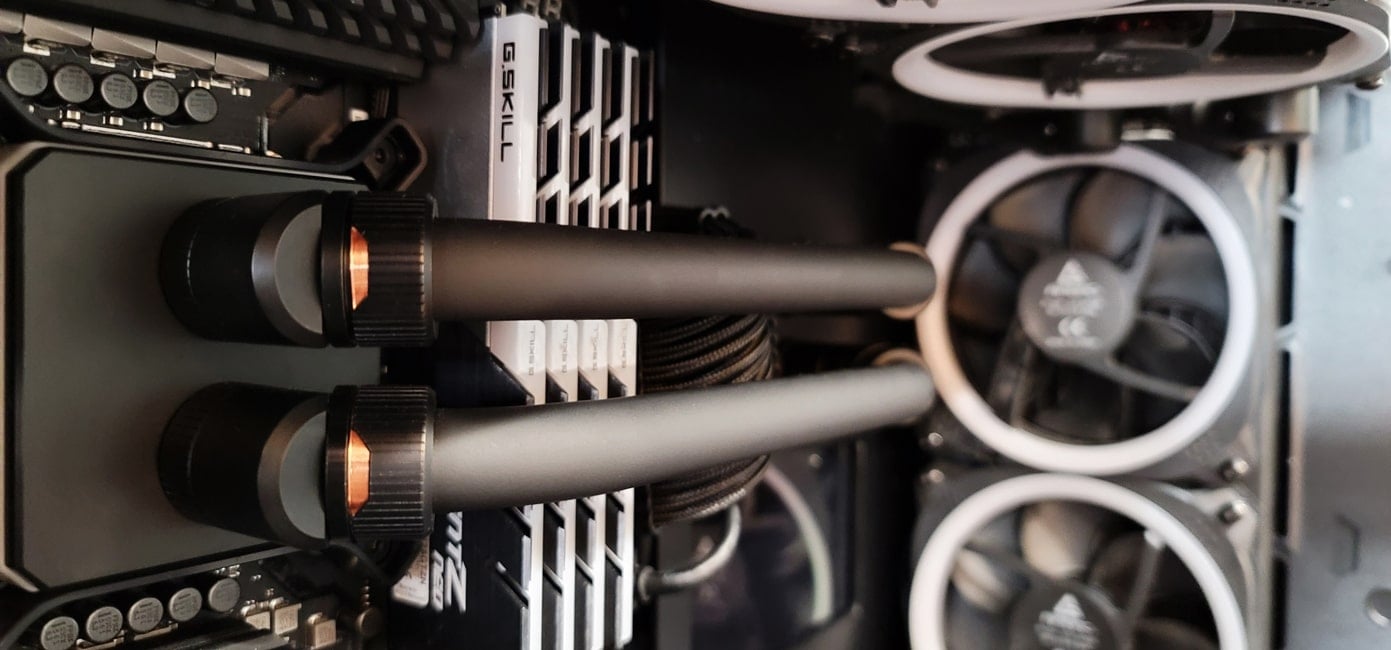
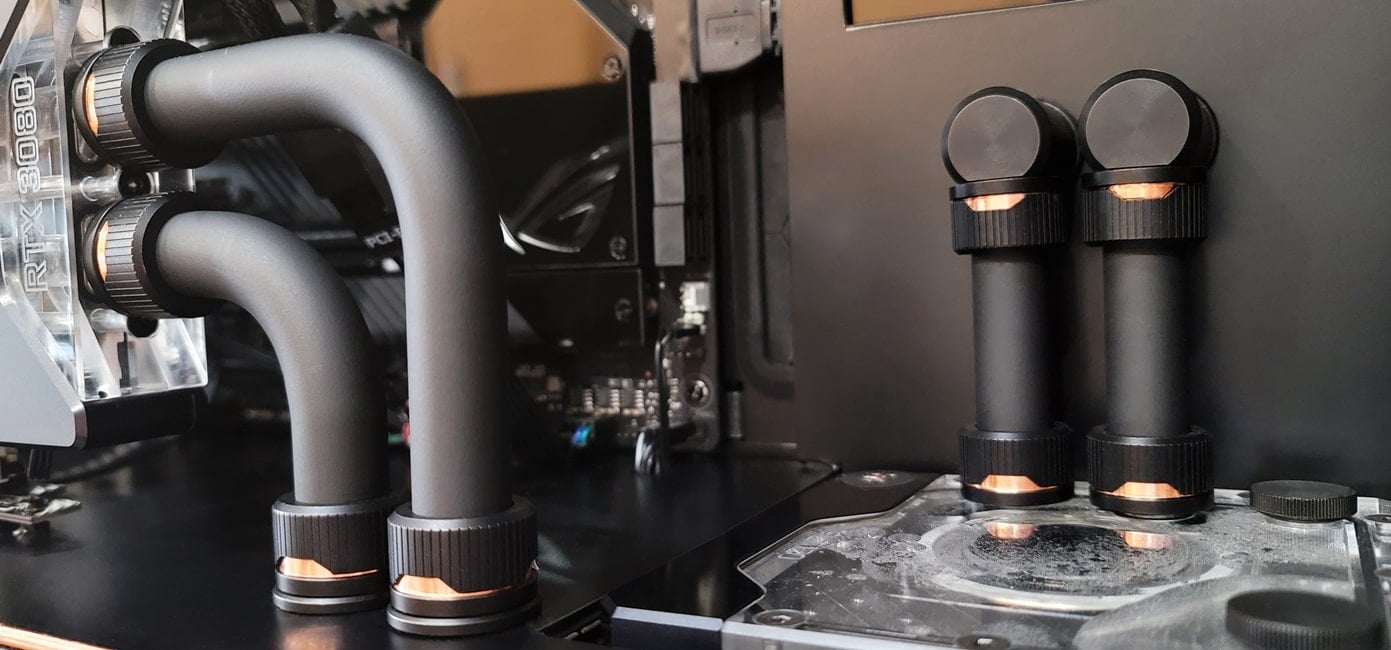
Hard Tubing: EK 16mm PETG
Hard-tube Fittings: EK Torque
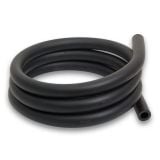
Soft Tubing: EK 16mm ZMT
Soft-tube Fittings: EK Classic
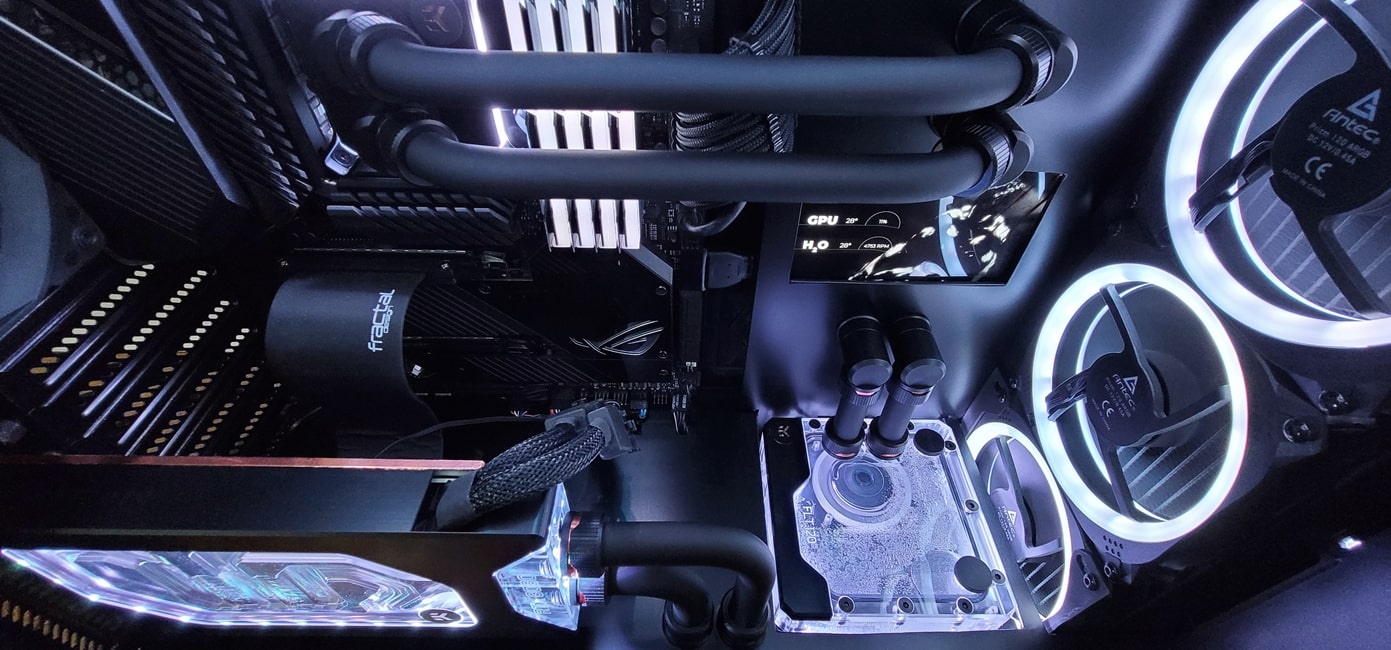
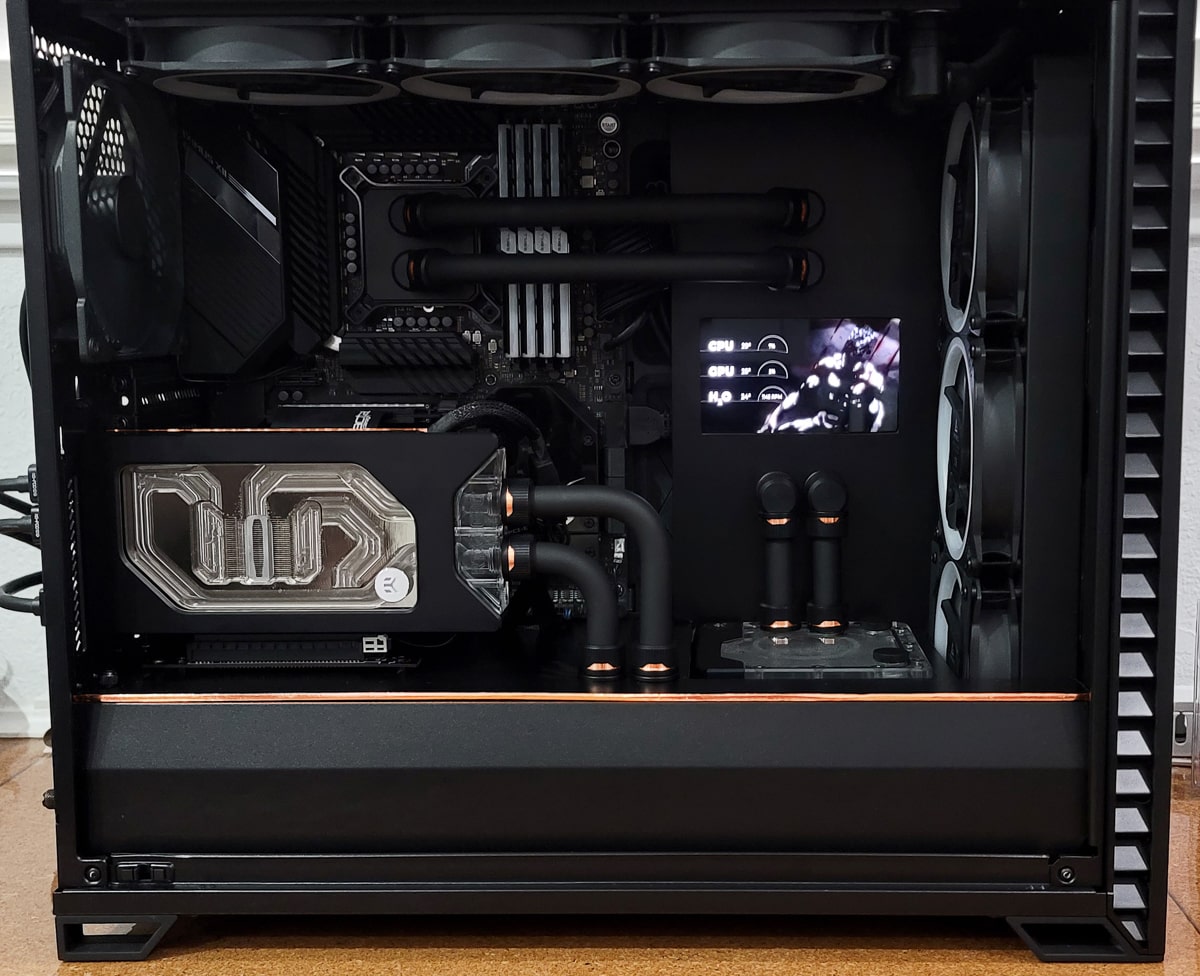
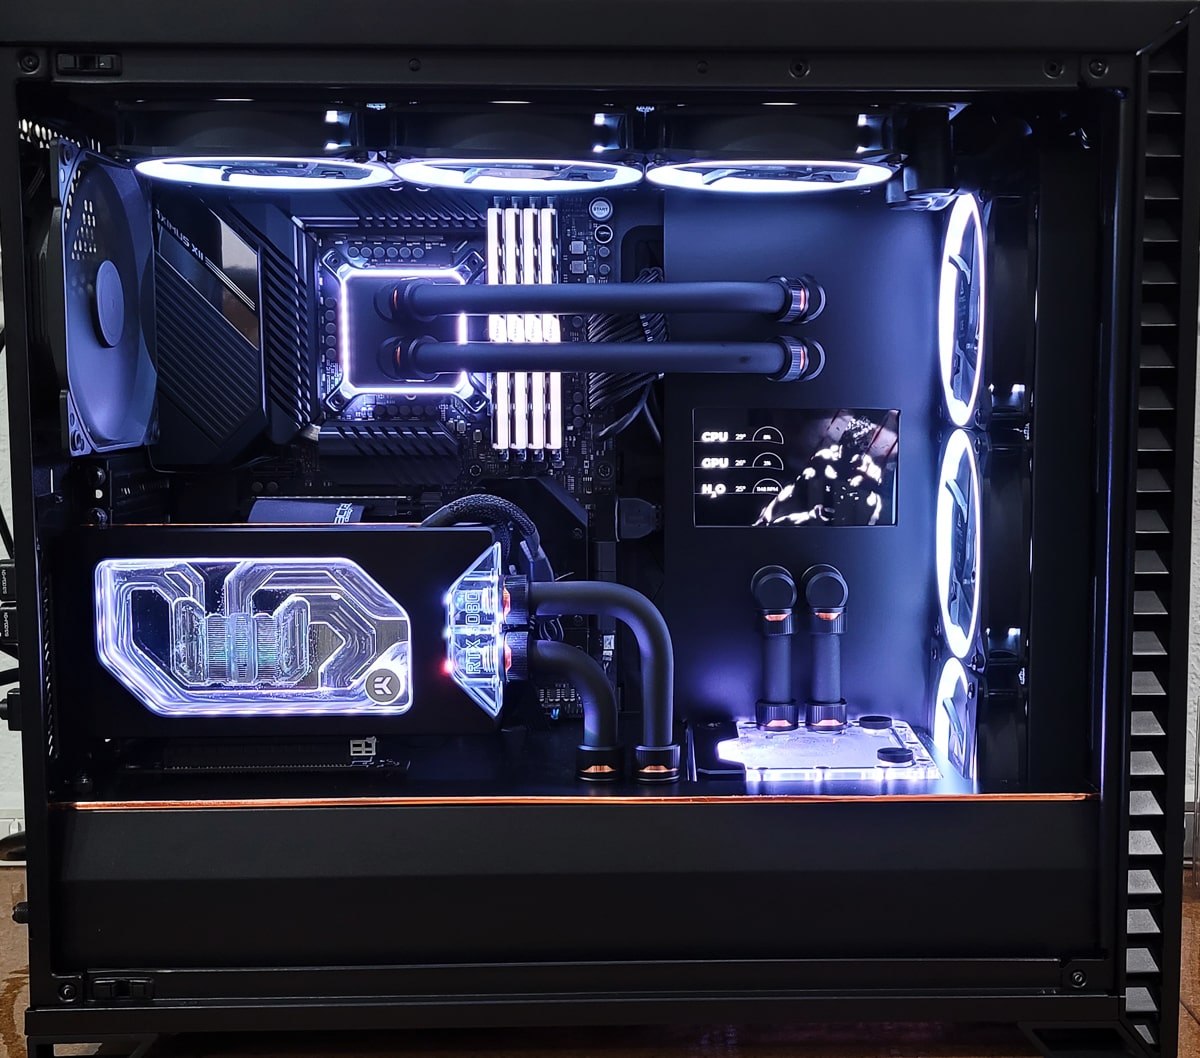
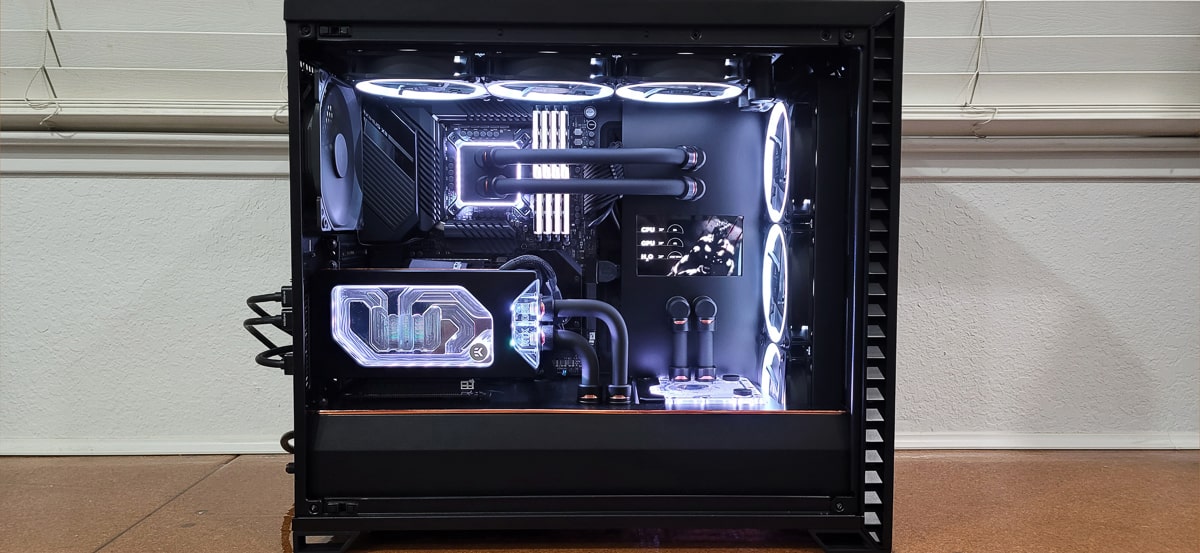
Mikey has brought us a fantastic example of what I would call “detailed minimalism”. That sounds like a contradiction but this PC shows us what it means.
Sleek and simple, with a color palette of only black, white and copper, Mikey’s vision is realized in a way that really defines elegance and style. Clearly a labor of love, it’s hard to believe that this is not only Mikey’s first water-cooling system but his first-ever PC build.
I had the opportunity to ask Mikey a few questions about his amazing work.
Does this project have a name?
It does and just like trying to pick the parts, it was tough to come up with the name. It's mostly black so things like "Obsidian" sounded cool but I also had these copper accents and a few other things that I thought brought some sophistication/beauty into the rig so I finally landed with the name of "LUXE" and think that suits it well.
What is this PC’s primary use?
Thus far I've used the PC for work way more than gaming though I've gamed plenty on it. I actually set-up two different overclock profiles depending on my use. Typically, when 5pm comes, the overclock goes up, the RGB mouse and keyboard come out and then I let the FPS fly!
How long have you been building PCs?
Literally, this is my first build... I hate to say this. My PC before this was an 8-year-old HP that I bought off their website. PC Master Race, don't hate me but I was a console-boy through-and-through before this. I watched my friend build a few and I'd be lying if I said it didn't spark my interest. So, between this and the old PC constantly having new issues I figured it was time to make a change.
What made you decide to go with water cooling on your first rig?
I always found it really interesting. I went down a rabbit-hole on YouTube watching PC builds and thought water cooling elevated a PC build and the more custom the loop got, the cooler it looked. I saw a few builds that really made me want to do a custom hard-tube loop.
How did you learn to build a custom water cooling loop?
Lots and lots of YouTube and reddit! After prepping myself the best I could it was trial and error. I had a basic understanding of water cooling parts and what each component did but I didn't have any idea of what was available.
What were the deciding factors in your choice of brands/parts for this rig?
This was the most challenging part of the build because ultimately, I am not familiar with brands and the crazy number of variations/options available... I spent six days deciding on which fans to use because the further I would dig, I'd find something I liked better than the last option. I knew I wanted a black build but wanted the option to turn on some lighting if I ever wanted to. The fans, for example, have a black housing and black blades which give the blacked-out look but the inset-rgb ring gave the option of some RGB without being super obvious. I also wanted the PC to last a good while so when it came to picking the CPU and GPU I wanted something that wouldn't go obsolete for a while.
Did you come across any unforeseen obstacles to complete the build?
Yeah, it was actually really tough to get everything to fit in this case the way I had planned. Being my first build I did my best to look-up part dimensions to make sure things would fit but things like running the plumbing through the backplate and still making sure the back panel of the case would close were hard without having the actual parts. At the same time, I didn't want to risk putting in an order for all of the parts only for them not to fit so this lead me to order a part or two, make sure they fit and then make a final order with everything else.
Was any modding necessary to get this finished product? If yes please explain
To get the look I was going for, I had to do something different with the pump/reservoir because if I were to mount it the way I had seen others do it would simply be in the way of something or be blocking something else. My option was to lay it flat at the bottom of the case which meant cutting into the PSU shroud of the case as well as modifying the angle brackets for the pump so it looked good.
Are you happy with the look/sound/performance of your new rig, and is there anything you would have done differently?
Absolutely! The look is really stunning in an elegant sort of way and I still really enjoy looking at it. Sometimes I'll turn on white lights of just one component and the way it shines on the black and copper accents make it feel totally different. The computer is nearly dead-silent while I'm working. The PC sits directly on the desk to my left and I can actually hear the pump over the fans. When gaming, I have a fan profile that ramps the fans to 100% to ensure everything stays as cool as possible. It's louder for sure but I put on the gaming headset and the fan noise fades away. The performance is stellar as well! No regrets!
Any advice for the aspiring water cooler?
Jump right in but take your time visualizing what you want. Dig online and see as many builds as possible and be inspired by cool things you see. Shoot, my design changed five or six times. I changed my whole build after seeing a build with a sensor panel. After I saw this, I wanted to incorporate one but it meant changing the water pump/reservoir entirely. I just think taking your time up-front pays off in the end. Also, spreading out time to buy parts makes them more affordable. It's easier to get that CPU or GPU you want over a month or two and you won't regret it later.
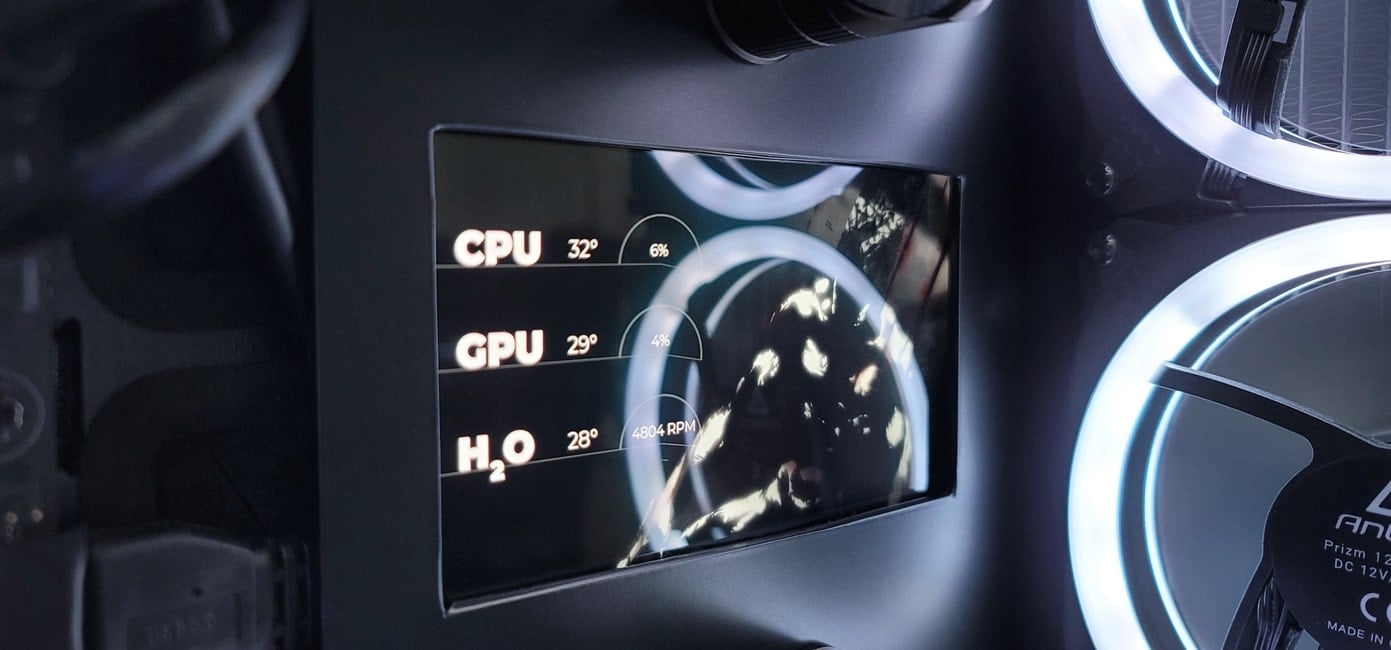
I particularly like the back panel in this build with the LCD. How did you achieve the beautiful matte black finish there?
So this is actually a sheet of acrylic that was cut to size and then a window cut out for the screen. Then the whole panel was wrapped with matte black vinyl. It made the finish super smooth and consistent but was crazy-easy and super inexpensive. The matte vinyl is a different "shade" of black from the case, and from the tubing so even though everything is black, there's actually a lot of depth so everything doesn't look flat.
Tell us about the panel also. What hardware is it? Is it running dedicated software? How is it powered? We want to know all about it!
The panel is a 5.5" screen straight off Amazon. It's powered by USB and has an HDMI cable that runs to the GPU. Think of it like another monitor but instead of it sitting on your desk it sits inside the case. I'm using AIDA64 Extreme which allows you to display a sensor panel. You pick the sensors you want to show up, position them where you want, throw on a photoshopped background and you have yourself a cool real-time sensor panel.
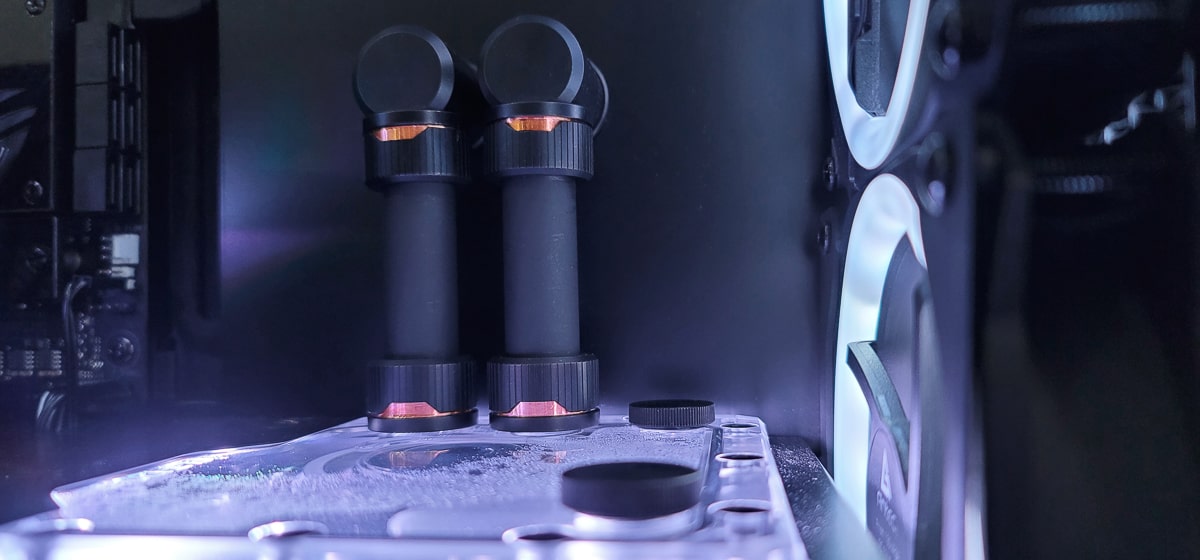
The copper accents on your fittings are exactly the kind of beautiful tiny details I love to find, but I can’t find these fittings anywhere. Tell me about those.
These are normal black EK Torque fittings but the copper accents are actually copper foil tape. I cut strips from the tape (left the backing on so they weren't sticky) and looped them around the fitting before tightening it down. What you're left with is a "ring" around the fitting. The best part is, because it's only a loop of tape, you don't have to disassemble anything if you ever want to change it out. You can buy colored vinyl or something else, cut strips out of that and replace them at any time to change-up the look.
Same question on the copper trim strip on your power supply shroud.
Yep - same thing; and on the top of the GPU backplate. Using the same foil tape was really versatile and allows you to get a consistent look.
This looks like hardline tubing, but like the fittings I can’t find any tubing that looks like this. How did you get the matte black look?
This is normal 16mm hard PETG tubing that you can get from anywhere and then painted matte black. I saw one YouTube video of someone that painted their tubes matte black and he made it a point to say that the industrial matte black he used produced the best matte black he had ever seen in all his builds. It’s Krylon Industrial Matte Black spray paint. I was grateful for his experiences and opted to do the same. Painting them did take some time. I think in total there were seven really light coats to make them look smooth and consistent. Also life pro-tip: wear gloves because this matte black paint loves to show fingerprints!
My cyberstalking… err, research says there’s an Arduino involved with the lighting somehow. What’s up with that?
Haha! This was actually just done recently... Basically it's my way of being able to control aRGB of each component separately. When I first completed the build it was only a short time before realizing how lame the motherboard software was. I think this is an issue with being a noob but it was nearly impossible to turn the rgb off on the motherboard and RAM, but only turn the top fans on with white light. The Arduino COD16 is like $30 and has separate headers which can be coded to do whatever you want so really it just gave some freedom with the RGB.
How long did this project take you from concept to completion?
Including parts ordering etc? It took roughly 5 months in total from the time I ordered my first part to what you see here. My first case came with a shattered glass panel and had to be returned and upon the return, the case happened to also go out-of-stock. That was fun but without the physical case, it was hard to order other parts without being able to measure and mock up anything. Then everyone knows the pain of trying to land a 30-series GPU let alone this is a new water block from EK that was delayed a few times before finally getting a hold on it. When I say 5 months, plenty of that was simply waiting around haha.
How many hours of actual labor time do you think you have in it?
Great question actually! If I assumed I had all the parts ready to go all at once with the design I was going for on paper I would say I had less than 24 total hours in the build. I learned that using cardboard to mock things up is really, really useful. Once I had a good template of the back panel, for example, it was easy to trace it on to the acrylic to cut and drill. I'd say it took equally as long in sleepless nights trying to think and visualize how everything would look and coming up with the design itself.
Thanks for taking the time to answer all of my questions, Mikey! Your rig is a work of art and it really deserves its place in our Featured Rigs. The fact that it’s your very first PC build is proof that even the newest builder can make something special with vision, patience and time.
We’re watching you, builders. We’re selecting potential builds for our future Featured Rigs daily, so keep up the awesome work and check back for our next installment.


Recent Posts