2-Day Expedited Shipping Only $14.95 - See Restrictions
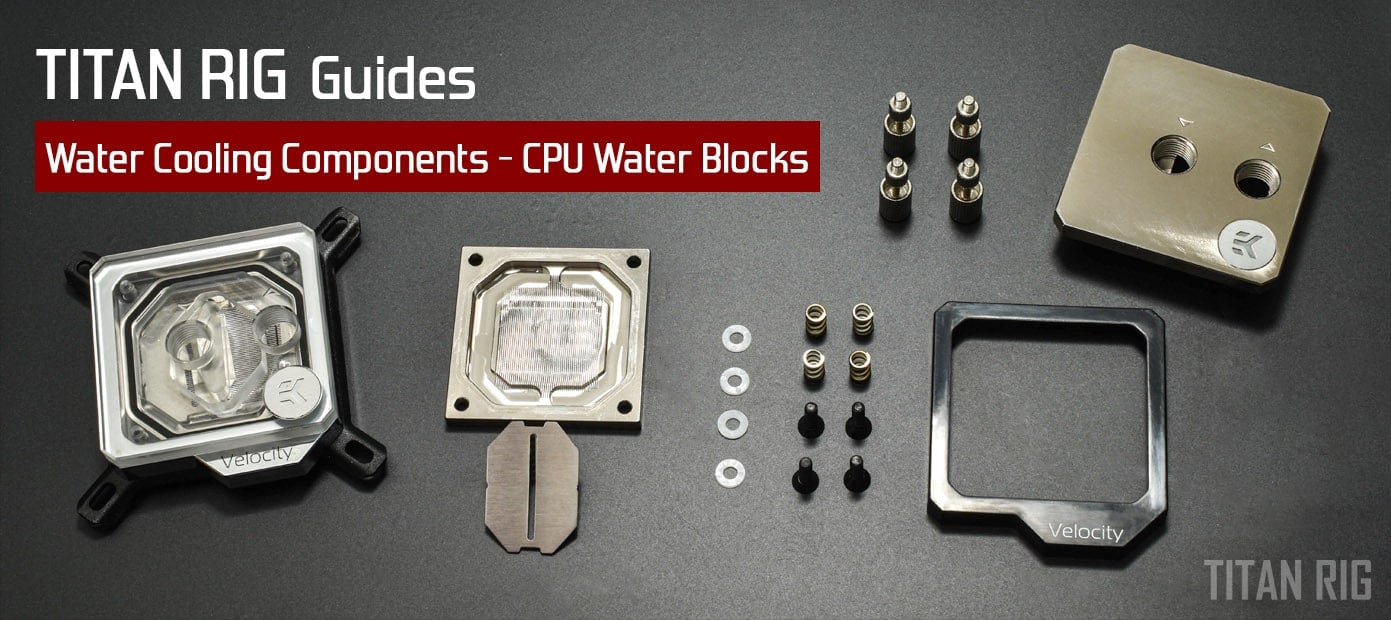
Water Cooling Components - CPU Water Blocks
March 15, 2021 2
In our last installment of the Component Series we talked about water blocks and some of the features and characteristics that they all share. The next few posts will take a closer look at blocks for specific hardware, starting with CPU water blocks.
While all kinds of things in a PC can be cooled with water, the CPU is by far the most common. Your CPU is one of the two most powerful computational parts of your PC and it puts out heat accordingly. While CPU manufacturers have been focusing more on energy efficiency and have made great gains, some of today’s most powerful processors still boast a TDP (Thermal Design Power) of over 250 watts. In your custom water cooling loop the CPU water block keeps that heat moving out away from its source and safely to the PC coolant.
As we mentioned in our last chapter, water blocks in general are available with a lot of different options. Materials, performance, aesthetics and cost are all variables in any water block purchase.
So how do these variables apply to CPU water blocks specifically, and what factors come into play with CPU blocks?
1 – Materials
Just a quick recap from our initial listing on materials used in PC water blocks:
Metals
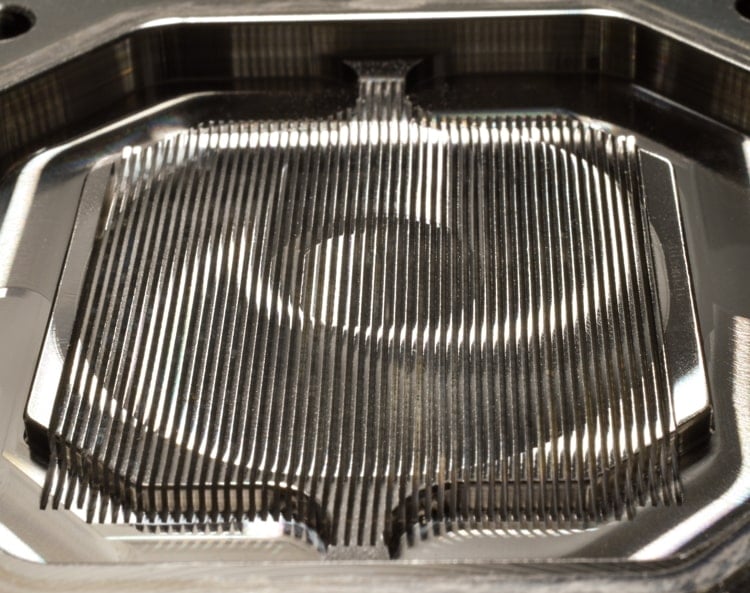
• Copper and aluminum are the strongest option by far, and they can aid in heat transfer as they offer more surface area in contact with the cooling liquid.
• Both copper and aluminum are subject to oxidation and discoloration simply from humidity in the ambient air. They are also obviously opaque, minimizing lighting options. Some are made in combination with acrylic elements like logos and lighting strips, but without those lighting isn’t an option.
Acrylic
• Acrylic offers moderate strength and a clear view of the internal workings of the water block. Being crystal clear, it can be illuminated in many ways also.
• While acrylic is fairly strong, it’s also brittle. Overtightening a fastener or fitting in threaded acrylic can cause stress cracks.
• Cleaning acrylic with alcohol can also cause microfractures called crazing.
Acetal
• Acetal, or POM, is very durable and will not easily crack or discolor. It’s also immune to most chemicals so cleaning is easy.
• Acetal is soft, making it much easier to damage threads by overtightening or cross threading. It’s also opaque, so illumination options are limited in the same way as metal blocks.
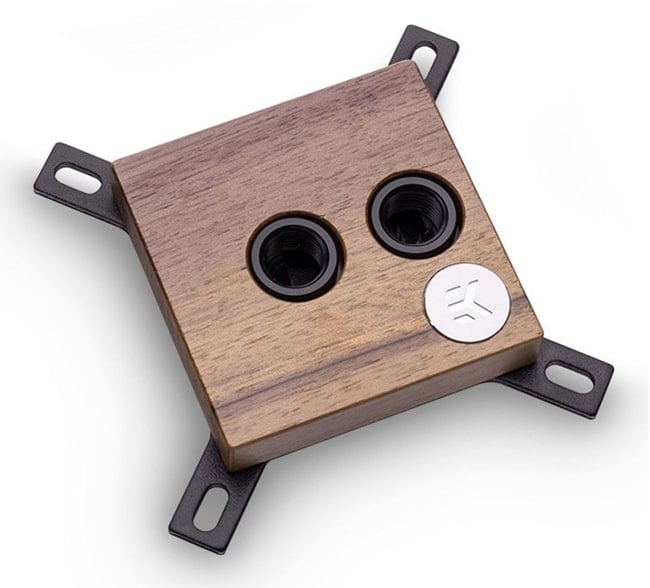
Wood
• There’s one more material that I need to add here that has recently come to the retail market: wood. EK Water blocks offers a version of their Velocity CPU block with a cover made from a solid piece of eastern American walnut. While this block looks amazing and includes a pair of matching walnut 12mm hardline fittings, it is expensive and does not allow for any illumination. Like any other water block, take these points into consideration.
2 – Fit
This may seem obvious but it’s sometimes overlooked. Different CPU sockets have different retention mechanisms and sizes. Make sure that the block you’re purchasing will work with your system. Intel and AMD both have over a dozen different socket number designations for their processors. Thankfully, many of these share the same mounting system so a given CPU water block will work for many different sockets. All of Intel’s 1150 series (LGA 1150, 1151, 1155 and 1156) share the same mounting system for instance. You’ll find water blocks that support these sockets often simply show “115X” in their compatibility list. This means they will work on any of these sockets.
Always check the socket compatibility for any water block you’re considering purchasing.
Until recently, socket fit was the only physical issue a builder had to consider with regard to his mainboard. If a CPU water block supported the CPU’s socket it would work for that processor, simple as that.
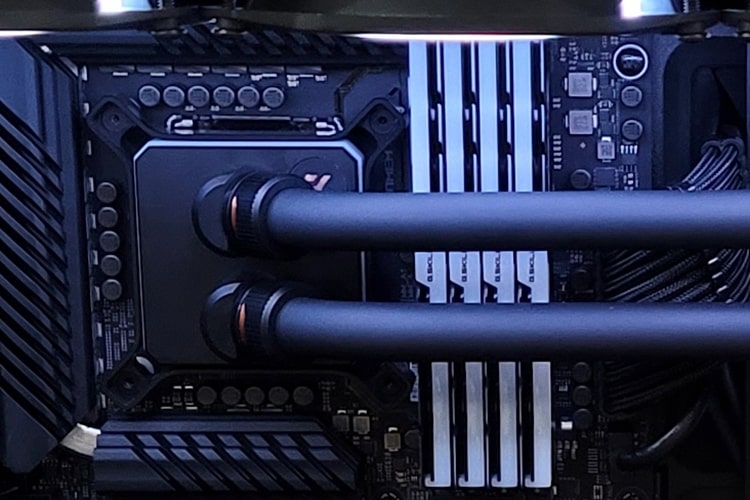
Today’s motherboards have changed the game. Not only do you have to check socket compatibility for any water block you’re considering but also motherboard compatibility.
Motherboard form factors have a lot of standards that have to be adhered to. One of those dictates how close motherboard components can be to the CPU socket. This is meant to create standards in cooling system mounting, and it’s a great idea. The problem is these standards only apply to the base motherboard itself and not to anything added by the OEM like custom heat sinks. In some cases these additional components are too close to the CPU socket to allow certain water blocks or even air coolers to function.
Always check the manufacturer’s page for the block in question for motherboard compatibility.

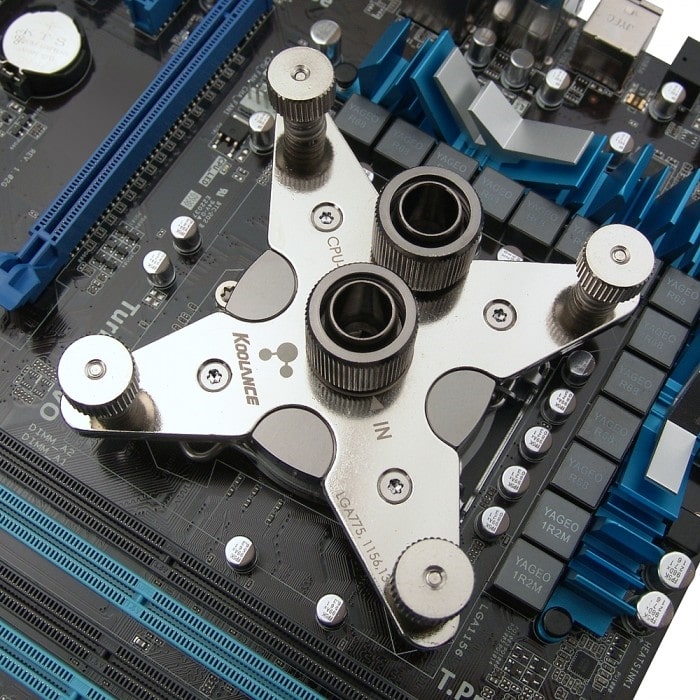
The factory-installed custom heat sink on this motherboard is preventing the installation of this water block.
Image credit: Custom PC Photographer: Antony Leather
3 – Performance
As we mentioned in our previous installment, the cooling performance of a specific water block can usually be found online. Several third-party sites offer testing reviews, normally providing results in comparison to other blocks tested with the same methods.
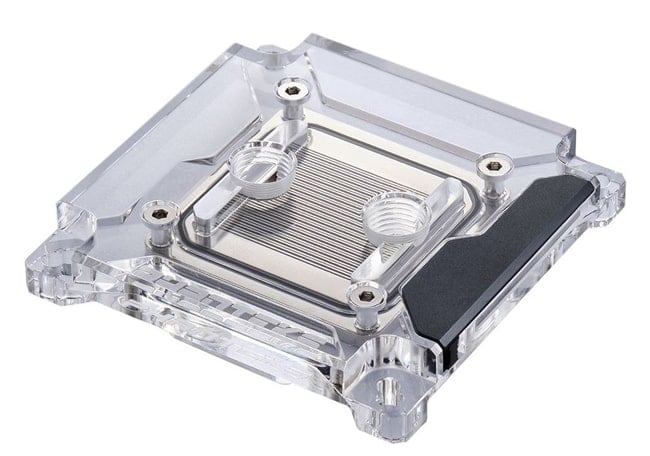
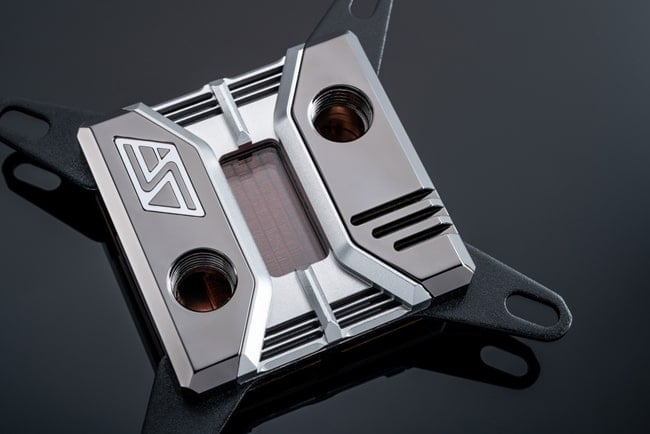
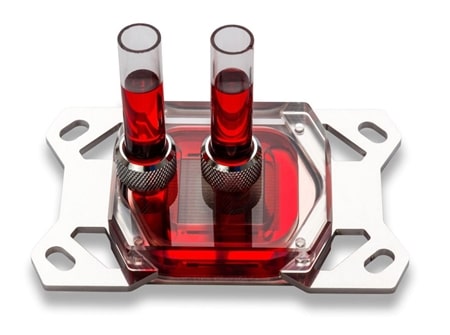
While newer water blocks typically offer more advanced cooling methods and better performance, there are some older generations of cpu blocks that still perform quite well. Companies that sell what we’ll call consumer-grade products (as opposed to industrial-grade) may choose to discontinue a product or product line shortly after the profit margin falls below a certain point. In smaller companies, older product lines may be terminated simply to free up design and manufacturing capacity for newer product. The Koolance CPU water block below is a great example of an older CPU water block that I suspect could compete with the best on the market today. We just might have to test that someday..
Remember that in the end, it’s all about what you need. If you want to squeeze every degree of cooling capacity out of your custom water loop that you can, you’ll need to look at different water blocks than you would if you’re simply wanting to keep your CPU out of the thermal danger zone.
4 - Aesthetics
CPU water blocks have probably got the widest range of aesthetic options of any component with the possible exception of reservoirs. Unlike GPU water blocks, many brands offer specific models of their CPU blocks in different material combinations.
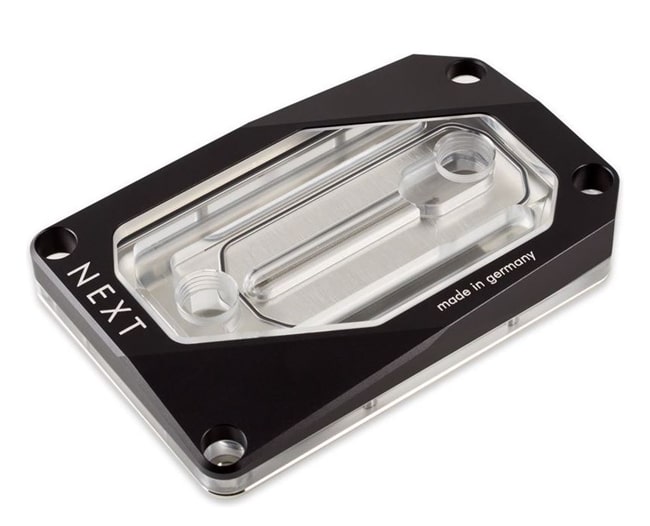
Heatkiller blocks from Watercool are a good example, with three of their current water blocks being offered in four different variations each in top and trim materials.


The aesthetic choice is up to you and your personal taste. Thankfully, the brands that bring us these beautiful chunks of hardware realize that options are good.
5 – Cost
Cost is typically the first factor in any purchase. You decide on a budget for your block and keep your search under that point. Competition between brands helps us the consumer there, keeping costs down in general while still offering us the widest possible range of options.

Keep in mind that a water block doesn’t have to be the most expensive to perform well. Your decision on which CPU water block to buy will be a combination of all of the above.
Installation
Once you’ve finally gotten your hands on the water block you’ve been wanting you’ll need to install it. The installation process for some CPU waterblocks may be different than others in their specifics so always read the manufacturer’s documentation before installing your new block.
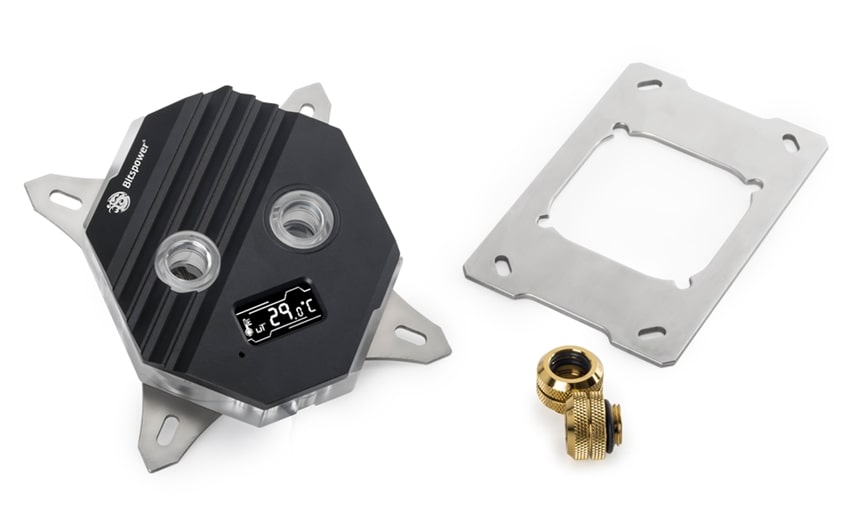
Be aware that Intel and AMD both have very different mounting systems that come preinstalled on motherboards that support them. There are some things that they have in common though. There will be a backplate that supports the water block, either included with the block itself or already installed with the motherboard. Most water blocks will also come with a rubber pad in the shape of this supporting bracket that goes between the bracket and the motherboard.
Typically, the stock mounting clips on an AMD system must be removed before the water block can be installed. On most Intel systems this isn’t necessary as the mounting holes are unoccupied.
General procedure:
The installation procedure is easier if you can do it with the motherboard in a horizontal position. If the mounting system for your water block requires you to remove or add a back plate to the motherboard you’ll need to stand it up to do that, but the rest of the process should be done horizontally if possible.
If you have a cooling solution on your CPU already, remove it and clean the processor’s surface well with high-purity isopropyl alcohol or a purpose-made cleaner like Arcticlean from Arctic Cooling.
If you have an AMD motherboard, remove the stock mounting clips by removing their screws. Be aware that there is a backplate on the rear that is also being held in place with those screws also so if your motherboard isn’t lying flat that plate will fall off.
Once your backplate is set up as instructed in the water block documentation there are typically threaded studs or screws of some sort that thread into it, often with plastic washers. Put those in place as instructed.
At this point you’ll want to add thermal paste to the surface of your CPU. See our Thermal Grizzly buyer's guide on their range of thermal solutions. It doesn’t take very much and it’s very easy to overdo it. Place a dot in the center of the CPU roughly 5mm in diameter – the size of a very small pea.

Once you have your thermal paste ready, place the water block into the CPU as straight as possible. It shouldn’t be necessary to twist the block after it’s made contact with the CPU to get it aligned.
Install the springs, nuts, or other retention hardware supplied with the block and tighten as instructed.
Once this is done you’ll want to take a flashlight and look all around the edges of the CPU in its socket. If there is thermal paste coming out from under the CPU you’ve used too much. Ideally if this happens you’ll want to remove the water block, clean up the CPU and socket area with alcohol and repeat these steps with less paste.
Note: Depending on your mounting hardware are the fittings you plan to use, it may be easier to install the fittings into the water block before installing the block into your system.
Take your time, examine all of the options listed above, and pick the CPU block that checks off all of your needs. You’ll end up with a system that runs cool and looks good doing it without breaking your budget.

2 Comment(s)
Load more comments
Recent Posts